
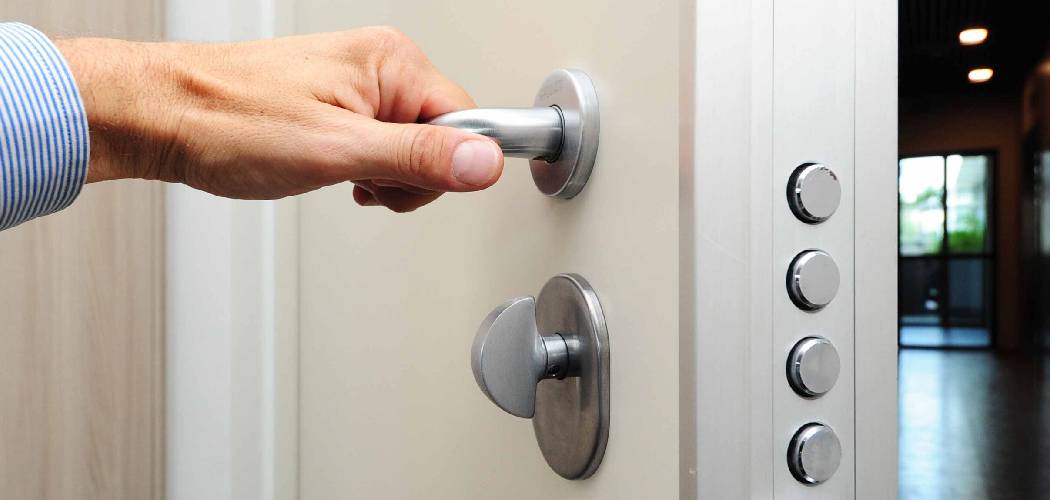
The best way to strengthen your entryway is by replacing short standard screws with longer hardware and installing a heavy-duty strike plate. Many homes come with basic locks and small screws that only bite into the soft door trim, leaving the frame vulnerable. Learning how to reinforce door frames and hardware is a straightforward process that instantly improves your peace of mind. You do not need advanced carpentry skills to make a meaningful difference in your home safety.

By upgrading a few simple components, you transfer any physical force from the fragile trim directly into the sturdy structural studs of your wall. This simple upgrade requires only basic tools and a bit of patience. This guide will help you systematically upgrade your entryway hardware so you can secure your home effectively and safely.
Why This Task Matters
The most common reason a door fails under pressure is not a broken lock, but a splintered door frame. Standard home builders often use half-inch screws to secure strike plates and hinges. These short screws only reach the decorative wood frame, which is too thin to withstand significant force. When you upgrade these components, you anchor the door to the heavy wooden framing that supports your house.
This task matters because a strong lock is only as reliable as the wood holding it in place. Reinforcing your entryway adds a critical layer of structural integrity without requiring major renovations or expensive security systems. It is a practical, cost-effective way to protect your family and belongings. Upgrading your hardware ensures that everyday wear and tear, as well as unexpected pressure, will not compromise your safety.
Tools or Materials You May Need
Having the right materials ready will make this process smooth and safe. You will not need complex machinery, just a few reliable hand tools and hardware upgrades.
- A power drill or impact driver
- A manual Phillips-head screwdriver
- A heavy-duty reinforced strike plate
- Three-inch wood screws (usually #8 or #9 size)
- Safety glasses and work gloves
- A tape measure and pencil
- Optional: A magnetic bit holder for your drill to keep screws steady and prevent them from dropping while you work.
Before You Begin
Before you begin, make sure your door opens and closes smoothly without catching on the frame. Start with the safest and simplest check by inspecting the existing deadbolt and hinges for any loose screws or rust. Put on your safety glasses, as drilling into older wood frames can sometimes send small splinters into the air.

Clear the entryway of any rugs, shoes, or clutter to give yourself plenty of safe working space. Ensure you have the correct replacement hardware that matches the size and finish of your current locks. If your door frame shows signs of severe wood rot or structural damage, the task can become dangerous because new screws will not hold securely.
Step-by-Step Guide to How to Reinforce Door
Step 1 – Inspect the Current Door Hardware
Start by thoroughly examining the existing hardware on your entryway. Open the door wide and look closely at the hinges, the deadbolt latch, and the metal strike plate on the frame. You are checking for any loose screws, cracked wood, or misaligned plates that might cause friction.
Run your hand along the edge of the door and the frame to feel for any rough spots or protruding metal. Taking a few minutes to assess the current condition helps you understand exactly what needs upgrading. If the wood is solid and the lock functions smoothly, you are ready to proceed. If you find significant damage, note it so you can address it properly.
Step 2 – Remove the Existing Short Screws
Start with the safest and simplest check by removing one screw from the middle hinge on the frame side. Use your manual screwdriver or a drill on a low setting to carefully back the screw out. Most standard standard screws are only about half an inch to an inch long, which is insufficient for real security.
Remove the screws one at a time so the door does not fall out of alignment or pinch your fingers. Place the old hardware in a container so you do not accidentally step on sharp threads. Removing these small screws prepares the way for structural anchors that will actually reach the wall studs.
Step 3 – Install Three-Inch Hinge Screws
Take a heavy-duty three-inch wood screw and slowly drive it into the empty hole on the hinge. The new screw will pass through the thin door jamb and bite deeply into the sturdy structural framing behind it. Drive the screw firmly, but stop just as the head sits flush against the metal hinge plate.
Repeat this process for at least two screws on every hinge along the door frame. Do not remove all the screws at once; replace them systematically to keep the door perfectly balanced. You will feel the drill working slightly harder as the screw enters the wall stud, which indicates a successful, secure hold.
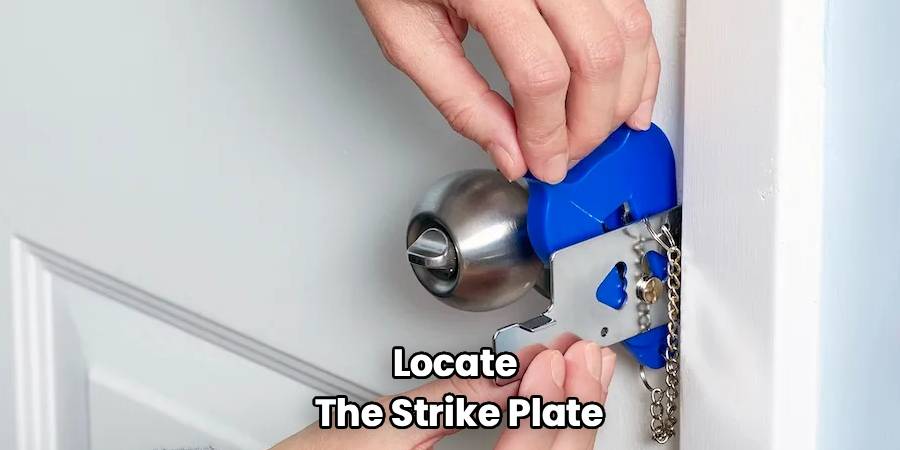
Step 4 – Remove the Standard Strike Plate
Locate the strike plate on the door frame, which is the metal piece where the deadbolt rests when locked. Remove the two short screws holding it in place and carefully pry the plate away from the wood. Standard plates are usually quite small and offer very little surface area to distribute force.
Check the exposed wood underneath the plate for any splitting or damage. If the mortise—the shallow cutout in the wood—is filled with debris, gently brush it out. Preparing a clean, flat surface is vital for the new, larger plate to sit perfectly flush against the door jamb.
Step 5 – Install a Reinforced Strike Plate
Position your new, elongated reinforced strike plate over the existing hole in the frame. These security plates are significantly longer than standard ones and use four to six screws instead of just two. Align the center hole perfectly with where the deadbolt will extend.
Using your drill, secure the plate starting with the center screws, driving them deep into the wall studs. Add the remaining three-inch screws along the top and bottom of the extended plate. The longer plate distributes pressure over a much wider area, making the frame significantly more resilient against external force.
Step 6 – Install a Door Reinforcement Lock
For added security, consider adding a secondary door reinforcement lock on the inside of the frame. Mount this device slightly higher than the deadbolt, out of reach of small children. Follow the manufacturer instructions to mark the drill points on the door jamb with a pencil.
Drill pilot holes to prevent the wood trim from splitting, then secure the lock bracket using three-inch screws. This type of lock swings inward to block the door from opening, providing an extra layer of mechanical defense. Test the mechanism a few times to ensure it swings smoothly without scraping against the door.
Step 7 – Test the Door for Proper Alignment
Once all the new hardware is tightly secured, slowly close the door to check your work. The deadbolt should extend smoothly into the new strike plate without requiring you to push or lift the door. If this does not work, try the next step of slightly loosening the hinge screws to adjust the balance.
A successful installation means the door opens freely, latches securely, and sits evenly within the frame. Walk outside and push firmly against the locked door; it should feel rigid and fully stabilized. Taking the time to test your adjustments ensures your entryway is both safe and functionally sound.
Common Mistakes to Avoid
One of the most frequent mistakes beginners make is using a drill at full speed when driving long screws. High-speed drilling can easily strip the screw head or split the fragile wood trim of the door jamb. To avoid this, apply steady pressure and use a low torque setting on your drill. Stop driving the screw as soon as it sits flush with the metal plate to prevent pulling the door frame out of alignment.
Another common error is ignoring the hinges and only focusing on the lock side of the door. The hinges are just as vulnerable to pressure as the deadbolt. If you leave standard half-inch screws in the hinges, the door can simply detach from the frame regardless of how strong the lock is. Always reinforce both sides of the entryway equally.
Finally, people often skip drilling pilot holes when installing new security locks or extended strike plates. Driving thick screws directly into old, dry wood almost guarantees the frame will crack. Taking the extra minute to drill a narrow pilot hole removes material and creates a safe path for the larger screw threads, keeping your frame completely intact.
Safety Warnings
Always wear protective safety glasses when operating a power drill to protect your eyes from flying wood splinters or metal shavings. Never force a screw into wood if you feel extreme resistance, as the screw head can snap off and leave sharp metal exposed.
Be highly cautious of pinching hazards when working near heavy doors and hinges. Keep your fingers clear of the gap between the door and the frame while testing locks or adjusting hardware. If you attempt to remove all hinge screws at once, the heavy door can fall and cause severe injury. Always replace one screw at a time. If the door frame shows signs of severe rot or insect damage, do not continue the installation.
When to Call a Professional
Call a professional if your door frame is heavily damaged, severely warped, or suffering from structural wood rot. Driving longer screws into rotten wood provides a false sense of security and will not hold the door securely.
You should also seek expert help if your door is severely misaligned and scrapes aggressively against the floor or frame. Re-hanging a heavily skewed door requires shimming and leveling that goes beyond basic troubleshooting. Additionally, if you live in a historic home with metal framing or non-standard door measurements, consult a local locksmith or carpenter to ensure the correct hardware is used safely.
Expert Tips
To make driving three-inch screws much easier, rub the threads with a small amount of plain bar soap or candle wax. This simple lubrication reduces friction, prevents the wood from splitting, and saves your drill battery. Keep the application light so you do not leave a messy residue on your door frame.
When drilling pilot holes, wrap a piece of visible painter’s tape around your drill bit about three inches from the tip. This acts as a visual depth guide so you know exactly when to stop drilling. It prevents you from drilling too deep and accidentally hitting hidden electrical wiring inside the wall cavity. Keep your workspace well-lit with a portable work light so you can clearly see the alignment of your strike plates.
Frequently Asked Questions
Do I need to reinforce both the front and back doors?
Yes, you should reinforce all exterior entryways. Back doors and side doors are often targeted because they are out of public view. Applying the same heavy-duty hardware and long screws to every exterior door ensures your home has consistent security all the way around.
What size screws are best for securing door hinges?
Three-inch screws are generally the most effective size for residential doors. They are long enough to pass through the metal hinge, the decorative wood trim, and deep into the structural wall studs. Use #8 or #9 thickness screws to match standard hinge holes.
Can I install a reinforced strike plate on a hollow core door?
Strike plates are attached to the wooden door frame, not the door itself, so the type of door does not affect the plate installation. However, hollow core doors are very fragile and should never be used as exterior entryways. Always use solid wood or steel doors for exterior security.
Why is my door hard to close after installing new screws?
If the door is difficult to close, the new screws may be over-tightened, pulling the frame slightly out of square. Alternatively, the screw heads might not be sitting completely flat inside the metal hinge plate. Try slightly loosening the screws to relieve the tension and realign the door.
Will reinforcing my door damage my home’s current weatherstripping?
If done carefully, upgrading your hardware will not harm your weatherstripping. Ensure that your new strike plate sits flush within the wooden mortise so it does not snag the rubber seals. Test the door slowly after installation to verify the weatherstripping still compresses evenly.
Conclusion
Securing your home begins with strengthening the weak points that builders often overlook. By taking the time to replace standard hardware with heavy-duty components and three-inch screws, you significantly increase the structural integrity of your entryway. The process is straightforward, requires minimal tools, and provides a substantial upgrade to your overall safety. Remember to work slowly, tackle one screw at a time, and always prioritize personal safety when handling power tools. Knowing exactly how to reinforce door frames and hinges gives you practical control over your living environment. We encourage you to take the safest next step by inspecting your current entryway hardware today and planning your simple, effective upgrades.