

We’ve all been there. You just bought a standalone security camera to keep an eye on the front porch, the garage, or maybe the nursery. You unbox it, hold it in your hand, and realize you don’t want to invest in a bulky, expensive DVR system or a complicated network setup. You just want to see the live feed on your living room television. Is that too much to ask?
Ideally, setting up home security should be simple, but the industry often makes it feel like you need an IT degree to plug in a camera. The good news is that viewing your surveillance feed directly on your television is entirely possible, and frankly, it’s a lot easier than most people think. Whether you are trying to monitor a retail store entrance or just want to see who is ringing your doorbell without getting off the couch, there are straightforward solutions available.
In this guide, we are going to walk you through exactly How to connect CCTV camera to TV without DVR, covering everything from the cables you need to the specific adapters that make the magic happen. By the end of this post, you’ll have a clear picture on your screen and money left in your wallet.
Step-by-Step Guide: How To Connect CCTV Camera To TV Without DVR
Connecting a security camera directly to a TV is a fantastic way to create a dedicated monitor station. It’s cost-effective, saves space, and reduces the amount of wiring cluttering up your home. However, televisions and security cameras don’t always speak the same language right out of the box.
Most standard CCTV cameras use what is called an analog signal or a specific digital signal that travels over coaxial cables (often ending in a BNC connector), while your modern TV relies on HDMI or, if it’s a bit older, RCA (the yellow, white, and red plugs). Because of this mismatch, you usually can’t just plug one into the other. You need a translator—an adapter or converter.
Below, we’ll break down the process into step-by-step instructions, focusing on the most common method: using a BNC-to-HDMI converter, since this works for almost every modern television.
Step 1: Determine the Best Method on How To Connect CCTV Camera To TV Without DVR
Before you rush to buy cables or adapters, first check the type of camera you have. This step is crucial since the output of your camera dictates what equipment you’ll need.
You’ll usually encounter either:
- Analog CCTV Cameras: These feature a round BNC connector and are the easiest to connect directly to a TV using a converter.
- IP (Network) Cameras: These use an Ethernet cable. Direct connection to a TV is more complex and often requires either a smart TV app or a special decoder.
For this guide, focus on analog/BNC-style cameras, as they’re most common for direct TV connections. Once you’ve confirmed your camera type, you’re good to move forward.
Step 2: Gather the Necessary Tools and Adapters
Next, make sure you have the following items ready:
- CCTV camera (analog, AHD, CVI, or TVI preferred)
- 12V DC power supply for the camera
- BNC to HDMI converter (not HDMI to BNC)
- CCTV cable (Siamese cable) for both video and power
- HDMI cable for TV connection
- (Optional) BNC to RCA adapters if your TV only has AV inputs
The BNC to HDMI converter is what bridges the gap between your camera’s video output and your TV’s input.
Step 3: Power Your Camera and Establish the Basic Connection
Now it’s time to connect everything:
- Run your Siamese cable from the camera’s location to the TV area. The cable splits into two ends—one for video (BNC) and one for power.
- Plug the BNC end into the camera’s video output and the power plug into the camera’s power input.
- On the other end of the cable (near your TV), plug the power connector into your 12V power supply. Plug the power supply into an electrical outlet.
- Check your camera for a faint red glow if it has night vision—this means it’s powered up.
Step 4: Install the BNC to HDMI Converter
Now, connect your camera to the TV system:
- Attach the BNC cable from your camera to the “Input” port on the converter. Push in and twist to lock.
- Plug the USB power cable (included with the converter) into a wall outlet or USB port to power the converter.
- If your converter has a resolution switch, set it to the highest resolution compatible with your TV—usually 1080p.
- Make sure the converter’s power light is on, indicating it’s working.

Step 5: Configure Your TV Display
You’re almost done—time to get that image on the screen:
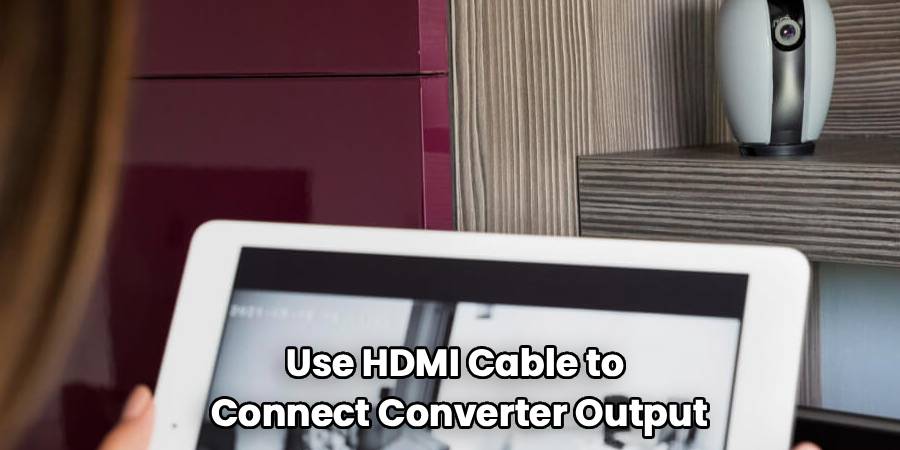
- Use the HDMI cable to connect the converter output to one of your TV’s HDMI input ports.
- Using your TV remote, change the TV’s input source to the HDMI port you just plugged into.
If all connections are secure and powered, your camera’s live video feed should appear on your TV screen right away—no software, no IP addresses, and no passwords required.
You are in the home stretch. Now that the hardware is daisy-chained together, it is time to get the image on the screen.
- Plug one end of your standard HDMI cable into the Output port of the converter box.
- Plug the other end into an available HDMI port on your TV (e.g., HDMI 1).
- Grab your TV remote and change the “Source” or “Input” to the corresponding HDMI channel.
If everything is connected correctly, you should see your camera’s live feed pop up on the screen immediately. There is no software to install, no IP addresses to configure, and no passwords to remember. It is a pure, hardwired video feed.
Step 6: Dealing with Audio and Interference
Most standard CCTV setups for this method are video-only. However, if your camera has a built-in microphone and your cable supports audio (often a white RCA plug alongside the yellow video plug), you can connect this too.
If you are using the HDMI converter, check if it has an audio input jack (often a 3.5mm jack). You may need an RCA-to-3.5mm adapter to feed the sound into the HDMI stream.
Also, keep an eye out for “rolling lines” or fuzzy static on your screen. This is usually caused by a “ground loop”—basically electrical interference. If you see this, ensure your camera power supply and your TV are plugged into properly grounded outlets. You can also buy a cheap “ground loop isolator” to plug into the video line, which usually clears up the picture instantly.
Frequently Asked Questions
When you start mixing and matching video equipment, questions inevitably pop up. Here are some of the most common things people ask when setting up a direct-to-TV surveillance system.
Can I connect a wireless CCTV camera to my TV without a DVR?
Yes, but it works differently than the wired method we just discussed. If you have a Wi-Fi camera (like a Ring, Nest, or a generic IP camera), you generally cannot plug it physically into the TV because it doesn’t transmit an analog video signal.
However, if you have a Smart TV (Android TV, Fire TV, or Roku TV), you can often download an app that corresponds to your camera brand. Alternatively, you can use voice commands if your ecosystem allows it. For example, saying “Alexa, show me the front door camera” on a Fire TV Stick can pull up the feed over your home Wi-Fi network. If you have a non-smart TV, you can buy an Android TV box, install the camera’s app on that box, and connect the box to your TV via HDMI.
Will I be able to record footage with this setup?
No, and this is the main trade-off. Connecting a camera directly to a TV is a live monitoring solution only. Because there is no DVR (Digital Video Recorder) or NVR (Network Video Recorder) involved, there is no hard drive to save the video.
Think of this setup like a digital peephole. It is perfect for seeing who is at the gate right now, but if a theft occurs while you are asleep, you won’t be able to rewind the footage to see what happened. If recording is essential for you, you will need to add an SD card to the camera (if it supports one) or bite the bullet and install a recorder.
Can I view multiple cameras on one TV screen?
If you plug a single camera into a converter and then into the TV, you will only see that one image. The TV assumes it is receiving a movie or a show, so it fills the screen with that one signal.
To see multiple cameras at once (split-screen or “quad view”), you need an intermediate device called a CCTV Quad Processor or a Video Multiplexer. You would plug 4 cameras into the Multiplexer, and then plug the Multiplexer into the HDMI converter. This device combines the signals into one video feed that shows all four views in a grid pattern on your TV. It’s a great way to build a security hub without a full DVR.
How long can the cable be before the video quality drops?
If you are using high-quality coaxial cable (like RG59), you can run video nearly 600 to 700 feet without significant loss of quality. However, if you are using the thinner, pre-made cables that often come in DIY kits, you might start seeing ghosting or graininess after about 150 feet.
If you need to run a very long distance (over 1000 feet), you should look into using “Video Baluns.” These allow you to send the video signal over Cat5/Cat6 Ethernet cable, which maintains signal quality over much longer distances than standard coax.
Does this setup work with 4K TVs?
Absolutely. In fact, 4K TVs are great for this because they offer a large, clear picture. The BNC to HDMI converter will scale the image to fit your screen. However, remember that the image quality is limited by the camera, not the TV. If you connect an old, low-resolution analog camera to a brand new 65-inch 4K TV, the image might look a bit blocky or blurry because you are stretching a small image across a huge canvas. For the best results on a 4K TV, use a high-definition analog camera (AHD or TVI) with 1080p or higher resolution.
Conclusion
How To Connect CCTV Camera To TV Without DVR is a straightforward process that offers a reliable, low-cost way to keep your property secure. By bypassing the complex recording systems and focusing on a simple, direct connection, you gain the ability to monitor your surroundings instantly with the click of a remote.
This setup is ideal for homeowners who need a live view of a nursery, a front gate, or a driveway but don’t want the hassle of managing hard drives and cloud subscriptions. Whether you choose to use a BNC to HDMI converter for a crisp digital picture or rely on AV cables for older equipment, the peace of mind that comes with seeing your property clearly is invaluable.
Remember, while this method is perfect for live viewing, it doesn’t record footage. But for many of us, simply knowing who is knocking at the door before we open it is all the security we really need. So grab your cables, plug in that converter, and enjoy your new home command center.