

Upgrading your home lighting is one of the most practical DIY projects you can tackle, offering immediate benefits in convenience and energy savings. Imagine walking into your laundry room or garage with your hands full of groceries, and the lights turn on automatically. No more fumbling in the dark for a tiny toggle. While electricity can seem intimidating to beginners, this upgrade is actually quite straightforward if you follow safety protocols carefully.

You do not need to be a certified electrician to modernize your switches. By learning how to install a motion sensor light switch, you empower yourself to improve your home’s functionality and security in just an afternoon. This guide will walk you through the entire process safely, ensuring you feel confident every step of the way. Let’s get your home automated and efficient.
Why Install a Motion Sensor Light Switch?
There are compelling reasons to swap out your standard single-pole switches for modern motion sensors. The primary motivation for most homeowners is energy efficiency. We have all experienced the frustration of walking into an empty room only to find the lights blazing, perhaps left on for hours. Motion sensors eliminate this waste by automatically cutting power when a room is unoccupied for a set period. This small change adds up to noticeable savings on your monthly electricity bill over time.
Beyond money, these switches offer significant safety and hygiene benefits. In high-traffic areas like bathrooms or mudrooms, touch-free operation reduces the spread of germs on high-touch surfaces. Furthermore, navigating a dark hallway or staircase becomes much safer when the path illuminates automatically ahead of you. It is a simple upgrade that modernizes your living space while making your daily routine smoother and safer.
7 Step-by-Step Guide on How to Install a Motion Sensor Light Switch
Step 1: Turn Off Power at the Breaker Box
The absolute first and most critical step in any electrical project is ensuring the power is completely disconnected. Never attempt to work on a switch with live current flowing. Locate your home’s main service panel, which is usually found in the garage, basement, or utility closet. Open the panel door and find the specific breaker that controls the room where you will be working. Flip that switch firmly to the “Off” position.
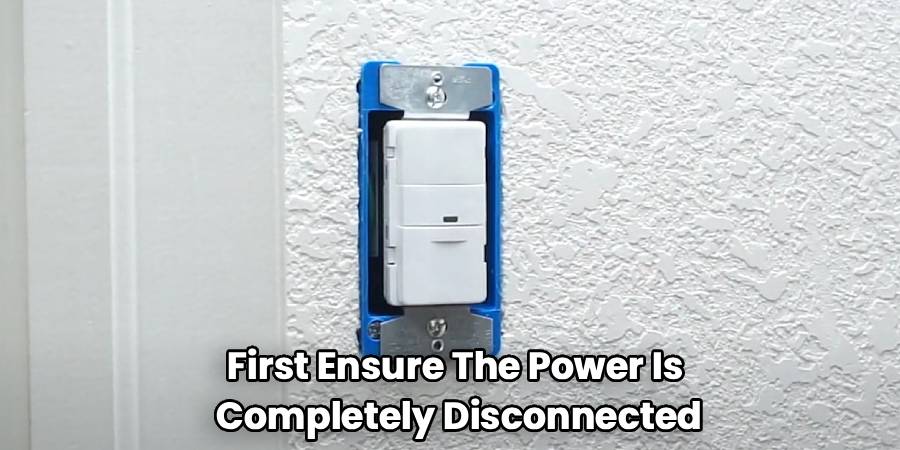
If your panel labels are faded or unclear, it is safer to turn off the main breaker to the entire house. Once you have flipped the breaker, return to the room and try flipping the existing light switch on and off to verify that the light does not turn on. This simple check prevents dangerous accidents and ensures you can work with confidence.
Step 2: Test the Wires for Voltage
Even after flipping the breaker, you must double-check that the wires inside the box are dead before touching anything. Remove the faceplate of the existing switch by unscrewing the small screws that hold it in place. Carefully pull the switch out from the wall just enough to expose the side terminals, but do not touch the bare wires yet.
Use a non-contact voltage tester—a small, inexpensive tool available at any hardware store—and bring the tip close to each wire connected to the switch. If the tester beeps or lights up red, the circuit is still live, and you need to go back to the breaker panel. Only proceed when your voltage tester confirms there is absolutely no power running to the switch. This verification is essential for your personal safety.
Step 3: Identify Your Wiring Setup
Once you have confirmed the power is off, you need to understand what wires you are working with. Most standard single-pole switches will have two black wires attached to the side terminals, and a bare copper or green wire attached to a green screw. The black wires are your “line” (power coming in) and “load” (power going to the light). You might also see white neutral wires bundled together in the back of the box.
It is crucial to check your new motion sensor’s manual because many modern sensors require a neutral wire to function. If your switch box does not have a bundle of white wires tucked in the back, you may need a specific type of sensor designed for “no neutral” installation. Take a moment to label the wires with masking tape if they look confusing, marking which wire was connected to which terminal.
Step 4: Disconnect the Old Switch
With your wires identified and safety confirmed, you can now remove the old hardware. Take your screwdriver and loosen the terminal screws on the side of the old switch. If the wires are wrapped around the screws, gently unhook them. If the wires are inserted into “stab” holes in the back of the switch, there is usually a small slot next to the hole where you can insert a small screwdriver to release the tension and pull the wire out.
Once the wires are free, separate them carefully so you can see the exposed copper ends. If the ends look frayed, damaged, or bent crookedly, use your wire strippers to snip off the damaged portion and strip away about half an inch of insulation to create a fresh, clean connection point. This preparation ensures your new switch will have a solid electrical path.
Step 5: Connect the Ground Wire
We will start the installation of the new device by connecting the ground wire first. This is a vital safety feature that directs stray electricity safely into the ground rather than through you in the event of a fault. Locate the green or bare copper wire coming from your wall box. Connect this to the green wire or the green screw on your new motion sensor switch.
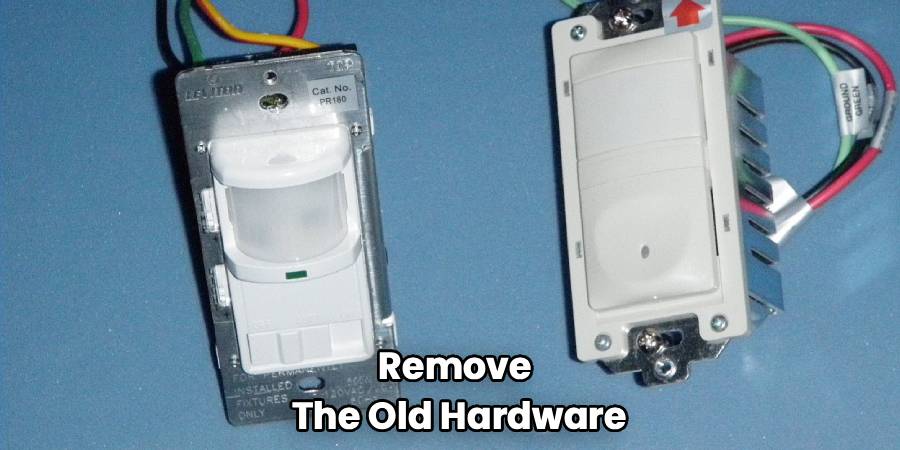
If your new switch has a pre-attached green wire, twist the exposed ends of the wall ground and switch ground together using a wire nut. Twist the nut clockwise until it is tight and secure. Give the wires a gentle tug to make sure they do not come loose. Establishing this ground connection provides a foundation of safety for the rest of the installation process.
Step 6: Connect Line and Load Wires
Now you will connect the wires that actually carry the electricity. This is the core part of learning how to install a motion sensor light switch correctly. Your new switch likely has black leads or specific terminals labeled “Line” (or “Hot”) and “Load.” Connect the black wire coming from your wall that brings power (Line) to the corresponding “Line” wire on the sensor.
Connect the other black wire that goes up to your light fixture (Load) to the sensor’s “Load” wire. Secure these connections tightly with wire nuts. If your new switch requires a neutral connection, find that bundle of white wires in the back of the box, add the white wire from your new switch to that bundle, and secure them all with a larger wire nut. Ensure no bare copper is exposed outside the wire nut connectors.
Step 7: Mount and Test the Switch
With all wiring connections secure, carefully fold the wires back into the electrical box. It can get crowded in there, so fold them in a zigzag pattern to save space. Push the motion sensor switch into the box and secure it with the provided mounting screws. Do not overtighten, as this can crack the faceplate. Reattach the wall plate.
Now, return to your breaker panel and flip the power back on. Walk into the room to test the sensor. Most switches have specific programming steps to set the sensitivity and timer duration, usually found behind a small panel on the front of the switch. Follow the manufacturer’s guide to adjust how long the light stays on after motion stops. Once adjusted, you are done and ready to enjoy hands-free lighting.
Frequently Asked Questions
Can I Install a Motion Sensor Switch Without a Neutral Wire?
Yes, you absolutely can. While many smart switches and motion sensors require a neutral wire (usually white) to power the internal electronics, several manufacturers produce “no-neutral” models specifically for older homes. These models typically rely on the ground wire or a very small trickle of current through the load wire to function. When shopping, simply look for packaging that explicitly states “No Neutral Required” to ensure compatibility with your home’s wiring.
Why Does My Motion Sensor Light Turn On and Off Randomly?
Phantom switching is usually caused by sensitivity settings that are too high or poor positioning.
- Sensitivity: The sensor might be picking up movement from pets, HVAC vents moving curtains, or even heat shifts. Lower the sensitivity dial.
- Positioning: If the switch faces a hallway or window, passersby might trigger it.
- Wiring: Loose connections can also cause flickering. Double-check your wire nuts to ensure everything is tight and secure.
How Do I Adjust the Time Delay on My New Switch?
Most motion sensor switches feature small dials or dip switches located behind the faceplate or under a small removable cover on the front of the device. You will typically see options ranging from “Test” (5-10 seconds) to 30 minutes.
- Use a small flathead screwdriver to gently turn the dial.
- Set it to “Test” mode first to verify the range.
- Once satisfied, set it to your preferred duration, such as 5 or 15 minutes.
Will a Motion Sensor Switch Work with LED Bulbs?
Generally, yes, but compatibility varies. Modern motion switches are designed to handle LED, CFL, and incandescent bulbs. However, older sensors or cheap models might cause LED bulbs to flicker or glow faintly when off because they require a minimum load that efficient LEDs might not provide. Always check the packaging of the switch to verify it is “LED Compatible” and ensure your total wattage falls within the switch’s specified range.
Can I Use a Motion Sensor Switch in a 3-Way Setup?
Yes, but you need specific hardware. A standard single-pole motion sensor cannot simply replace a switch in a 3-way circuit (where two switches control one light, like at the top and bottom of stairs). You must purchase a “3-way motion sensor switch.”
- Often, only one of the two locations needs to be replaced with the sensor.
- The other switch usually remains a standard mechanical switch.
- Wiring instructions for 3-way sensors are more complex, so read the manual carefully.
Conclusion
Taking the time to upgrade your home’s electrical fixtures is a rewarding investment that pays off every single day. By following this guide, you have not only enhanced the functionality of your living space but also taken a proactive step toward energy conservation. The convenience of having lights respond to your presence is something you will appreciate every time you walk into the room with full hands. Furthermore, the added element of safety for children and guests navigating your home cannot be overstated.
You now possess the knowledge of how to install a motion sensor light switch, a skill that demystifies home electrical work and opens the door to further improvements. Whether you plan to upgrade your bathroom fans, install dimmer switches, or add smart home devices, the principles you learned here—safety first, identifying wires, and securing connections—apply universally. Enjoy your new automated lighting and the peace of mind that comes with a job well done.

About
Robert D is a distinguished figure in the world of Safety Systems and Risk Management, with a decade of expertise creating innovative and sustainable workplace solutions. His professional focus lies in merging traditional safety protocols with modern digital monitoring techniques, fostering environments that are both practical and hazard-conscious. As the lead author of SafetyRift, Robert delves into the art and science of risk mitigation, inspiring safety officers and industry professionals alike to bridge the gap between compliance and culture.
Education
RMIT University (Melbourne, Australia)
Associate Degree in Design (Industrial Safety)
-
Focus on sustainable safety infrastructure, industry-driven risk assessments, and practical implementation.
-
Gained hands-on experience with traditional hazard identification and digital monitoring tools, such as IoT safety sensors and predictive analytics software.
Nottingham Trent University (United Kingdom)
Bachelor’s in Occupational Health and Safety (Honors)
-
Specialized in systemic design with a focus on blending human behavior psychology with modern safety production techniques.
-
Participated in industry-wide projects, working with global logistics and manufacturing firms to gain real-world insights into large-scale safety deployments.
Publications and Impact
In SafetyRift, Robert shares his insights on safety design processes, protective materials, and strategies for efficient, accident-free production. His writing bridges the gap between foundational safety knowledge and modern industrial needs, making it a must-read for both budding safety coordinators and seasoned risk management professionals.
