
It’s late. You pull into the driveway, and the yard stays dark. The motion light that usually flicks on and greets you? Nothing. You fumble for your keys in the shadows, listening to every little noise.
A dead security light isn’t just an annoyance. It’s a gap in the wall you’ve built around your home.
The good news: fixing it is usually quick, cheap, and something you can do yourself. No electrician needed for most jobs.
In this guide, you’ll learn how to change outdoor security light bulb the right way. We’ll cover the tools you need, safe step-by-step instructions, the different bulb types you might run into, and the mistakes that trip up first-timers. By the end, you’ll have a bright, working light again — and the confidence to do it whenever a bulb burns out.
Why a Working Security Light Matters
A security light does one simple job. It removes the dark corners where someone could hide.
When that bulb dies, the corner comes back.
Here’s what a working light actually gives you.
- A visible deterrent. Motion lights startle anyone who shouldn’t be there.
- Safer footing. You see the steps, the ice, the garden hose left out.
- Clearer camera footage. Most security cameras need light to record anything useful at night.
- Peace of mind. You stop bracing yourself every time you walk to the door after dark.
A dead bulb quietly cancels all of that. And most people don’t notice until the night they need the light most.
In short: changing a burned-out bulb fast keeps your home’s first layer of protection working.
What You’ll Need to Change the Bulb
Before you climb a ladder, gather everything in one spot. Stopping halfway to hunt for a tool is how accidents happen.
Here’s your full checklist.
Tools and Supplies
- A replacement bulb that matches your fixture (more on that below).
- A sturdy ladder — tall enough that you’re not stretching.
- Work gloves to protect your hands and grip better.
- A dry cloth to wipe the fixture and new bulb.
- A flashlight or headlamp, since you may be working in the dark.
Nice to Have
- Safety glasses, especially for overhead work.
- A screwdriver if your fixture has a cover held by screws.
- A step stool spotter — a friend to hold the ladder steady.
Warning: Never touch a halogen bulb with bare fingers. The oil from your skin creates a hot spot that shortens the bulb’s life or causes it to shatter. Always handle halogen bulbs with a cloth or gloves.
In short: match the bulb first, grab a solid ladder, and keep gloves and a light source within reach.
How to Change Outdoor Security Light Bulb: Step by Step
Take this slow the first time. Working with electricity and heights means small mistakes carry real weight.
Step 1: Cut the Power
This is the step people skip, and the one that matters most.
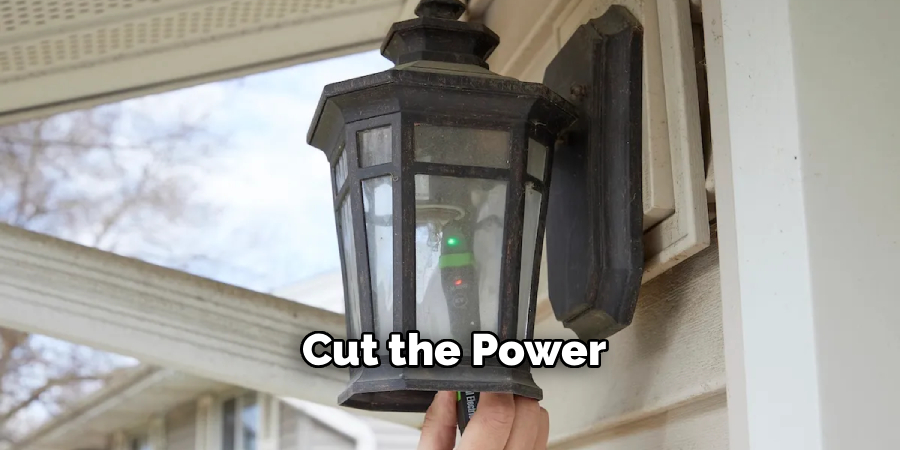
- Go to your breaker box and switch off the circuit for the outdoor light.
- If the light has a wall switch, turn that off too.
- Test it. Wave your hand in front of the motion sensor or flip the switch to confirm the light stays dark.
Warning: Never change an outdoor light bulb with the power live. Even a bulb that looks off can carry current through a faulty fixture.
Step 2: Let the Bulb Cool
If the light was on recently, the bulb is hot. Halogen bulbs get hot enough to burn you in a second.
Wait 10 to 15 minutes before touching anything. Grab your ladder and set up while you wait.
Step 3: Set Up Your Ladder Safely
Place the ladder on firm, level ground. Don’t lean it on soft soil or a wobbly step.
- Open it fully and lock the braces.
- Face the ladder as you climb.
- Keep your hips between the rails — don’t lean out to reach.
If you can’t reach comfortably, climb down and reposition. It’s worth the extra minute.
Step 4: Open the Fixture
Most outdoor security lights have a glass or plastic cover over the bulb.
- Some twist off with a gentle turn.
- Some have small screws — loosen them with your screwdriver.
- Some flip-style floodlights let you tilt the head to reach the bulb.
Set the cover and any screws in your pocket or a bag so they don’t drop.
Step 5: Remove the Old Bulb
Grip the old bulb with a gloved hand or cloth.
- Screw-in bulbs turn counterclockwise — “lefty loosey.”
- Pin-style halogen bulbs pull straight out of their socket, or release with a small clip.
If the bulb feels stuck, don’t force it. We’ll cover stuck bulbs in the troubleshooting section.
Step 6: Install the New Bulb
Line up your new bulb and put it in gently.
- Screw-in bulbs turn clockwise until snug — don’t overtighten.
- Pin bulbs push straight in until they seat, or clip into place.
Hold halogen bulbs with a cloth the whole time.
Step 7: Reassemble and Restore Power
Put the cover back and tighten any screws. Climb down and move the ladder away.
Now go back to the breaker and switch the power on. Trigger the motion sensor or flip the switch.
Your light should come on bright. In short: kill the power, let it cool, work safely on a solid ladder, swap the bulb, and restore power to test.
Choosing the Right Replacement Bulb
Grabbing the wrong bulb is the most common reason a “simple” job turns into a second trip to the store. Two things matter: the bulb type and the fitting.
Let’s start with the type, because it changes how bright, how efficient, and how long-lasting your light will be.
LED vs. Halogen vs. CFL
Here’s how the three main outdoor bulb types compare.
| Feature | LED | Halogen | CFL |
| Lifespan | 15,000–25,000 hrs | 1,000–2,000 hrs | 8,000–10,000 hrs |
| Energy use | Very low | High | Low |
| Brightness on | Instant | Instant | Slow warm-up |
| Cold weather | Excellent | Good | Poor |
| Cost over time | Lowest | Highest | Moderate |
| Best for | Almost every outdoor light | Old fixtures needing exact match | Budget indoor-style fixtures |
For most people, LED is the clear winner for an outdoor security light. It lasts years, runs cool, turns on instantly, and handles cold nights without dimming.
Match the Fitting and Shape
The bulb type is only half the story. It also has to physically fit.
- Check the base — screw-in bases are marked like E26 (standard) or E12 (candelabra).
- Check the pin type if it’s a halogen floodlight, often marked as R7S or a two-pin base.
- Check the shape and size so the cover still closes over it.
The easiest trick: take the old bulb to the store or photograph its markings. Match it exactly.
Match the Brightness and Sensor Rating
One more check that people miss.
- Look for lumens, not just watts. More lumens means a brighter light.
- If your fixture uses a motion sensor or dusk-to-dawn photocell, buy a bulb labeled compatible with sensors. Some cheap LEDs flicker or won’t trigger correctly.
In short: pick an LED when you can, match the base and shape exactly, and confirm it works with motion sensors.
Common Mistakes and Troubleshooting
Changing a bulb looks foolproof. In practice, a handful of small errors leave you in the dark, on a ladder, wondering what went wrong. Here are the ones that catch people — why they happen, and how to fix each.
Mistake 1: Leaving the Power On
You tell yourself the switch is off, so you’re fine.
Why it happens: People trust the wall switch without checking the breaker, and faulty fixtures can stay live.
The fix: Always cut power at the breaker box and test the light before touching it. This one habit prevents the most serious injuries.
Mistake 2: Touching a Halogen Bulb With Bare Hands
The new bulb burns out within days, or shatters when the light turns on.
Why it happens: Skin oil leaves a residue that overheats one spot on the glass.
The fix: Handle halogen bulbs with gloves or a cloth only. If you already touched one, wipe it clean with rubbing alcohol before installing.
Mistake 3: Buying the Wrong Bulb
You get up the ladder and the bulb won’t fit the socket.
Why it happens: Bases and pin types look similar but aren’t interchangeable.
The fix: Bring the old bulb to the store or snap a photo of its markings. Match the base, shape, and sensor compatibility before you buy.
Mistake 4: The New Bulb Won’t Turn On
You did everything right, but the fixture stays dark.
Why it happens: The bulb may be loose, the breaker may still be off, or the motion sensor needs a reset.
The fix: Check the bulb is seated snugly. Confirm the breaker is on. Then reset the sensor by switching the fixture off and on at the wall for a few seconds.
Mistake 5: A Stuck or Broken Bulb
The old bulb won’t budge, or it snaps and leaves the base in the socket.
Why it happens: Moisture and heat corrode the metal base to the socket over time.
The fix: With the power off, grip the base with pliers or press half a raw potato onto the broken glass to twist it free. A dab of petroleum jelly on the new base prevents this next time.
Mistake 6: Working on a Wet or Windy Day
You slip on the ladder or water gets into the open fixture.
Why it happens: Rushing to fix the light regardless of weather.
The fix: Wait for dry, calm conditions. Water plus electricity plus a ladder is a combination worth avoiding entirely.
In short: kill the power, handle halogen with care, match the bulb, reset the sensor, free stuck bulbs gently, and never work in bad weather.
Frequently Asked Questions
Do I need to turn off the power to change an outdoor security light bulb?
Yes, always. Switch off the breaker for that circuit and test that the light stays dark before you touch it. Even a bulb that appears off can carry current through a faulty fixture, so this step protects you from a shock.
Why does my new security light bulb keep burning out fast?
A few things cause this. You may have touched a halogen bulb with bare hands, leaving skin oil that creates a hot spot. Moisture in the fixture or a loose connection can also shorten bulb life. Switching to a sealed, sensor-compatible LED bulb usually solves it for good.
Can I put an LED bulb in an old halogen security light?
Often, yes — as long as the base fits and the LED is labeled compatible with your fixture. LEDs run cooler, last far longer, and use less energy. Just check that it works with any motion sensor or dusk-to-dawn photocell, since a few older fixtures need a specific type.
My motion sensor light won’t turn on after changing the bulb. What now?
First, confirm the bulb is seated tightly and the breaker is back on. Then reset the sensor: switch the fixture off at the wall, wait a few seconds, and switch it back on. If it still won’t trigger, the bulb may not be sensor-compatible, or the sensor itself may need service.
How often should I replace an outdoor security light bulb?
It depends on the bulb type. A halogen may need replacing every year or two, while a quality LED can last a decade or more. If your light flickers, dims, or takes longer to turn on, that’s your cue to swap it before it fails completely.
Wrapping Up
A dark security light leaves a gap right where you want protection most. The fix is simpler than you’d think.
You now know how to change an outdoor security light bulb safely — cut the power, let it cool, work on a steady ladder, match the right bulb, and test your work. You also know how to dodge the mistakes that leave first-timers stuck in the dark, from stuck bulbs to sensors that won’t reset.
Take your time, choose an LED when you can, and your yard stays bright for years.
Want to make your home even safer? Check out our guide on [related topic: setting up motion-activated security cameras] next.

About
Robert D is a distinguished figure in the world of Safety Systems and Risk Management, with a decade of expertise creating innovative and sustainable workplace solutions. His professional focus lies in merging traditional safety protocols with modern digital monitoring techniques, fostering environments that are both practical and hazard-conscious. As the lead author of SafetyRift, Robert delves into the art and science of risk mitigation, inspiring safety officers and industry professionals alike to bridge the gap between compliance and culture.
Education
RMIT University (Melbourne, Australia)
Associate Degree in Design (Industrial Safety)
-
Focus on sustainable safety infrastructure, industry-driven risk assessments, and practical implementation.
-
Gained hands-on experience with traditional hazard identification and digital monitoring tools, such as IoT safety sensors and predictive analytics software.
Nottingham Trent University (United Kingdom)
Bachelor’s in Occupational Health and Safety (Honors)
-
Specialized in systemic design with a focus on blending human behavior psychology with modern safety production techniques.
-
Participated in industry-wide projects, working with global logistics and manufacturing firms to gain real-world insights into large-scale safety deployments.
Publications and Impact
In SafetyRift, Robert shares his insights on safety design processes, protective materials, and strategies for efficient, accident-free production. His writing bridges the gap between foundational safety knowledge and modern industrial needs, making it a must-read for both budding safety coordinators and seasoned risk management professionals.
