
There is a universal sound that every homeowner knows and dreads. It usually happens at 2:00 AM on a Tuesday—a sharp, piercing chirp echoing through the hallway. It’s the sound of a smoke detector demanding attention. While it is certainly annoying in the middle of the night, that little noise is a critical lifeline protecting your family. Keeping your smoke alarms functioning is one of the most important home maintenance tasks you can perform. If you are staring up at your ceiling wondering what to do next, you aren’t alone. Many people search for a clear guide on how to change battery in smoke alarm Kidde models to stop the chirping and restore their peace of mind.
Taking care of your fire safety equipment shouldn’t feel like a complex puzzle. Kidde is one of the most trusted names in fire safety, and they have designed their units to be relatively user-friendly. However, depending on when your home was built or when you last updated your alarms, you might be dealing with a variety of different models. Some open from the front, some twist off the ceiling, and others are hardwired into your home’s electrical system with a backup battery. In this guide, we will walk you through everything you need to know, ensuring your home stays safe and your sleep remains uninterrupted.
Understanding Your Kidde Smoke Alarm Before You Start
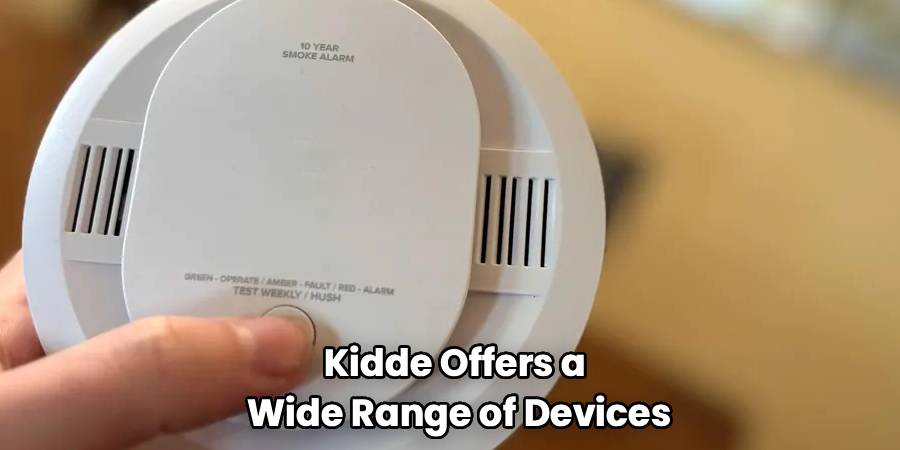
Before you grab a stepladder, it is helpful to understand exactly what you are dealing with. Not all smoke detectors are created equal, and Kidde offers a wide range of devices. Identifying your specific type is the precursor to a successful battery swap.
Most modern homes feature one of three main types of Kidde alarms. The first is the battery-only unit, which runs entirely on AA or 9V batteries. These are common in older homes or areas where wiring wasn’t feasible. The second is the hardwired alarm with battery backup. These are connected to your home’s power grid but keep a battery inside so they work during a power outage. Finally, there are the 10-year sealed lithium battery models. It is crucial to note that if you have a sealed lithium model, you do not change the battery. If this unit chirps, it usually means the entire alarm has reached the end of its life and needs to be replaced.
Knowing the difference prevents you from trying to pry open a sealed unit, which can damage the device and void the warranty. Once you’ve confirmed you have a replaceable battery model, you are ready to proceed.
Changing the battery is a straightforward process, but safety and precision are key. You will be working at height, likely on a ladder, so take your time. Below, we have broken down the process to ensure you get it right the first time.
Safety Precautions and Preparation
Before you begin, ensure you have a sturdy stepladder. Never stand on a swivel chair or unstable furniture to reach a smoke alarm. It is also wise to inform your family members that you will be testing the alarm so the sudden noise doesn’t panic anyone.
Gather your supplies beforehand. You will need a fresh, high-quality battery. Kidde generally recommends specific brands like Duracell, Energizer, or Panasonic. Using generic or rechargeable batteries is often discouraged because they may not provide the consistent voltage required for safety equipment. Check the back of your alarm or the user manual for the exact battery type required—usually a 9-volt or AA batteries.
Detailed Instructions: How To Change Battery In Smoke Alarm Kidde
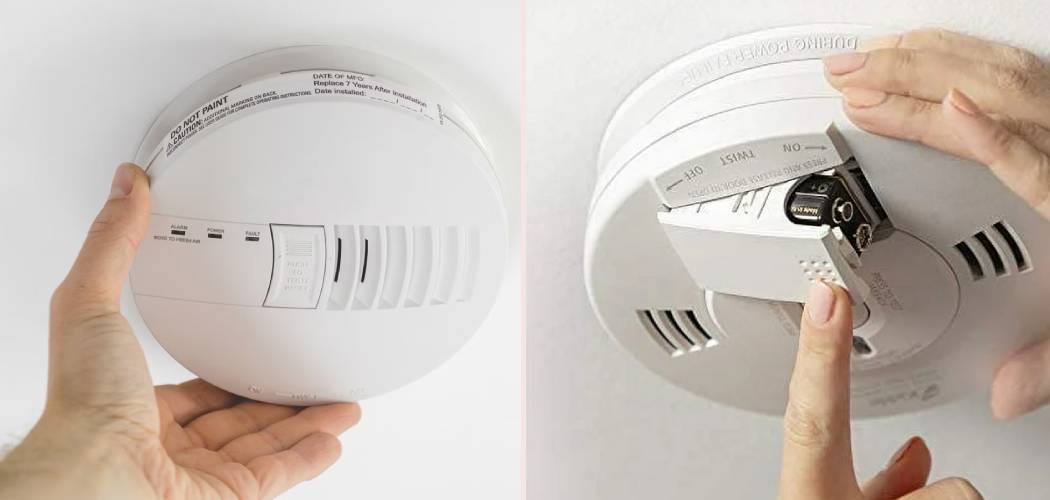
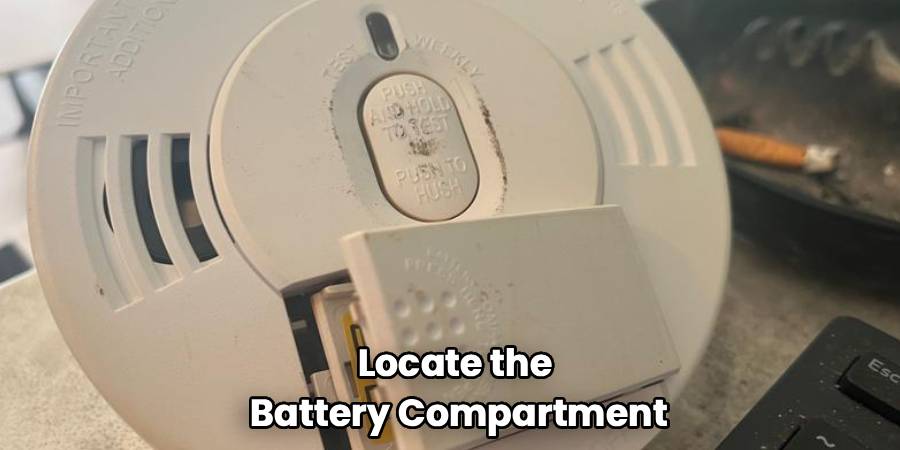
When you are ready, climb your ladder safely and locate the battery compartment. The method for accessing the battery depends on your specific model housing.
For Front-Load Models:
These are the most convenient designs. You will see a battery door on the face of the alarm. You typically press a finger tab or slide a latch to pop the door open. The old battery will drop down or be easily accessible without removing the alarm from the ceiling.
For Rear-Load Models:
If you don’t see a door on the front, you likely have a rear-load model. You will need to remove the unit from the mounting bracket. To do this, grasp the alarm body and twist it counter-clockwise (left). It should release from the bracket. If it is hardwired, you will see wires connecting it to the ceiling—don’t yank them! There is usually a quick-connect plug. Squeeze the plastic tabs on the plug to disconnect the alarm from the power, allowing you to bring the unit down for easier battery replacement.
Once the unit is open, remove the old battery. If there is a ribbon underneath the battery, ensure it is free so you can use it to pop the battery out next time.
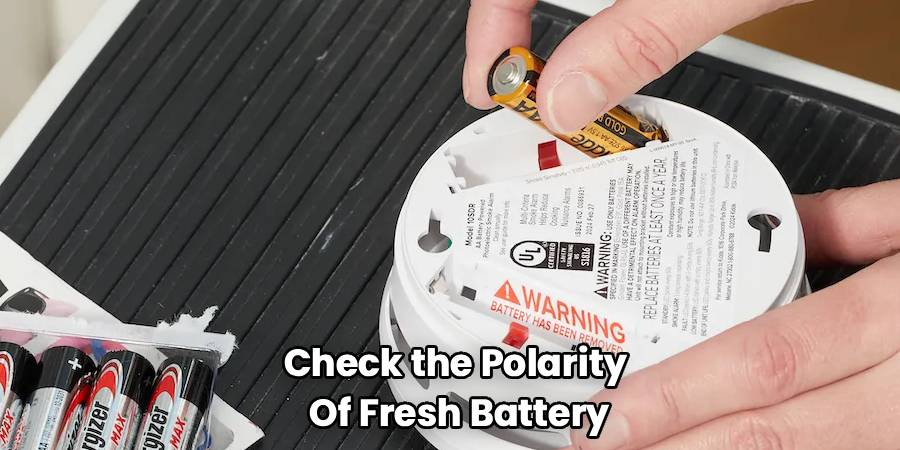
Installing the New Battery
Take your fresh battery and check the polarity (the positive and negative ends). Most compartments have markings indicating which way the battery should face. For 9-volt batteries, there is a large and a small connector that snap into place. For AA batteries, match the plus (+) and minus (-) signs.
Insert the new battery firmly. If your unit has a “battery drawer” that slides out, ensure the battery is seated flat before closing the drawer. The door should close easily; if you have to force it, the battery might be misaligned.
Reattaching the Alarm
If you had to remove the alarm from the ceiling, now is the time to put it back. If it is hardwired, reconnect the power harness first—it usually only fits one way and will click when secure. Line up the slots on the back of the alarm with the tabs on the mounting bracket. Push the alarm gently against the ceiling and twist clockwise (right) until it locks into place. You should feel it secure itself.
Testing the Unit
This is the most critical step. Never assume the alarm is working just because you put a new battery in. Locate the “Test” button on the front of the cover. Press and hold it for about five seconds. You should hear a very loud, ear-piercing siren pattern (usually three beeps, a pause, and three beeps).
If you hear this sound, congratulations! You have successfully performed the maintenance. If the alarm remains silent or continues to chirp, you may have a defective battery or a unit that needs cleaning.
The Importance of Cleaning
While you are up there, use a can of compressed air or a vacuum cleaner with a soft brush attachment to clean around the sensor openings. Dust, spider webs, and pet dander can accumulate inside the sensor chamber. This debris can block the sensor or cause false alarms. A quick clean during your battery change routine significantly reduces the chance of those annoying false alarms while cooking or showering.
By following this routine, you are doing more than just stopping a noise; you are ensuring that the specific process of how to change battery in smoke alarm Kidde devices is done correctly, keeping your home compliant and safe.
Troubleshooting Common Issues
Sometimes, despite your best efforts, the alarm might not behave as expected. You’ve changed the battery, but the chirping continues. This is a common frustration known as “residual charge” or “error memory.”
Why Does It Still Chirp?
If you install a new battery and the unit still chirps every minute, the alarm might hold a residual charge that thinks the old battery is still there. To fix this, perform a “reset.” Remove the new battery and disconnect the unit from the ceiling power (if hardwired). With no power source connected, press and hold the test button for 15 seconds. This drains any remaining electricity from the capacitors. Reinstall the new battery, reconnect the power, and test again. This often clears the error.
Another possibility is that the battery drawer isn’t fully closed. Some Kidde models have a safety mechanism that prevents the drawer from closing if the battery isn’t inserted, but if it is slightly ajar, the unit may not make proper contact.
Is Your Alarm Expired?
If you have tried everything and the unit is still acting up, check the manufacture date on the back label. Smoke alarms have a lifespan of 10 years. After a decade, the sensors degrade and become unreliable. If your alarm is older than 10 years, no amount of fresh batteries will fix it—it’s time to replace the entire unit.
Frequently Asked Questions
We know that smoke alarms can be confusing. Here are answers to the most frequent questions homeowners have about maintaining their Kidde devices.
How often should I change my Kidde smoke alarm battery?
The general rule of thumb is to change standard alkaline batteries (9V or AA) once a year. Many people use “Daylight Saving Time” as a reminder to change their clocks and their smoke alarm batteries on the same day. However, if you use heavy-duty lithium batteries (for replaceable models), they may last longer. Always listen for the low-battery chirp, which is the ultimate indicator that it’s time for a swap.
Can I use rechargeable batteries in my smoke detector?
No, you generally should not use rechargeable batteries in smoke alarms. Rechargeable batteries, such as NiMH (Nickel-Metal Hydride), have a different voltage curve than alkaline batteries. They lose their charge faster and abruptly, which means you might not get a sufficient “low battery” warning period. Smoke alarms are designed to work with the slow, predictable voltage drop of alkaline or lithium primary batteries. Always check your user manual, but sticking to standard high-quality alkaline brands is the safest bet.
What do the different beep patterns mean?
Kidde alarms communicate through specific patterns. A consistent, single chirp every 30 to 60 seconds usually indicates a low battery. If you hear three long beeps, a pause, and three more beeps, that is an active fire alarm—you should evacuate immediately. Some newer models also have a carbon monoxide sensor; four quick beeps usually indicate the presence of CO gas. Knowing the difference between a “low battery” chirp and an “emergency” alarm is vital for your family’s safety.
My alarm is hardwired; why does it need a battery?
Hardwired alarms are connected to your home’s electricity, but power outages happen—often during storms when fire risks (like lightning strikes or power surges) are high. The battery acts as a backup power source. If your power goes out, the battery ensures the alarm keeps “sniffing” for smoke. Therefore, even hardwired units will chirp when the backup battery is low, and it must be replaced just like a standalone unit.
How do I dispose of old smoke alarm batteries?
Standard alkaline batteries (AA, 9V) can typically be disposed of in your regular household trash in most areas, as they no longer contain mercury. However, lithium batteries should ideally be taken to a recycling center or a battery drop-off location (often found at hardware or electronics stores). Never dispose of batteries in a fire, as they can explode. If you are replacing an entire smoke alarm unit, check local regulations, as the tiny amount of radioactive material in ionization alarms often requires special disposal protocols.
Conclusion
How To Change Battery In Smoke Alarm Kidde instructions are simple to follow, but performing them correctly is vital for the safety of your home. By taking the time to identify your specific model, using the correct replacement battery, and cleaning the unit of dust, you ensure that your first line of defense against fire is always ready. Remember to test your alarms monthly and replace the batteries annually to avoid those midnight chirps. A few minutes of maintenance today can provide years of protection for you and your loved ones.