

Have you ever walked into a dark laundry room with a basket full of clothes, fumbled for the switch with your elbow, and wished the house would just know you were there? Or maybe you have kids who seem allergic to turning off the bathroom lights, driving your electricity bill up month after month. The solution isn’t magic; it’s a simple hardware upgrade.
Adding automation to your lighting is one of the most satisfying weekend projects you can tackle. It’s practical, it saves money, and it adds a touch of modern convenience to your home. While electrical work can seem intimidating to a beginner, swapping a standard single-pole switch for a sensor is actually quite straightforward if you take the right safety precautions. In this guide, we will walk you through exactly how to install motion detector light switch hardware safely and correctly, transforming your dumb lights into smart energy-savers.
We’ll cover everything from the tools you need to the nitty-gritty wiring details. By the end of this post, you won’t just have a new switch; you’ll have the confidence to tackle other small electrical jobs around the house.
Why Make the Upgrade
Before we start unscrewing faceplates, let’s talk about why this project is worth your time.
Energy Efficiency
This is the big one. We all forget to flip the switch sometimes. A motion sensor acts as a safety net for your wallet. If no one is in the room, the light shouldn’t be on. It’s that simple. Over a year, those saved hours of electricity add up, especially in high-traffic areas like mudrooms, garages, and pantries.
Convenience and Hygiene
In rooms like the kitchen or bathroom, your hands might be wet, messy, or full. Touchless lighting keeps your switches clean and saves you the hassle of washing your hands just to turn on a light.
Safety and Security
A dark garage or hallway can be a tripping hazard. Having lights that trigger instantly upon entry prevents accidents.
Understanding the Technology
Most residential switches use Passive Infrared (PIR) technology. These sensors detect heat energy radiated by warm bodies (like you or your cat) moving across the sensor’s field of view. When that heat signature moves, the switch trips and the lights come on.
You will also encounter two main modes:
- Occupancy Mode: Auto-ON when you enter, Auto-OFF when you leave.
- Vacancy Mode: Manual-ON when you enter, Auto-OFF when you leave. (Great for bedrooms so lights don’t pop on if you roll over in your sleep).

Prerequisites Before You Learn How To Install Motion Detector Light Switch
Before you rush to the hardware store, you need to check your existing wiring setup. This is where many DIY motion detector switch projects hit a snag.
Most modern motion sensors require a Ground wire (usually bare copper or green). Many also require a Neutral wire (usually white). Standard single-pole switches often just switch the “Hot” wire and don’t utilize the neutral, so the neutral might be bundled up in the back of the box, or it might not be there at all (common in older homes built before the 1980s).
Open up your switch box and look:
- If you see a bundle of white wires tucked in the back capped with a wire nut, you have a neutral. You can use almost any motion sensor.
- If you only see black wires (and maybe a ground), you need to buy a specific sensor labeled “No Neutral Required.” Do not skip this step!
Tools and Materials Checklist
You don’t need a contractor’s van full of gear, but you do need the basics:
- Non-Contact Voltage Tester: This is non-negotiable for safety. It beeps when power is present.
- Screwdrivers: Ideally both flathead and Phillips. A #2 Phillips is standard for switch screws.
- Wire Strippers/Cutters: For trimming and stripping wire insulation.
- Needle-Nose Pliers: Helpful for bending wire loops or fishing wires out of the box.
- Electrical Tape: For securing wire nuts.
- Wire Nuts: Your new switch usually comes with them, but it helps to have extras.

7 Easy Step-by-Step Guide To Install Motion Detector Light Switch
This section is the meat of the project. We are assuming you are installing a standard single-pole switch (one switch controls one light). If you are working on a 3-way switch (two switches control one light, like at the top and bottom of stairs), the wiring is more complex and requires a specific 3-way compatible sensor.
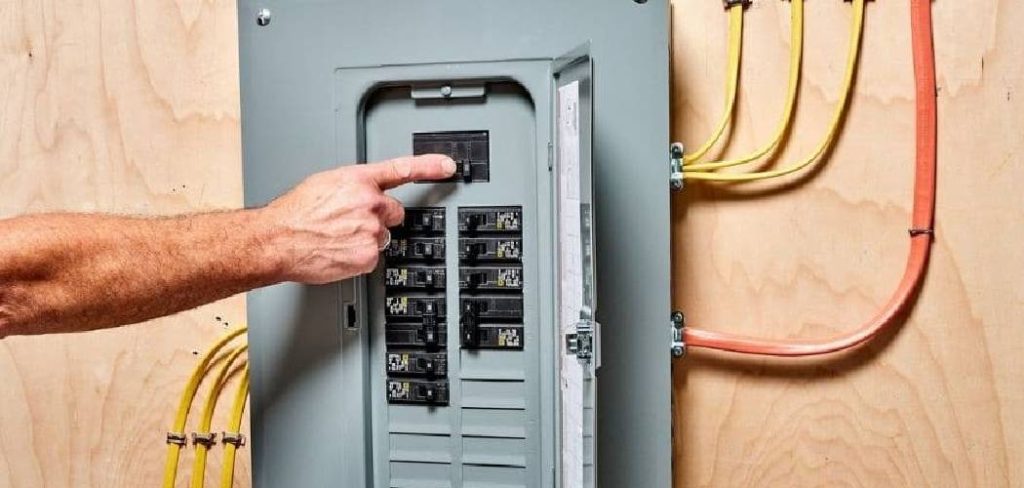
Step 1: Safety First—Cut the Power
Never work on live wires. Go to your home’s electrical panel (breaker box). Locate the breaker that controls the room you are working in and flip it to the “OFF” position.
Once you think the power is off, return to the switch. Flip it on and off to ensure the light doesn’t work. However, a burnt-out bulb could fool you. This is why you use your non-contact voltage tester. Hold the tip of the tester against the switch faceplate and the wires (once you unscrew the plate). If it stays silent, you are safe to proceed. If it beeps or lights up, the power is still on—go back to the panel and find the right breaker.
Step 2: Remove the Old Hardware
Take your flathead screwdriver and remove the screws holding the faceplate cover. If the paint has sealed the cover to the wall, gently score around the edge with a utility knife so you don’t peel the drywall paper when you pull it off.
Next, remove the two screws holding the switch itself to the electrical box. Gently pull the switch out from the wall. Do not disconnect the wires yet!
Pull the switch out as far as the wires allow so you have room to work.

Step 3: Identify Your Wires
This is the detective part of installing a motion sensor switch. Your old switch likely has two or three wires connected to it:
- Line (Hot): This wire brings power from the breaker panel. It is usually black.
- Load: This wire carries the power up to the light fixture. It is also usually black (sometimes red).
- Ground: This is usually a bare copper wire or a green wire connected to a green screw.
If you have a bundle of white wires tucked in the back of the box, those are your Neutrals.
Here is the tricky part: On a standard dumb switch, it doesn’t matter which black wire goes to which screw. But for a motion sensor, it matters. The sensor needs to know which power source is constant (Line) to power its internal brain.
Pro Tip for Identifying Line vs. Load:
If you can’t tell which black wire is which, separate them safely (ensure they aren’t touching anything), turn the power back on briefly, and use your voltage tester. The wire that makes the tester beep is your Line (Hot) wire. The one that is silent is the Load wire. Turn the power back off immediately after identifying them. Mark the Hot wire with a piece of electrical tape so you don’t forget.
Step 4: Connect the New Motion Sensor
Now it is time to connect the new device. We are detailing the process for a standard single-pole installation.
Review the wiring diagram that came with your specific switch, as colors can vary by brand (Lutron, Leviton, etc.), but generally, the process looks like this:
- Ground: Connect the green wire from the sensor (or the green screw) to the bare copper wire coming from the wall.
- Neutral: If your switch requires a neutral, connect the white wire (or silver screw) to the bundle of white wires in the back of the box. You will likely need to add a pigtail (a short piece of wire) if the device has screw terminals.
- Line and Load: Connect the black wire from the sensor meant for “Line” or “Hot” to the wire you identified as the power source. Connect the other wire (often red or black) meant for “Load” to the wire going to the light.
This is the most critical part of the process when you figure out how to install motion detector light switch devices in your home because reversing these two wires often results in a switch that simply doesn’t power up.
Use wire nuts to secure these connections. Twist the nut clockwise until it feels tight. Give each wire a firm tug to make sure it is held securely by the nut. If a wire slips out, redo it. Loose wires cause fires.
Step 5: Tuck and Mount
Motion sensor switches are much bulkier than standard toggle switches because they house electronics inside. This makes the electrical box crowded.
Carefully fold the wires into an accordion shape and push them back into the box. Try to keep the ground wire away from the live terminals to prevent accidental shorts.
Push the new switch into place. Insert the mounting screws and tighten them until the switch is flush against the wall. It might feel like a tight squeeze; just be patient and go slow to avoid pinching any wires.
Step 6: Test Before You Finish
Before you put the faceplate back on, let’s make sure it works. Go back to your breaker panel and flip the power on.
Walk into the room. The light should click on. If it does, congratulations! If not, don’t panic. Check the troubleshooting section below. Wait for the sensor to initialize (some take up to a minute to “warm up” after receiving power).
Once you verify it works, screw the faceplate on.
Step 7: Customize Your Settings
Unlike a regular switch, you have options now. Most sensors have tiny dials or dip switches hidden under the faceplate or on the front panel. You can usually adjust:
- Time Delay: How long the light stays on after motion stops (e.g., 1, 5, 15, or 30 minutes). For a pantry, 5 minutes is plenty. For a garage, you might want 15.
- Sensitivity: How much motion is needed to trigger it. If the cat keeps turning it on, lower the sensitivity.
- Ambient Light: This feature prevents the light from turning on if there is enough natural daylight in the room. This is a massive energy saver for sunny rooms.
Troubleshooting Common Issues
Even experts run into snags. Here are the most common problems with motion sensor light switch installation and how to fix them.
The Light Won’t Turn On
- Check the Bulb: It sounds silly, but is the bulb burned out?
- Reversed Line/Load: Did you mix up the hot wire and the load wire? This is the most common error. Turn off power and swap the black wires.
- Ground Issue: Many sensors require a solid ground connection to function. Ensure your copper wire is securely attached.
- Black Tape Over Sensor: Some units come with a protective film over the lens. Make sure you peeled it off.
The Light Won’t Turn Off (Phantom Tripping)
- Sensitivity Too High: The sensor might be picking up motion from the hallway or an air vent moving curtains. Dial down the sensitivity.
- Time Delay: You might have set it to 30 minutes. Check the dial.
- Manual Override: Some switches have a manual override mode (activated by flipping the switch fast). Consult your manual to reset it to auto mode.
The Light Flickers
- Bulb Compatibility: Older motion sensors don’t play nice with CFLs or some LEDs. Ensure your bulb is “dimmable” or compatible with electronic switches.
- Loose Wiring: A loose neutral or ground can cause flickering. Double-check your wire nuts.
Frequently Asked Questions
Here are answers to the most frequent questions we hear about upgrading to motion detection.
Can I use a motion sensor with a 3-way switch?
Yes, but you have to buy a specific sensor. A standard single-pole sensor will not work in a 3-way setup (like a hallway with switches at both ends). You generally only need to replace one of the two switches with a motion sensor (usually the one where you enter the room most often), but you must buy a “3-Way Motion Sensor Switch.” The wiring is more complex, involving “traveler” wires.
Do these switches work with LED bulbs?
Most modern ones do, but it is worth checking the packaging. Look for “LED Compatible” or “CFL/LED Ready.” Older sensors were designed for incandescent loads and might cause LEDs to strobe or glow faintly when off.
Where is the best place to install the sensor?
Ideally, the switch should have a clear line of sight to the entry point of the room. If your switch is behind an open door, the door will block the sensor, rendering it useless. In that case, you might need a ceiling-mounted sensor or a “Remote Motion Detector” that communicates wirelessly.
How much power does the sensor itself use?
The sensor does use a tiny amount of electricity to stay “awake” and watch for motion. This is called “phantom load.” However, it is negligible—usually less than $1 per year. The amount you save by not leaving 60 watts of lights burning overnight far outweighs the sensor’s consumption.
Can pets trigger the light?
Yes. PIR sensors detect heat and motion. A large dog will almost certainly trigger it. A small cat might not, depending on the sensitivity setting. If this is a problem (like in a bedroom), use the “Vacancy Mode” (manual-on, auto-off) so the dog doesn’t wake you up at 3 AM.
Conclusion
Learning how to install motion detector light switch hardware is one of those skills that pays dividends immediately. You get the satisfaction of a job well done, lower energy bills, and a home that feels a little more intelligent.
The process might seem technical at first glance, but it really boils down to safety and identifying three or four wires. Once you understand the role of the Line, Load, Neutral, and Ground, you unlock the ability to install not just motion sensors, but smart Wi-Fi switches, dimmers, and timers throughout your home.
Take your time, respect the electricity, and don’t skip the voltage test. Before you know it, you’ll be walking into your garage with your hands full of groceries, and the lights will greet you automatically. It’s a small luxury, but one you’ll enjoy every single day. Happy wiring!