
Ensuring your home is safe for you and your loved ones is a top priority, and a properly functioning smoke detector is a critical part of that safety plan. Kidde is a trusted name in fire safety, and their smoke detectors are designed to be reliable and effective. If you’ve recently purchased one, you might be wondering about the next steps.
This guide is here to walk you through the process, making it simple and straightforward. Learning how to install a Kidde smoke detector is an empowering skill that provides peace of mind, knowing you’ve taken a vital step in protecting your household.
Whether you’re replacing an old unit or installing one for the first time, we’ve got you covered. We’ll go over everything from choosing the right location to testing the alarm once it’s in place. This comprehensive Kidde smoke detector installation guide will address both battery-operated and hardwired models, so you can feel confident no matter which type you have.

4 Easy Step-by-Step Guide to Installation
Installing a smoke alarm is a task most homeowners can handle with just a few basic tools. The process may vary slightly depending on whether you have a battery-only or a hardwired unit. We’ll break down both scenarios. Before you begin, always read the manufacturer’s manual that came with your specific Kidde model, as it will have the most precise instructions.
Step 1: Gather Your Tools and Choose a Location
Before you start drilling holes, let’s get prepared. You will need a few common household tools: a drill with a small drill bit, a hammer, a stepladder, a pencil, and a screwdriver. For hardwired installations, you’ll also need a voltage tester and wire strippers.
The placement of your smoke detector is crucial for its effectiveness. Smoke rises, so the best place for an alarm is on the ceiling, in the center of the room. If you must install it on a wall, place it 6 to 12 inches below the ceiling. You should install a smoke detector on every level of your home, including the basement. Also, place them inside each bedroom and outside sleeping areas, like in a connecting hallway.
Avoid installing alarms near kitchens, bathrooms, or laundry rooms, as steam and cooking fumes can cause false alarms. Also, keep them away from windows, doors, and air vents where drafts could interfere with their ability to detect smoke.

Step 2: Prepare the Mounting Bracket
Your Kidde smoke detector comes with a mounting bracket, which is the base that attaches to the ceiling or wall. For a battery-operated smoke alarm installation, hold the bracket against the surface in your chosen spot and use a pencil to mark where the screw holes will go. Use your drill to create small pilot holes on your marks. Then, gently tap the included plastic screw anchors into the holes with a hammer.
If you are replacing an existing hardwired detector, the process is slightly different. First, you must turn off the power to that circuit at your home’s main electrical panel. Use a voltage tester to confirm there is no electricity flowing to the wires. Once you are sure the power is off, you can disconnect the old detector and remove its mounting bracket. The new Kidde bracket should fit the existing electrical box, but you can use the new screws provided if needed.
Step 3: Connect the Power Source
For battery-operated models, this step is simple. Your detector either comes with batteries or requires you to purchase them. Open the battery compartment on the back of the detector, check the positive (+) and negative (-) terminals, and insert the batteries accordingly. Many Kidde models have a safety feature that prevents the compartment from closing if the batteries are inserted incorrectly.
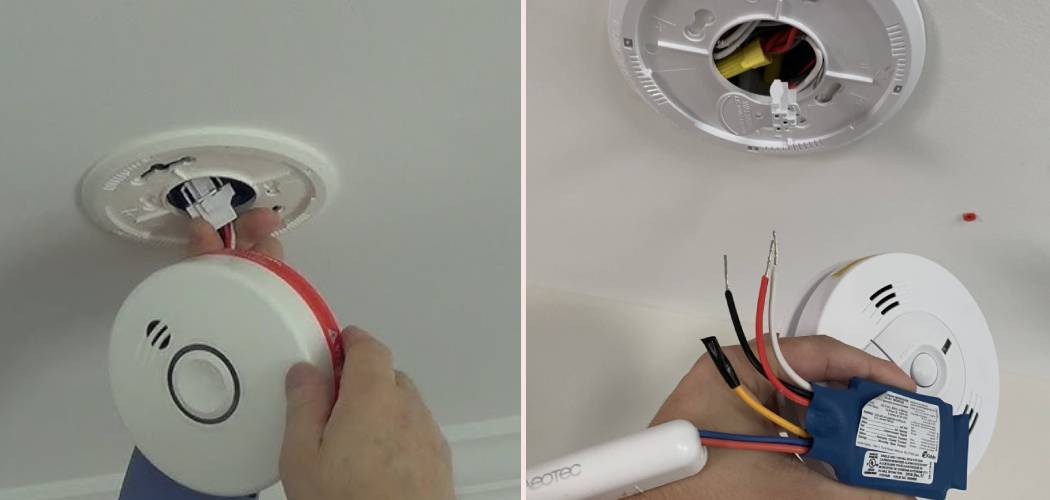
For hardwired smoke detector installation, this is the most technical part of the job. Your new Kidde detector will come with a wiring harness or a quick-connect adapter. This plug connects the alarm to your home’s wiring. Typically, you will see three wires: black (hot), white (neutral), and red or orange (interconnect). Match the wires from the alarm’s harness to the corresponding wires in the electrical box and twist them together with the provided wire nuts (black to black, white to white, red to red).
The interconnect wire is what allows multiple hardwired alarms to sound at the same time, even if only one detects smoke. If your home doesn’t have an interconnect wire, simply cap the red/orange wire on the harness and tuck it into the box.

Step 4: Attach the Detector and Test It
Once your power source is ready, it’s time to put the detector on its base. For a battery unit, simply align the detector with the mounting bracket and twist it clockwise until it locks into place. You will often hear a click. For a hardwired unit, plug the wiring harness into the back of the detector first. Neatly tuck the wires into the electrical box, then align the alarm with the bracket and twist it on.
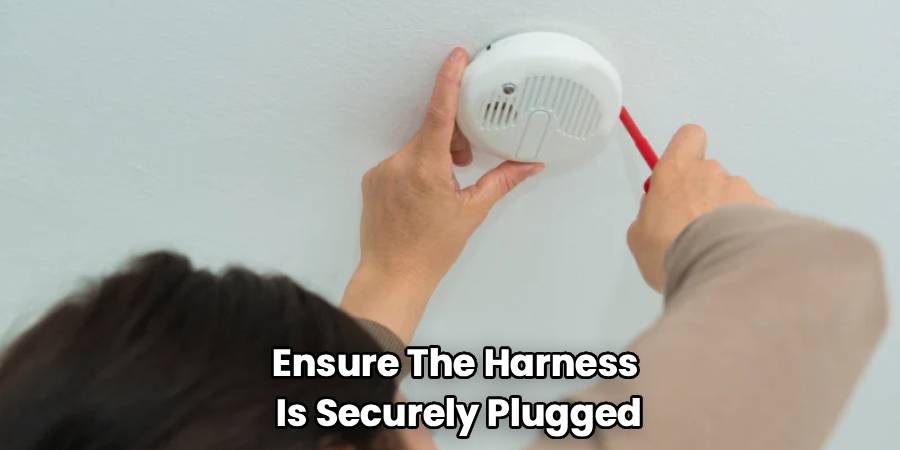
Now, you can restore power at the electrical panel for hardwired units. The final and most important action in knowing how to install a Kidde smoke detector is to test it. Press and hold the “Test” button on the face of the detector. You should hear a loud, piercing alarm. For hardwired, interconnected systems, test one alarm to ensure all the other alarms in the house also sound. If the alarm doesn’t sound, double-check your battery installation or wire connections.
Frequently Asked Questions
Even with a straightforward guide, questions can come up. Here are answers to some common queries about installing Kidde smoke detectors.
Where should I not install a smoke detector?
Knowing where to avoid placing a smoke detector is just as important as knowing where to install one. To prevent false alarms and ensure proper function, avoid installing detectors in “dead air” spaces, such as the corners where walls and ceilings meet. Also, keep them at least 3 feet away from air registers, ceiling fans, and vents that could blow smoke away from the unit. As mentioned earlier, steamy or dusty areas like bathrooms, unfinished attics, and garages are also poor locations for smoke detectors.
How often do I need to replace my smoke detector batteries?
For battery-operated units, you should replace the batteries at least once a year. A good habit is to change them when you change your clocks for daylight saving time. Many modern Kidde detectors come with a 10-year sealed battery, which means you never have to replace the battery. Instead, you replace the entire unit after a decade. If your detector starts to “chirp” intermittently, it’s a low-battery warning, and you should replace the batteries immediately.
Why is my new hardwired smoke detector chirping?
A newly installed hardwired smoke detector might chirp for a few reasons. The most common cause is that the backup battery needs to be activated or replaced. Even hardwired units have a battery backup for power outages. Make sure you have pulled the plastic tab to activate the battery. Another reason could be a loose connection in the wiring harness.
Turn off the power at the breaker, unplug the unit, and ensure the harness is securely plugged into the back of the alarm. Finally, residual electricity in the capacitor might cause a chirp right after installation. Pressing and holding the test button for about 15 seconds can help reset and discharge it.
How do I know when to replace the entire smoke detector?
All smoke detectors, regardless of the brand or type, have a limited lifespan. The sensors inside degrade over time. You should replace your smoke detectors every 10 years. Most Kidde alarms have a manufacturing date printed on the back. If you can’t find a date, or if the unit is yellowed or you’re unsure of its age, it’s safest to replace it. Writing the installation date on the back of your new alarm with a permanent marker can help you keep track.
Conclusion
Following these steps for how to install a Kidde smoke detector will help you secure your home effectively and give you confidence in your fire safety measures. This simple project is one of the most important you can undertake as a homeowner. By correctly placing, installing, and testing your alarms, you are creating an essential layer of protection for everything you hold dear.
Remember to perform regular maintenance to keep your system in top shape. Test your alarms monthly and replace batteries annually (unless you have a 10-year sealed unit). A little bit of upkeep goes a long way in ensuring your smoke detectors are ready to alert you in an emergency. With your new Kidde smoke detectors properly installed, you can rest easier knowing your home is being watched over.