
A doorbell that doesn’t ring might seem like a small annoyance, but it can disrupt your daily life, from missing package deliveries to not knowing when guests have arrived. Often, the hidden culprit behind a silent doorbell is its power source. Learning how to tell if doorbell transformer is bad is the first step toward fixing the problem and restoring peace of mind.
This small box, usually tucked away in an obscure corner of your home, is essential for your doorbell’s operation. It steps down your home’s standard voltage to a lower, safer level that the doorbell system can use. When it fails, the entire system goes down with it.
Don’t worry, you don’t need to be an electrician to diagnose this issue. With a few simple tools and a bit of patience, you can troubleshoot the problem yourself. This guide will walk you through the entire process, from understanding the initial signs of failure to safely testing the unit and confirming your suspicions.
Step-by-Step Guide to Diagnosing Your Doorbell’s Power Source
Before you start, it’s crucial to prioritize safety. You will be working with electrical components, so always turn off the power at your home’s main circuit breaker before touching any wires. Locate the breaker that controls your doorbell circuit and switch it to the “OFF” position.
Step 1: Gather Your Essential Tools
Having the right tools on hand makes the process much smoother and safer. You won’t need an entire workshop, just a few key items.
You will need a multimeter, which is the most important tool for this job. A digital multimeter is recommended as it’s easier to read than an analog one. You’ll also want a screwdriver for removing cover plates and a non-contact voltage tester to double-check that the power is off before you begin.
Finally, grab a flashlight or a headlamp, as transformers are often located in poorly lit areas like basements, attics, or closets.
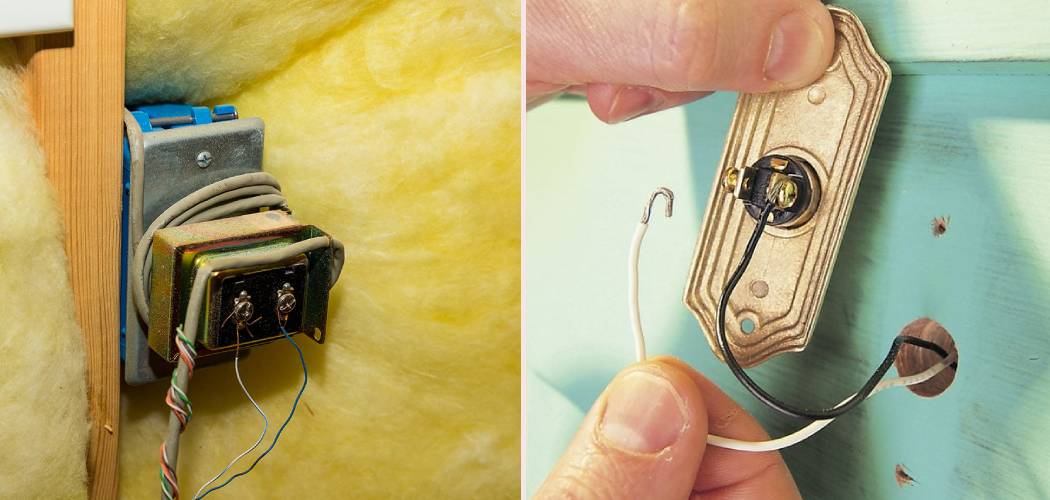
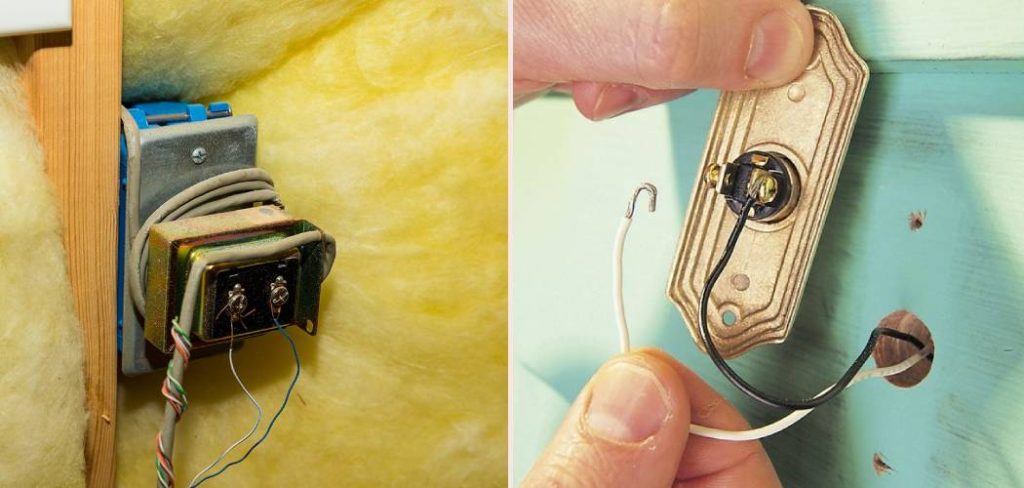
Step 2: Locate the Doorbell Transformer
Finding the transformer can sometimes be the most challenging part of the job. It’s a small, metal box, typically about two or three inches in size, with low-voltage wires extending from it.
Start your search near your main electrical panel. Builders often install them on the side of or close to the breaker box. If it’s not there, check other common locations.
Look in your attic, often near the access hatch or above the front door. Your basement or crawl space is another frequent spot, usually mounted on a ceiling joist. Also, check inside closets, particularly the one in your front hallway or coat closet. In some homes, it might even be inside the doorbell chime box itself.
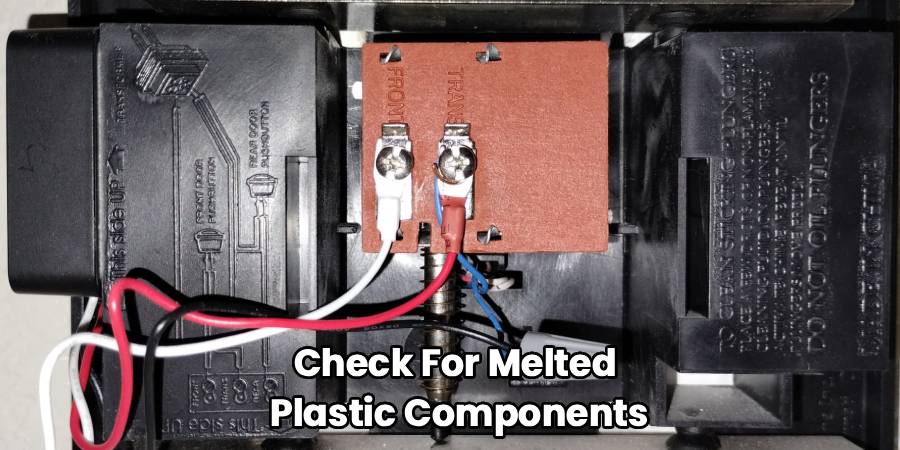
Step 3: Perform a Visual Inspection
Once you’ve located the unit, your first diagnostic step is a simple visual check. You can often spot signs of failure just by looking closely at the transformer and the area around it.
Look for any burn marks or signs of scorching on the transformer’s casing or the wall it’s mounted on. A failing unit can overheat significantly. Also, check for melted plastic components or insulation on the wires connected to it.
A slight, constant humming sound can be normal for a transformer, but a loud buzzing or sizzling noise is a clear red flag. If you notice a distinct smell of burnt plastic or varnish, it’s a strong indicator that the internal components have fried.
Pay attention to any corrosion on the terminals where the wires connect. Over time, moisture can cause rust, leading to a poor connection and system failure.
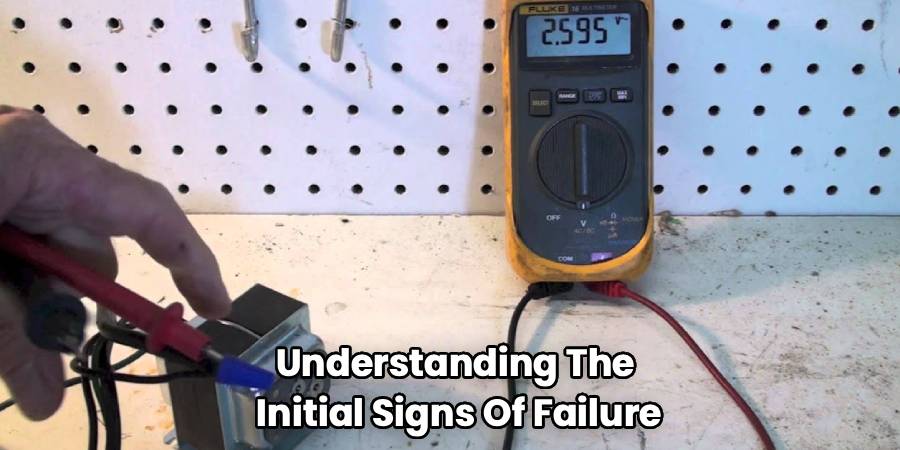
Step 4: Test for Power with a Multimeter
This is the definitive test. A multimeter will measure the voltage output and tell you for sure if the transformer is doing its job. This is where we determine how to tell if doorbell transformer is bad with concrete data.
First, ensure the power to the circuit is back ON. You can’t test for voltage if there’s no electricity flowing to the unit.
Set your digital multimeter to measure AC voltage (often indicated by “VAC” or “V~”). Since doorbell systems use low voltage, a setting around 25 or 50 VAC is usually appropriate.
Carefully touch one probe of the multimeter to one of the low-voltage screw terminals on the transformer and the other probe to the second terminal. Be careful not to let the metal probes touch each other, as this could cause a short.
Step 5: Analyze the Voltage Reading
The reading on your multimeter’s display holds the answer. A standard doorbell transformer should output a voltage somewhere between 10 and 24 volts, with 16 volts being the most common for traditional doorbells. Many modern smart doorbells require a higher voltage, typically between 16 and 24 volts.
If your multimeter reads a voltage within the expected range (e.g., 16-24V), the transformer is likely working correctly. The problem probably lies elsewhere in your doorbell system, such as the chime unit or the button itself.
A reading of zero, or very close to it, means the transformer has failed and is not providing any power. It will need to be replaced.
If you get a reading that is significantly lower than the specified rating (for example, 5V from a 16V transformer), the unit is failing. It can’t supply enough power to operate the doorbell chime, which explains why your doorbell isn’t working. This weak output also confirms the need for a replacement.
Step 6: Verify the Chime and Button
If your transformer tests fine, the next logical step is to check the other components. The issue could be with the doorbell button or the chime unit.
Start with the button. Unscrew it from the doorframe and disconnect the two wires attached to its back. Briefly touch the bare ends of these two wires together. If the doorbell chime rings, the button is faulty and needs to be replaced.
If touching the wires together does nothing, the problem may be the chime unit. After turning the power off again, remove the cover from the chime box. Check for any loose wires or obvious signs of damage. You can also use your multimeter here to check for voltage at the terminals inside the chime box when the button is pressed (or the wires are touched together).
If voltage is present at the chime but it doesn’t ring, the chime itself has failed. If there’s no voltage reaching the chime, you may have a break in the wiring between the transformer and the chime unit.

Frequently Asked Questions
Navigating doorbell issues can bring up a lot of questions. Here are answers to some of the most common ones.
What causes a doorbell transformer to go bad?
Several factors can lead to transformer failure. One of the most common is simple old age. These components don’t last forever and can wear out after many years of continuous operation.
Power surges from lightning strikes or issues with the electrical grid can also overload and destroy a transformer. A short circuit in the doorbell wiring is another culprit, causing the transformer to overheat and burn out as it tries to supply more power than it’s designed for.
Lastly, continuous or frequent use, like a button getting stuck in the “on” position, can cause the transformer to overheat and fail prematurely.
Can a bad transformer be a fire hazard?
Yes, a failing transformer can absolutely be a fire hazard. As the internal components break down, they can generate excessive heat. This heat can melt the plastic casing, damage the wire insulation, and even scorch the surrounding wood or drywall.
If you notice any signs of overheating, such as a burning smell, scorch marks, or a casing that is hot to the touch, you should immediately turn off the power at the circuit breaker. A transformer exhibiting these symptoms is a serious risk and must be replaced without delay.
How much does it cost to replace a doorbell transformer?
The cost of replacement can be broken down into parts and labor. The transformer itself is a relatively inexpensive part, typically costing between $15 and $30 at most home improvement stores.
If you are comfortable with basic electrical work and follow safety precautions, you can replace it yourself for just the cost of the part. This can be a satisfying and budget-friendly DIY project.
If you prefer to hire an electrician, the labor cost will be the larger part of the expense. Most electricians charge an hourly rate, and a job like this will likely take an hour or two. You can expect the total cost to be anywhere from $100 to $250, depending on your location and the complexity of the installation.
Is it safe to replace a doorbell transformer myself?
Replacing a transformer is a manageable DIY project for someone with basic home repair skills, provided you strictly follow safety procedures. The most critical step is to completely de-energize the circuit by shutting off the correct breaker.
Always use a non-contact voltage tester to confirm there is no power at the transformer before you touch any wires. If you have any doubt about your ability to perform the replacement safely, it is always best to call a qualified electrician. Your safety is more important than saving a few dollars.
Why is my new smart doorbell not working with my old transformer?
This is a very common issue. Smart doorbells, with their cameras, Wi-Fi radios, and processors, require significantly more power than traditional doorbells. An old transformer, even if it’s working perfectly, might not provide enough voltage.
Most smart doorbells require a transformer that can supply at least 16-24 volts. Many older homes have transformers that only output 10 or 12 volts. This is not enough to power up the smart doorbell, leading to it not working at all or exhibiting strange behavior like constantly rebooting.
Always check the power requirements for your specific smart doorbell model and compare them to the voltage rating printed on your existing transformer. If the voltage is too low, you will need to upgrade the transformer to a more powerful model.
Conclusion
Knowing how to tell if doorbell transformer is bad is a valuable skill that empowers you to diagnose one of the most common household electrical issues. By following the signs—from a complete lack of sound to an audible buzzing—and safely using a multimeter to test the voltage, you can pinpoint the problem with confidence. This methodical approach saves you from unnecessarily replacing other components and gets you right to the source of the issue.
Whether you choose to tackle the replacement as a DIY project or call in a professional, identifying the faulty part is the victory. You’ve solved the mystery behind your silent doorbell.
Restoring the simple chime of a doorbell brings back a sense of security and convenience to your home. It’s a small fix that makes a big difference in your daily routine. With a functioning system, you’ll never have to worry about missing an important visitor or a long-awaited delivery again.