

There are few things more annoying than a silent doorbell. You ordered a package, you’re expecting guests, or you’re waiting for a pizza, and suddenly you realize no one is coming to the door because they’ve been pressing a button that doesn’t work. You might assume the button itself is broken, or maybe the chime on the wall gave up the ghost. But often, the culprit is a little metal box hidden away in your garage or closet: the transformer.
This small component is the heart of your doorbell system. It steps down your home’s high-voltage power to a safer, lower voltage that your chime can handle. When it fails, the whole system goes dark. The good news is that you don’t necessarily need to call an expensive electrician right away. Learning how to test a doorbell transformer is easier than you think, provided you have a few basic tools and a healthy respect for electricity.
In this guide, we are going to walk through everything you need to know. We will cover the symptoms of a bad unit, how to find it (which is often the hardest part), and the exact steps to determine if it needs replacing.
Why Doorbell Transformers Fail
Before we dive into the testing process, it helps to understand what you are dealing with. Transformers are generally rugged devices. They don’t have moving parts, so they can last for decades. However, they aren’t invincible.
Heat is a major enemy. If the transformer was installed in a location without proper ventilation, or if it has been working too hard to power a modern video doorbell that requires more juice than the transformer was rated for, the internal windings can fuse or break. Power surges can also knock them out. Sometimes, the issue isn’t the transformer itself but loose wiring caused by vibrations over the years.
By performing a proper check, you aren’t just fixing a doorbell; you are ensuring your home’s electrical system is safe and functioning correctly.
Tools You Will Need
You can’t do a job without the right gear. Fortunately, this diagnostic task doesn’t require a van full of equipment. You likely have most of these items in your junk drawer or toolbox.
- Multimeter: This is non-negotiable. You need a digital multimeter to measure voltage. An analog one works too, but digital is easier to read.
- Screwdriver: Usually a Phillips head or a flathead, depending on how your transformer is mounted and wired.
- Flashlight: Transformers are notoriously shy. They like to hide in dark corners, basements, and attics.
- Non-Contact Voltage Tester: While not strictly necessary if you are careful with the multimeter, this is a great safety tool to double-check if wires are live.
- Masking Tape and Marker: Helpful for labeling wires if you decide to disconnect anything, though we will try to test without making a mess first.
Locating the Hidden Box
If you already know where your transformer is, you are ahead of the game. For many homeowners, finding the device is actually more frustrating than the electrical testing itself. Builders often install them in out-of-the-way places to keep them hidden from view.
If you are hunting for yours, check these common spots:
- The Garage: Look high up on the wall, often near the main electrical panel or near the garage door opener.
- The Basement: Check the ceiling joists, particularly near the furnace or electrical panel.
- Utility Closets: Look inside the closet where your water heater or HVAC unit lives.
- The Attic: Sometimes they are mounted directly to a light fixture junction box in the attic, buried under insulation.
- Behind the Chime: Occasionally, they are tucked into the wall cavity directly behind the doorbell chime itself.
Once you have located it, clear away any cobwebs or dust so you can see the terminals clearly.
Step-by-Step: Diagnosing Your Doorbell Power
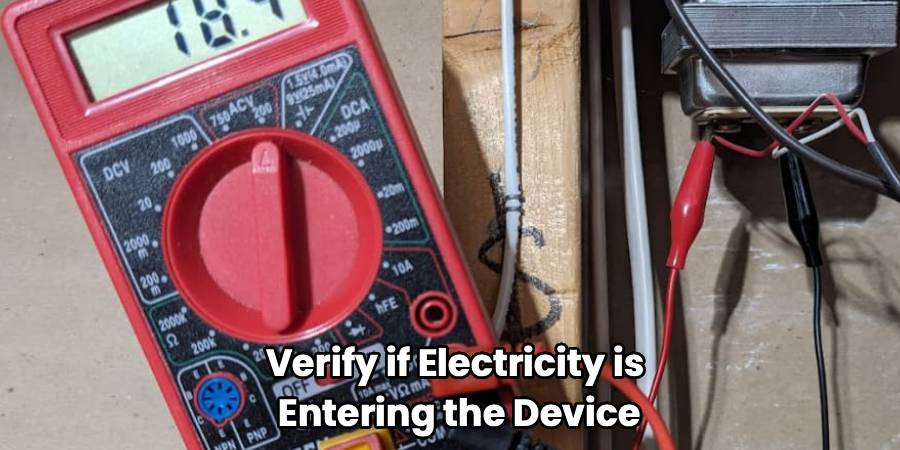
Now that you have your tools and you’ve found the device, it’s time to get to work. We are going to verify if electricity is entering the device and, more importantly, if the correct voltage is coming out.
This is a doorbell transformer testing guide designed for beginners, but please remember: you are working with electricity. Even though the output is low voltage (usually 16V to 24V), the input side is connected to your home’s 120V mains. If you are ever uncomfortable or unsure, stop and call a professional.
Step 1: Visual Inspection
Before you touch anything with a meter, just look at the unit. A visual check can save you a lot of time. You are looking for obvious signs of failure.
Is the casing bulging or warped? Do you see scorch marks on the wall around it? Does it smell like burning plastic? If you see any of these signs, you don’t even need to test it. It’s toast. Go buy a replacement.
Also, check the fine gauge wires connected to the screw terminals. Are they rusted? Are they loose? Sometimes the transformer is perfectly fine, but a wire has simply vibrated loose over the years. Give them a gentle wiggle to ensure they are secure. If a wire breaks off in your hand, you’ve likely found your problem.
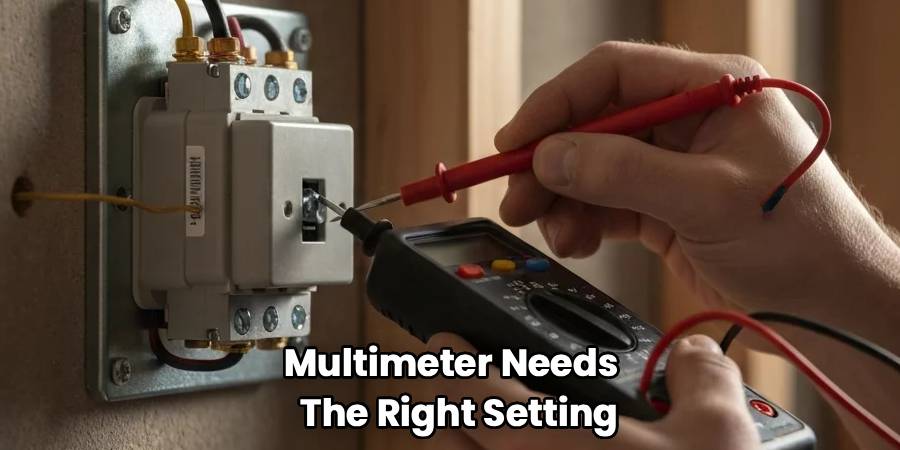
Step 2: Set Up Your Multimeter
To get an accurate reading, your multimeter needs to be on the right setting.
Most doorbell transformers output alternating current (AC), not direct current (DC). Look at the label on the transformer. It should say something like “16 VAC” or “24 VAC.” This stands for Volts Alternating Current.
On your multimeter, turn the dial to the AC Voltage setting. This is usually denoted by a “V” with a wavy line over it (V~). If your meter is not auto-ranging (meaning you have to pick a specific number range), choose the setting that is just above the expected voltage. For example, if you expect 16 volts, set the dial to the 50V or 200V AC range. Do not use the DC setting (V with a straight line), or you will get a reading of zero even if the power is working fine.
Step 3: How To Test A Doorbell Transformer Using a Multimeter
This is the moment of truth. You are going to measure the output directly at the source.
Be careful here. You generally test the transformer while the power is on because you need to see if it is producing voltage. However, keep your fingers away from the bare metal terminals. Hold the multimeter probes by the insulated handles.
- Locate the two screw terminals on the “low voltage” side of the transformer. These will have the thin doorbell wires attached to them.
- Take your red probe and place it on one screw terminal.
- Take your black probe and place it on the other screw terminal. It does not matter which probe goes to which screw for AC voltage.
- Look at the display on your multimeter.
If the transformer is rated for 16 volts, you should see a reading close to that, usually between 16 and 22 volts. It is normal for the reading to be slightly higher than the rating when there is no load (no button being pressed).
If you get a reading of zero or extremely low voltage (like 1 or 2 volts), and you are certain the breaker powering the house is on, then the transformer has failed internally. It is not converting the power, and it needs to be replaced.
Step 4: Verify Input Power (Optional but Recommended)
If you got a reading of zero in the previous step, there is one other possibility: the transformer isn’t getting power from the house. If the breaker is tripped, a perfectly good transformer will test dead.
Check your main electrical panel. Look for a breaker labeled “Doorbell,” “Furnace,” or “Garage.” Ensure it hasn’t tripped. If the breaker is on, you can assume the transformer is receiving 120V power. If you are comfortable working with high voltage, you can test the input wires, but this usually requires opening a junction box and exposing 120V wires. For most DIYers, if the breaker is on and the low-voltage output is zero, it’s safer to assume the transformer is bad rather than probing high-voltage lines.
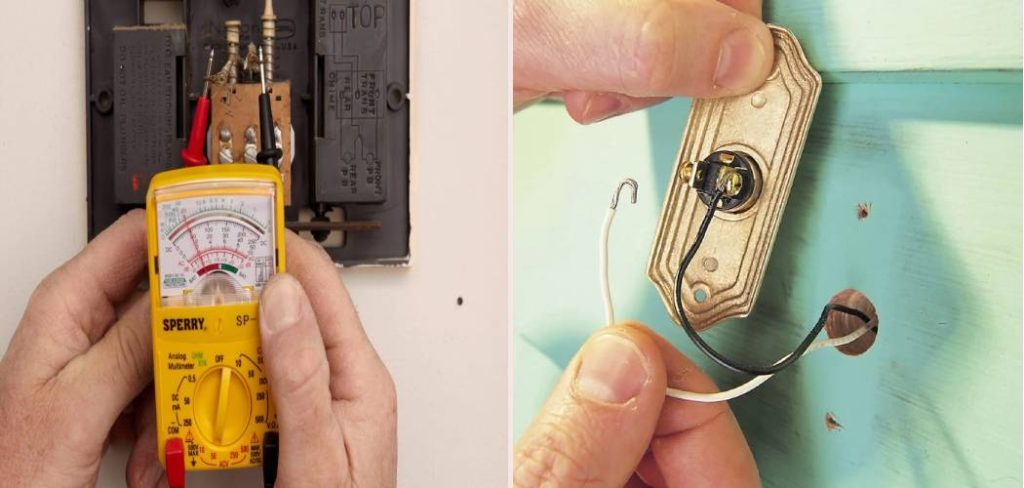
Step 5: Testing at the Doorbell Chime
Sometimes, testing the transformer directly is physically difficult because it’s in a cramped attic or crawlspace. If you can’t easily reach the transformer, you can try to measure doorbell transformer voltage at the chime box inside your house.
- Remove the cover of your “ding-dong” chime unit on the wall.
- You will typically see terminals labeled “Trans” (Transformer), “Front,” and “Rear.”
- Set your multimeter to AC Voltage.
- Touch one probe to the “Trans” terminal and the other to the “Front” terminal.
- Have a helper push the doorbell button outside.
If the voltage spikes or stays steady (depending on the system) but no sound comes out, your transformer is likely working, and the chime unit itself is broken. If you have absolutely no voltage reading at the chime wires, the break is either in the wiring hidden in the walls or the transformer itself is dead.
Frequently Asked Questions
Electrical issues can be confusing, and doorbells are surprisingly complex little circuits. Here are some answers to common questions that might pop up while you are troubleshooting.
How to know if my doorbell transformer is bad without a multimeter?
Ideally, you really should use a multimeter for accuracy. However, there are a few “hacky” ways to guess. One method involves using a spare length of wire to briefly touch the two terminals on the chime (the “Trans” and “Front” terminals). If you see a small spark or the chime activates, you know there is power coming from the transformer.
Another sign is heat. Touch the body of the transformer (carefully). It should be slightly warm to the touch—this is normal. If it is stone cold, it might be dead (or the breaker is off). If it is scorching hot, it is definitely failing or overloaded. Additionally, listen for a humming sound. A loud, aggressive buzz usually indicates the internal plates are vibrating loose, which is often a precursor to failure.
What voltage should my transformer read?
This depends entirely on your system. Older, traditional mechanical chimes (the ones that go “ding-dong” with real plungers) typically run on 16 Volts AC.
However, if you have installed a video doorbell like a Ring or Nest, these devices are power-hungry. They often require a more robust transformer that provides 16V to 24V AC with a higher “VA” (Volt-Amps) rating, usually 30VA or higher.
If you are reading 10-12 volts, that might be enough to make an old chime make a weak sound, but it is definitely not enough for a video doorbell. Low voltage often causes video doorbells to disconnect from Wi-Fi, freeze, or fail to ring the mechanical chime.
Can I fix a broken transformer?
No. Doorbell transformers are sealed units. They contain spools of copper wire wrapped around an iron core, often dipped in varnish or encased in resin. Once the internal windings burn out or break, you cannot open it up to repair it.
The good news is that they are relatively cheap. A standard replacement costs between $20 and $40 at most hardware stores. It is much safer and easier to simply swap the old unit for a new one rather than attempting a repair that could result in a fire hazard.
How do I check if the problem is the button or the transformer?
This is a classic troubleshooting step: how to check if doorbell transformer is working versus checking the button.
To rule out the button, go outside and unscrew the doorbell button from the wall. You will see two wires connected to the back. Disconnect them and touch the two bare wires together.
- If the chime rings: The transformer is fine, the wiring is fine, and the chime is fine. The button mechanism itself is broken. Buy a new button.
- If the chime does NOT ring: The problem is “upstream.” It could be the transformer, the chime unit, or a break in the wire. Proceed with testing the transformer as described in the step-by-step section above.
What if my multimeter readings fluctuate wildly?
If you are trying to measure doorbell transformer voltage and the numbers on your screen are jumping all over the place (e.g., 5V, then 18V, then 2V), check your connections.
First, ensure your probes are making solid metal-to-metal contact with the screws. Oxidation or rust on the screws can cause poor readings. Scratch the probe tip against the screw slightly to get through any grime.
If the connection is good and the voltage still fluctuates wildly, the transformer may have an intermittent internal short. This creates unstable power delivery, which is terrible for sensitive electronics like video doorbells. In this case, replace the unit.
Can a doorbell transformer cause a fire?
It is rare, but yes. Like any electrical device, if a transformer fails catastrophically, it can overheat. This is why they are often mounted on metal junction boxes—to contain potential sparks or heat.
If you hear a loud buzzing sound coming from the transformer or smell something like burning fish or melting plastic, turn off the breaker immediately. These are signs of severe overheating. Do not turn the power back on until the transformer has been replaced.
Conclusion
How To Test A Doorbell Transformer is a skill that saves you time, money, and the frustration of missed visitors. By following the steps outlined above, you can quickly determine if that silent chime is due to a $20 part in the basement or something more complex.
Remember, the process is logical: check the source, check the path, and check the endpoint. Start with the visual inspection, use your multimeter to get hard data, and verify that the power matches what your doorbell system requires. If you find the transformer is dead, replacing it is a straightforward DIY project that restores the voice of your home.
Don’t let a broken doorbell leave you in the dark. Grab your multimeter, find that hidden box, and get your home humming again.