
Camlock fittings, also known as cam and groove couplings, are among the most popular connection tools in industrial environments due to their simplicity and reliability. Whether you are transferring water, fuel, or chemicals, knowing how to use camlock fittings correctly is the first line of defense against dangerous leaks and disconnects. These couplings allow for quick connections without the need for complex tools, making them a favorite for operators in agriculture, manufacturing, and oil industries. However, their ease of use can sometimes lead to complacency.
This guide is designed to take you from a complete novice to a confident operator. We will break down the mechanics of the coupling, safety protocols, and the precise physical movements required to secure a connection. By following these instructions, you ensure not only the efficiency of your operations but also the safety of everyone in the immediate vicinity.
Proper Camlock Connection Matters
The importance of mastering these connections goes far beyond simple operational efficiency. When you are dealing with pressurized hoses carrying fluids, a loose connection can result in catastrophic failure. A disconnect under pressure can cause “hose whip,” where the loose hose flails uncontrollably, posing a severe risk of injury to anyone nearby. Furthermore, if the line is carrying hazardous chemicals or hot liquids, a leak caused by improper latching can lead to environmental contamination or severe burns. Taking the time to understand the nuances of the locking mechanism ensures that every transfer is secure, leak-free, and compliant with workplace safety standards.
9 Step Methods Guide on How to Use Camlock Couplings
Step 1: Identifying the Correct Size and Material
Before you even attempt to connect a hose, you must verify that you are holding compatible parts. It is critical to confirm that the male adapter and the female coupler are the same size and made from the same material.
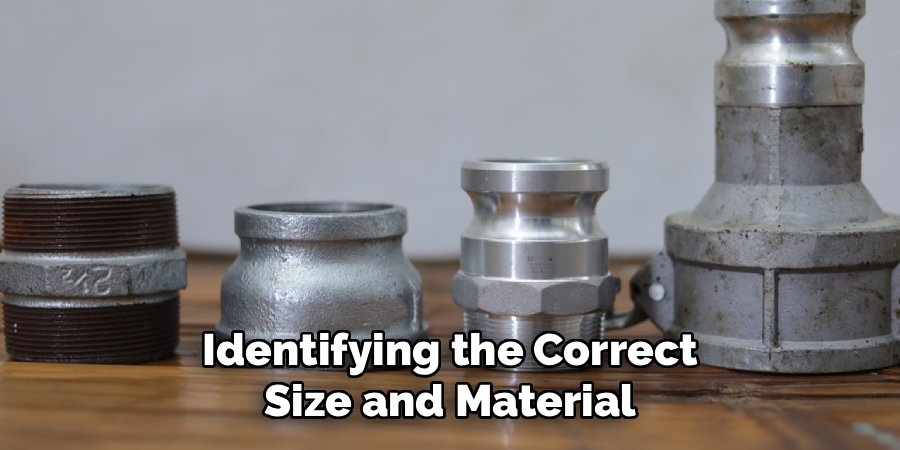
Mixing materials, such as connecting a stainless steel adapter to an aluminum coupler, can lead to uneven wear or chemical reactions that weaken the fitting over time. You should carefully read the stamped markings on the body of the camlock to verify the specifications. If the sizes are even slightly off, the seal will not hold pressure, leading to immediate failure once the flow starts.
Step 2: Inspecting the Gasket Before Learning How to Use Camlock Seals
The gasket is the heart of the camlock system, and ignoring it is the most common mistake beginners make. Located inside the female coupler, this rubber or silicone ring creates the actual watertight seal. You must physically inspect this gasket before every single connection. Look for signs of cracking, brittleness, or flattening, which indicate that the gasket has lost its elasticity. If the gasket is missing or damaged, metal-to-metal contact will not stop fluid from spraying out. If you are learning how to use camlock systems for the first time, make it a habit to poke the gasket to ensure it is seated correctly in the groove.
Step 3: Preparing the Hose Ends for Connection
Cleanliness is absolutely vital when working with industrial couplings. You must wipe down both the male adapter and the female coupler with a clean rag to remove any dirt, grit, or debris. Even a small grain of sand trapped between the adapter and the coupler wall can prevent the arms from closing fully or damage the metal surfaces. You should also ensure that the hose itself is not twisted or kinked. A twisted hose puts torsional stress on the camlock fitting, which can cause it to unlock or vibrate loose during operation. Straighten out your lines completely before bringing the two ends together.
Step 4: Aligning the Adapter and Coupler Correctly
Proper alignment is the key to a smooth connection that does not damage the gasket. You should hold the female coupler in one hand and the male adapter in the other, bringing them together in a straight line. Do not come in at an angle, as this can pinch the gasket or scratch the interior sealing surface. The goal is to have the male adapter slide effortlessly into the female body. If you feel significant resistance, do not force it, as you might be misaligned or using mismatched sizes. This alignment phase requires patience and a steady hand to ensure the components seat perfectly against one another.
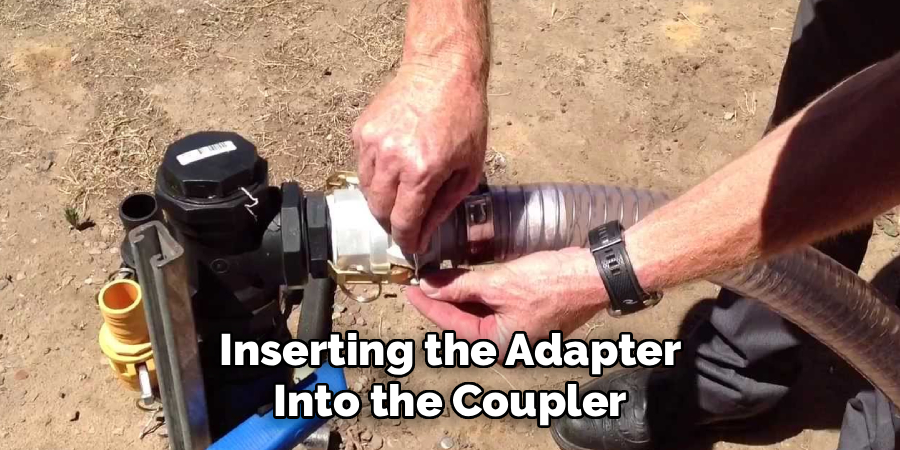
Step 5: Inserting the Adapter into the Coupler
Once you have aligned the parts, push the male adapter firmly into the female coupler until it makes contact with the bottom gasket. You should feel a distinct stop when the adapter hits the rubber seal. It is important to keep the cam arms on the female coupler fully extended outward during this insertion. If the arms are partially closed, they will block the adapter from seating fully. Apply steady forward pressure to ensure the adapter is resting squarely against the gasket. This position is the foundation of a secure seal, and rushing this step is a frequent cause of leaks.
Step 6: Closing the Cam Arms for How to Use Camlock Security
This is the defining action of the camlock mechanism. With the adapter fully seated, you must grasp the two cam arms (also called ears) on the outside of the female coupler. You should press both arms down towards the body of the coupling simultaneously. Closing them one at a time can sometimes cock the adapter to one side, creating an uneven seal. You will feel resistance as the cams engage with the groove on the male adapter, pulling it tighter against the gasket. The arms should snap flat against the coupling body. If they do not close all the way, stop immediately and check for obstructions.
Step 7: Verifying the Seal and Arm Position
After you have closed the arms, take a moment to visually and physically inspect the connection. The arms should be flush against the side of the coupler. If one arm is sticking out even slightly, the connection is not secure. You should give the hose a gentle tug to ensure the coupling is locked. This “tug test” confirms that the cams are fully engaged in the groove of the male adapter. This step confirms that you have successfully applied the principles of how to use camlock mechanisms to create a mechanical bond. It is a quick check that adds a significant layer of safety to your workflow.
Step 8: Installing Safety Pins or Clips
For industrial applications, especially those involving vibration or pulsation, reliance on friction alone is not enough. Most female couplers have small holes drilled into the cam arms and the coupling body. You must slide safety pins or clips through these holes.
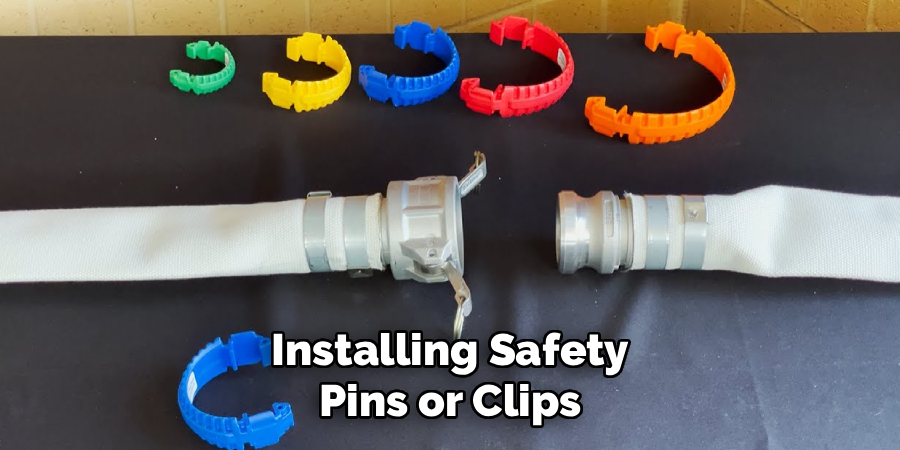
These clips prevent the arms from accidentally lifting up if the hose is dragged across the ground or subjected to pressure spikes. If you do not have official safety clips, you should obtain them before pressurizing the line. This mechanical backup is a mandatory safety requirement in many facilities to prevent accidental decoupling during operation.
Step 9: Pressurizing the System Slowly
Never slam a system with full pressure immediately after connecting a hose. You should open the supply valve slowly to gradually introduce fluid into the line. As the pressure builds, keep your eyes on the camlock connection. You are looking for any signs of weeping or dripping fluid around the joint. If you see even a single drop of leakage, shut the pressure down immediately. Do not attempt to tighten the cam arms while the line is under pressure. A slow pressurization allows you to catch errors without exposing yourself or the environment to the full force of the flow.
Depressurizing and Disconnecting Safely
The process of disconnection is just as dangerous as connection if done incorrectly. You must ensure that the line is completely depressurized before you attempt to open the cam arms. Opening a camlock under pressure can cause the hose to blow off with explosive force. Once the pressure is zero, remove the safety pins first. Then, pull both cam arms out slowly and simultaneously to release the grip on the male adapter. The adapter should slide out easily. Clean the components immediately after use to prevent corrosion or chemical residue buildup, ensuring they are ready for the next job.
Frequently Asked Questions
What Are the Different Types of Camlock Fittings?
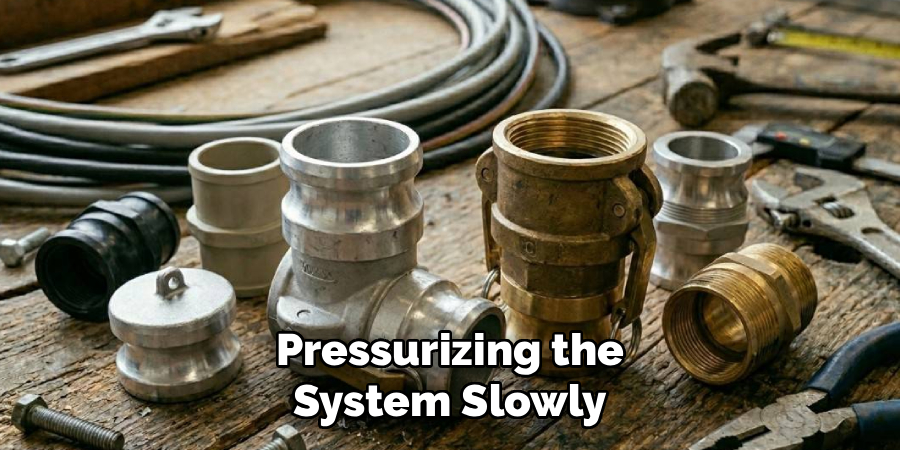
There are eight standard types of camlock fittings, usually labeled Type A through Type F, plus Type DC (Dust Cap) and Type DP (Dust Plug). Type A is a male adapter with a female thread, while Type C is a female coupler with a hose shank. Knowing the difference between these types is critical because you need to match the specific end connection of your hose or pipe to the correct camlock adapter. You should consult a sizing chart to ensure you buy the right type.
Can I Mix Different Materials of Camlocks?
It is generally not recommended to mix materials, such as connecting brass to aluminum or stainless steel to polypropylene. Different metals have different hardness levels, which can lead to galling or premature wear on the softer metal. Additionally, galvanic corrosion can occur when dissimilar metals are in contact with certain fluids. While it might be physically possible to lock them together, sticking to a single material for both the male and female ends ensures the longevity and safety of your equipment.
How Often Should I Replace the Gaskets?
You should replace the gaskets in your female couplers at the first sign of wear. In heavy-use industrial environments, this might mean replacing them monthly or even weekly. Factors like temperature, chemical compatibility, and the frequency of connection cycles all affect gasket life. A gasket that is flattened, cracked, or has lost its flexibility will not seal properly. Keeping a stock of spare gaskets is a cheap and effective way to prevent downtime and dangerous leaks.
What Is the Maximum Pressure for These Fittings?
The maximum pressure rating depends entirely on the size of the fitting and the material it is made from. Generally, smaller camlocks (under 2 inches) can handle higher pressures, often up to 250 PSI, while larger diameters (above 4 inches) might only be rated for 50 or 75 PSI. Stainless steel usually offers higher pressure ratings than polypropylene or aluminum. You must check the manufacturer’s data sheet for your specific specific coupling to ensure it can handle your system’s operating pressure.
Are Camlock Fittings Compatible with All Hoses?
Camlock fittings can be attached to almost any industrial hose, provided you have the correct hose shank or threaded end. However, the method of attachment varies. For low-pressure water, a simple hose clamp might suffice on the shank. For high-pressure or chemical applications, you will need a professional crimped ferrule or a bolt clamp to secure the hose to the camlock tail. Always ensure the attachment method matches the pressure rating of the hose assembly to prevent the fitting from blowing out of the hose.
Read More: How To Lock A Sliding Glass Door
Conclusion
Mastering the use of cam and groove couplings is a fundamental skill for anyone working in fluid transfer. By following inspection protocols, ensuring proper alignment, and always using safety clips, you can prevent costly accidents and ensure a smooth workflow. Remember that these tools are designed for convenience, but they still demand respect and attention to detail. Now that you understand how to use camlock couplings safely, you can approach your next project with the confidence that your connections are secure and your operation is protected.

