
There are few things more annoying than a smoke alarm that starts chirping in the middle of the night. It disrupts your sleep, causes panic for pets, and leaves you wondering if there is an actual emergency or just a technical glitch. Once you have determined there is no fire, you need a quick solution to silence the noise. Understanding how to reset a first alert smoke detector is a fundamental skill for every homeowner. This process helps clear errors, stops false alarms, and ensures your device is ready to protect your family again.
While it might seem complicated at first glance, the process is actually quite straightforward. You do not need to be an electrician to handle this task safely. By following a few standard procedures, you can restore peace to your home in minutes. This guide walks you through everything you need to know to get the job done right.
You Need to Reset Your Smoke Detector
Understanding why your device is malfunctioning is just as important as fixing it. Smoke detectors are sensitive instruments designed to save lives, but they can be triggered by things other than actual fires. High humidity from a nearby bathroom, cooking fumes, or even accumulated dust can trick the sensors. Sometimes, the internal processor simply encounters a glitch, much like a computer that needs a reboot. In these instances, a simple reset clears the error memory and allows the processor to start fresh.
Furthermore, changing the battery is not always enough to stop the chirping. Many units hold a residual electrical charge in their capacitors even after the old battery is removed. This lingering energy can cause the unit to “remember” the low battery warning, continuing the annoying beep even with a fresh battery installed. A proper reset drains this charge completely. Taking the time to perform this maintenance ensures your safety equipment functions reliably when it matters most.
8 Step Methods Guide on How to Reset a First Alert Smoke Detector
Step 1: Prepare Safely Before You Reset a First Alert Smoke Detector
Before you begin any work on ceiling-mounted electronics, you must prioritize your physical safety. Most smoke alarms are located high up on walls or ceilings, requiring a sturdy stepladder to reach them. Ensure your ladder is placed on a flat, non-slip surface and is fully opened with the spreaders locked.
If you have hardwired units, it is a smart precaution to turn off the circuit breaker that controls the alarm system at your main electrical panel. This adds an extra layer of safety when handling wires. Gather a fresh battery and a can of compressed air beforehand so you do not have to climb up and down repeatedly. Being prepared prevents accidents and makes the process much smoother.
Step 2: Remove the Unit from the Mounting Bracket
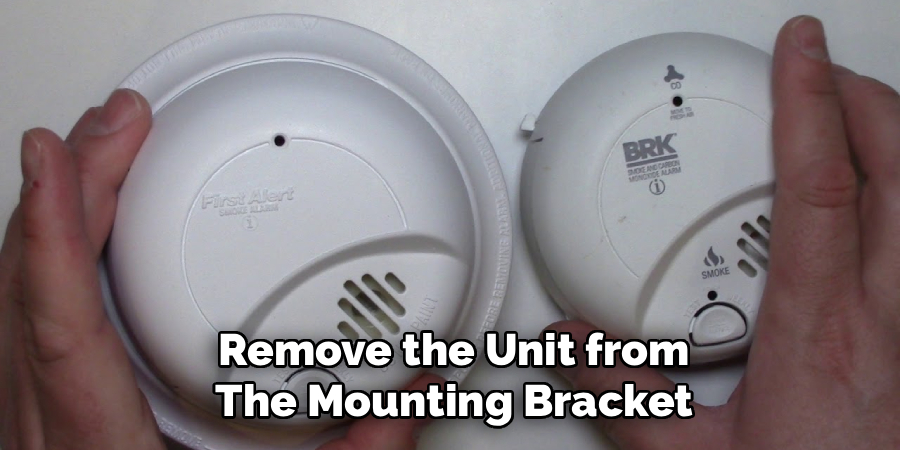
To access the internal components and battery compartment, you must take the device down from the ceiling. Most First Alert models operate on a simple twist-lock mechanism. Reach up and grasp the body of the alarm firmly but gently. Rotate the entire unit counter-clockwise—usually about a quarter turn—until it releases from the plastic mounting bracket screwed into the ceiling. If the unit feels stuck, do not force it, as some models have a small tamper-resist pin that must be removed first. Once the unit is free from the bracket, lower it carefully. You will now be able to see the back of the device and identify exactly what model you are working with.
Step 3: Disconnect the Power Harness for Hardwired Models
If your smoke detector is hardwired into your home’s electrical system, you will see a bundle of wires connecting the back of the unit to the ceiling box. This is called the power harness, and it usually connects via a plastic plug with squeeze tabs. To fully power down the unit, you must disconnect this plug. Squeeze the plastic tabs on the sides of the connector and gently pull the plug away from the smoke detector. It should slide out with minimal resistance. If your unit is strictly battery-operated and has no wires, you can skip this specific action. However, for hardwired units, this disconnection is vital because you cannot reset the processor while it is still receiving current from the house.
Step 4: Remove the Backup or Primary Battery
With the unit in your hand and disconnected from the wall power, locate the battery compartment. This is usually found on the back of the device or in a side drawer that slides out. Open the compartment door and remove the battery completely. It does not matter if the battery is brand new or old; it must be removed to break the electrical circuit.
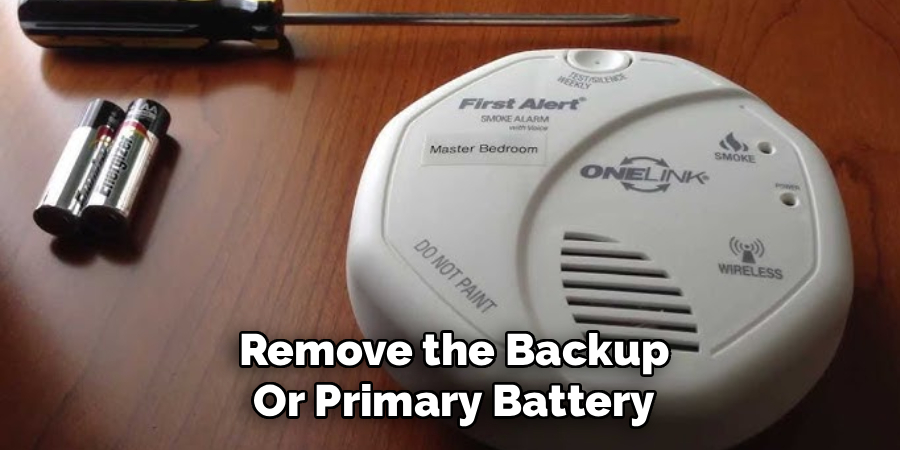
If you are dealing with a sealed 10-year battery model, the process is different, but for standard units, removing the power source is key. Check the metal contacts inside the battery drawer for any corrosion or debris. If you see white or green powder, clean it off, as this can interrupt power flow later.
Step 5: Drain Residual Charge to Reset a First Alert Smoke Detector
This is the most critical step that many homeowners overlook. Even with the battery out and the power disconnected, the internal capacitors can store a small amount of electricity. This residual charge keeps the logic chip active, meaning it might hold onto the error code causing the chirping. To fix this, locate the “Test/Silence” button on the front of the cover. Press and hold this button down for at least 15 to 20 seconds. You might hear a weak chirp die out, which is a sign the remaining energy is leaving the system. By draining this power, you are forcing the processor to shut down completely, wiping its short-term memory of any previous errors.
Step 6: Clean the Sensors with Compressed Air
While the unit is powered down, take a moment to address the root cause of many false alarms: dust. Over time, dust, pet dander, and small insects can drift into the sensing chamber. This debris interferes with the sensors, causing the unit to think there is smoke when the air is clear. Take a can of compressed air and blow it through the vents around the perimeter of the alarm. If you do not have compressed air, you can use a vacuum cleaner with a soft brush attachment to gently suction around the openings. Cleaning the unit now ensures that when you power it back up, it gets a clear reading of the environment immediately.
Step 7: Reinstall a Fresh Battery and Reconnect Power
Now that the unit is reset and clean, it is time to restore power. Always use a brand-new, high-quality alkaline or lithium battery rather than reusing the old one. Match the positive and negative symbols in the compartment to ensure correct installation. Close the battery door securely. If your unit is hardwired, plug the power harness back into the rear of the unit. You should hear a quick chirp, which indicates the device is receiving power and waking up. This single chirp is normal and different from the repetitive error chirping you heard earlier. Double-check that the battery drawer is flush with the unit body to avoid loose connections.
Step 8: Remount the Device and Check the Status Light
Align the smoke detector with the mounting bracket on the ceiling or wall. Rotate it clockwise until you feel it click or lock into place. Give it a gentle tug to ensure it is secure and will not fall. Once mounted, look for the LED status light, usually located near the test button.
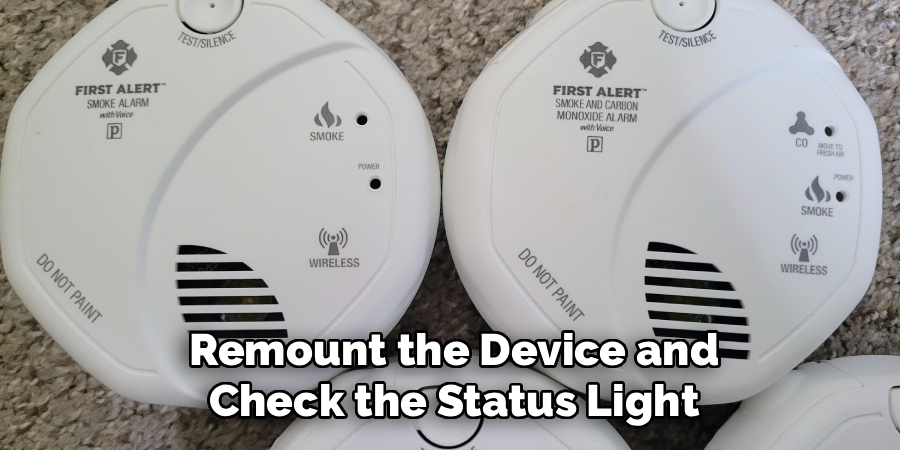
In most First Alert units, a green light indicates it is receiving AC power, while a blinking red light usually signifies normal battery operation (flashing once per minute). If the light is solid green, you know the hardwiring is successful. If you flipped a circuit breaker earlier in the process, go back to your electrical panel and switch it back on now.
Perform a Final Test Cycle
The final step in the process is confirming that the alarm is fully operational. Press and hold the “Test” button again, but this time, wait for the loud alarm sound. It should emit a piercing, ear-splitting siren pattern. This confirms that the battery is strong, the processor is reset, and the speaker is working. If the units are interconnected, this test should trigger all other alarms in your home to sound as well. If the alarm sounds clearly and stops immediately after you release the button, you have successfully completed the reset. If it continues to chirp after this process, the unit may be defective or expired.
Frequently Asked Questions (FAQ)
Why Is My Smoke Detector Still Beeping After Changing the Battery?
This is a very common frustration for homeowners. Usually, the beeping continues because the device retains a residual electrical charge that “remembers” the low battery error. To fix this, you must perform a hard reset by disconnecting the power and holding the test button to drain the capacitors. Additionally, ensure the battery drawer is completely closed and the battery is facing the correct direction. Sometimes, a loose connection or a slightly open drawer prevents the battery from making full contact.
What Is the Difference Between Resetting Hardwired and Battery Units?
The core concept is the same, but the execution differs slightly regarding the power source.
- Battery-only units: You simply remove the battery and discharge the unit.
- Hardwired units: You must physically unplug the device from the ceiling wiring harness and remove the backup battery.
If you do not unplug the harness on a hardwired unit, the device remains powered by your home’s electricity, preventing the processor from shutting down and resetting correctly.
How Often Should I Test or Reset My First Alert Smoke Detector?
You should test your smoke detectors once a month using the test button to ensure the circuitry and batteries are working. A full reset is not required monthly; it is only necessary when the unit is malfunctioning, chirping falsely, or after you have replaced an old battery. However, proactive maintenance is key. Vacuuming the unit every six months and replacing the batteries annually helps prevent the need for frequent resets and keeps the sensors accurate.
What Does the Flashing Red Light Mean on My Detector?
A flashing red light communicates the status of your device. Under normal operation, a First Alert detector will flash red briefly once every minute to show the battery is functioning. However, if the red light flashes rapidly or is accompanied by audible chirping, it indicates a problem. This could mean the battery is low, the unit has reached its end of life, or the sensor is detecting smoke. Consult your specific user manual to decode the exact flash pattern.
When Should I Replace the Entire Smoke Detector Unit?
Smoke detectors do not last forever. First Alert recommends replacing the entire unit every 10 years. Even if the battery is new and you clean it regularly, the internal sensors degrade over time and become less sensitive to smoke. Check the manufacturing date stamped on the back of the device. If it is more than 10 years old, a reset will not fix the issue, and the unit must be replaced immediately for your safety.
Conclusion
Dealing with a chirping alarm is stressful, but it doesn’t have to be difficult. By following these steps, you can troubleshoot the issue quickly and restore quiet to your home. Regular maintenance, such as cleaning the sensors and changing batteries annually, will prevent most of these problems from occurring in the first place. Remember, these devices are your first line of defense against fire, so keeping them in top shape is essential for your family’s safety.
Now that you know how to reset a first alert smoke detector, you can handle false alarms with confidence. Take a moment today to check the dates on your devices and perform a quick test. A few minutes of effort now ensures that your home remains safe, secure, and chirp-free.

About
Robert D is a distinguished figure in the world of Safety Systems and Risk Management, with a decade of expertise creating innovative and sustainable workplace solutions. His professional focus lies in merging traditional safety protocols with modern digital monitoring techniques, fostering environments that are both practical and hazard-conscious. As the lead author of SafetyRift, Robert delves into the art and science of risk mitigation, inspiring safety officers and industry professionals alike to bridge the gap between compliance and culture.
Education
RMIT University (Melbourne, Australia)
Associate Degree in Design (Industrial Safety)
-
Focus on sustainable safety infrastructure, industry-driven risk assessments, and practical implementation.
-
Gained hands-on experience with traditional hazard identification and digital monitoring tools, such as IoT safety sensors and predictive analytics software.
Nottingham Trent University (United Kingdom)
Bachelor’s in Occupational Health and Safety (Honors)
-
Specialized in systemic design with a focus on blending human behavior psychology with modern safety production techniques.
-
Participated in industry-wide projects, working with global logistics and manufacturing firms to gain real-world insights into large-scale safety deployments.
Publications and Impact
In SafetyRift, Robert shares his insights on safety design processes, protective materials, and strategies for efficient, accident-free production. His writing bridges the gap between foundational safety knowledge and modern industrial needs, making it a must-read for both budding safety coordinators and seasoned risk management professionals.
