

Adding motion sensor lights to your home is a fantastic way to improve security and convenience. They can illuminate dark pathways, deter potential intruders, and help you find your keys without fumbling in the dark. While the idea of electrical work can seem intimidating, this project is manageable for a DIYer with the right guidance.
This guide is designed to walk you through the process, ensuring you feel confident and prepared. We’ll cover everything from safety precautions to the final connections. Learning how to wire a motion sensor light is a practical skill that enhances your home’s safety and functionality.
Step-by-Step Guide to Wiring Your Motion Sensor Light
Tackling this project requires careful attention to detail and a commitment to safety. Before you begin, make sure you have the necessary tools on hand: a voltage tester, wire strippers, pliers, a screwdriver, and wire nuts. Also, ensure you have your new motion sensor light fixture and any required mounting hardware. Always read the manufacturer’s instructions that come with your specific light, as there can be slight variations between models.
Step 1: Prioritize Safety by Shutting Off the Power
This is the most critical step in any electrical project. Go to your home’s main electrical panel, often located in the garage, basement, or a utility closet. Locate the circuit breaker that controls the power to the light fixture you will be working on. Flip the breaker to the “OFF” position. To be absolutely certain no one accidentally turns it back on, you can place a piece of tape over the switch as a warning.
Once you’ve done this, go back to the light switch that controls the fixture and flip it on and off to confirm the power is cut. Use a non-contact voltage tester at the fixture’s electrical box to double-check that there is no live current before you touch any wires.
Step 2: Remove the Existing Light Fixture
If you are replacing an old light, you’ll need to remove it first. Start by unscrewing the mounting screws that hold the fixture to the electrical box. Be prepared to support the fixture’s weight as it comes loose. Once it’s free from the wall or ceiling, you will see the wires connecting it to your home’s electrical system.
Typically, you will find three wires: a black (hot) wire, a white (neutral) wire, and a bare copper or green (ground) wire. Carefully unscrew the wire nuts that connect the fixture’s wires to the house wires. Once all the wires are disconnected, you can set the old fixture aside. If there is no existing fixture, you will be working with the wires coming from the junction box that was installed for this purpose.

Step 3: Mount the New Motion Sensor Fixture Bracket
Your new motion sensor light will come with a mounting bracket or crossbar. This piece attaches directly to the electrical junction box in your wall or eave. Align the bracket with the screw holes on the box and secure it using the provided screws. Many motion sensor lights have a gasket that fits between the mounting plate and the wall. This is important for outdoor fixtures as it creates a seal to protect the wiring from moisture. Make sure this gasket is properly in place before you fully tighten the bracket. A secure bracket is essential for holding the weight of the new fixture.
Step 4: Connecting the Wires
Now comes the core of the project. You will connect the wires from your new motion sensor light to the corresponding wires in the electrical box. While holding the new fixture close to the bracket, match the wires by color.
- Ground Connection: Start with the ground wire. Connect the bare copper or green wire from the electrical box to the green or bare copper wire from your new fixture. Twist them together and secure them with a wire nut.
- Neutral Connection: Next, connect the white (neutral) wire from the box to the white wire from the fixture. Secure them with a wire nut.
- Hot Connection: Finally, connect the black (hot) wire from the box to the black wire from the fixture. Secure this connection with a wire nut.
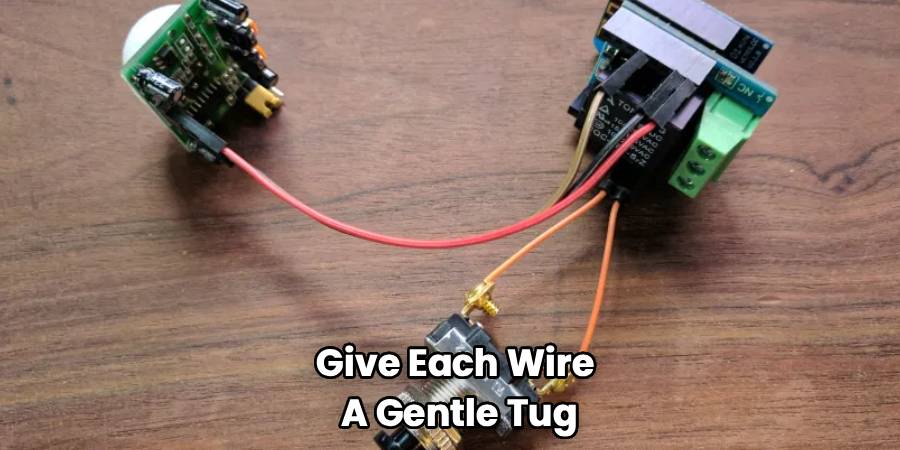
Give each wire a gentle tug to ensure the connections are tight and secure within the wire nuts. Some motion sensors have an additional wire, often red, which is a “load” wire used to connect multiple lights in a series. If your setup only involves one light, you will typically cap this red wire with a wire nut and follow the manufacturer’s specific directions.

Step 5: Secure the Fixture and Restore Power
With the wires connected, carefully tuck them back into the electrical box. Be gentle to avoid loosening any of your connections. Align the new motion sensor fixture with the mounting bracket and secure it in place with the provided mounting nuts or screws. Ensure the fixture is snug against the wall and the moisture gasket is compressed to create a good seal.
Now, you can head back to the electrical panel and flip the breaker back to the “ON” position. Turn on the light switch that controls the fixture. Most motion sensor lights will turn on for a brief period when they first receive power, and then they will enter a “test” mode.
Step 6: Test and Adjust Your Motion Sensor Settings
The final step is to configure the sensor to your liking. Most units have adjustable settings for sensitivity, duration, and light sensitivity (dusk-to-dawn).
- Test Mode: Use the test mode to walk around the detection area and see what triggers the light. This helps you aim the sensor correctly.
- Sensitivity: Adjust the sensitivity dial to control how much movement is needed to trigger the light. If passing cars or swaying branches are setting it off, you may need to lower the sensitivity.
- Duration: Set the duration for how long you want the light to stay on after it detects motion. This can range from one minute to ten minutes or more.
- Light Sensitivity: The dusk-to-dawn setting tells the sensor only to activate when it’s dark outside, which saves energy. You can adjust this so it comes on at your desired level of darkness.
Take some time to fine-tune these settings over the next day or two to get the performance just right for your specific location and needs.
How to Wire a Motion Sensor Light with an Override Switch
Some homeowners want the ability to override the motion sensor and keep the light on continuously. This often involves a slightly different wiring setup at the switch. To create this function, you may need to run a 3-wire cable (black, red, white, plus ground) between the switch and the light. The black wire would provide constant power, while the red wire would be the switched hot wire controlled by the motion sensor.
The light switch itself would be a double switch or a specific 3-way switch. This allows you to flip the switch to bypass the sensor and provide direct power to the light. This is a more advanced setup, and if you are not comfortable with complex wiring, it is best to consult an electrician. For a standard installation, the single switch that cuts power to the entire unit is sufficient.
Frequently Asked Questions
Can I wire a motion sensor to an existing light?
Yes, you can. Instead of replacing the entire fixture, you can install a separate, remote motion sensor to control one or more existing lights. This involves wiring the sensor between the power source (the switch) and the light fixture. The power goes into the sensor, and the sensor’s load wire then connects to the light. This allows the sensor to act as the switch for your existing fixture.
Does a motion sensor light need a switch?
It is highly recommended and often required by electrical code to have a standard wall switch that controls the power to the motion sensor light. This switch allows you to completely turn off the power to the unit for maintenance, bulb replacement, or to disable the motion-sensing function if needed. It also provides a way to reset the sensor if it gets stuck in an “on” state, which can sometimes be done by flipping the switch off and on.
Why does my motion sensor light stay on all the time?
There are a few common reasons for this. First, the sensitivity might be set too high, causing it to be triggered by minor movements like wind blowing through trees or small animals. Second, the fixture could be stuck in an override mode, which keeps it on continuously. This can often be reset by flipping the wall switch off for about 30 seconds and then back on. Finally, a power surge or a failing sensor can also cause this issue.
Do motion sensor lights use a lot of electricity?
No, motion sensor lights are very energy-efficient. Because they only turn on when motion is detected, they spend most of their time off. This uses significantly less electricity than a light that is left on all night. When paired with modern LED bulbs, the energy consumption is minimal, making them an excellent choice for saving on utility bills while improving security.
How do you wire two lights to one motion sensor?
To wire two or more lights to a single motion sensor, you will wire them in parallel. The main power source connects to the sensor first. Then, the load wire (often red) from the sensor is connected to the black (hot) wires of all the light fixtures you want to control. The neutral (white) wires from all fixtures and the sensor are connected together, and all ground wires are also connected. The key is to ensure the total wattage of all the connected lights does not exceed the maximum load rating of the motion sensor.
Conclusion
Following this guide on how to wire a motion sensor light will equip you with the knowledge to complete this valuable home improvement project safely. By taking your time, prioritizing safety, and carefully following each step, you can successfully install a system that adds a new layer of security and convenience to your property.
The peace of mind that comes with a well-lit exterior and the energy savings you’ll gain make this a DIY task that is well worth the effort. Enjoy the enhanced safety and functionality of your new motion-activated lighting.

