
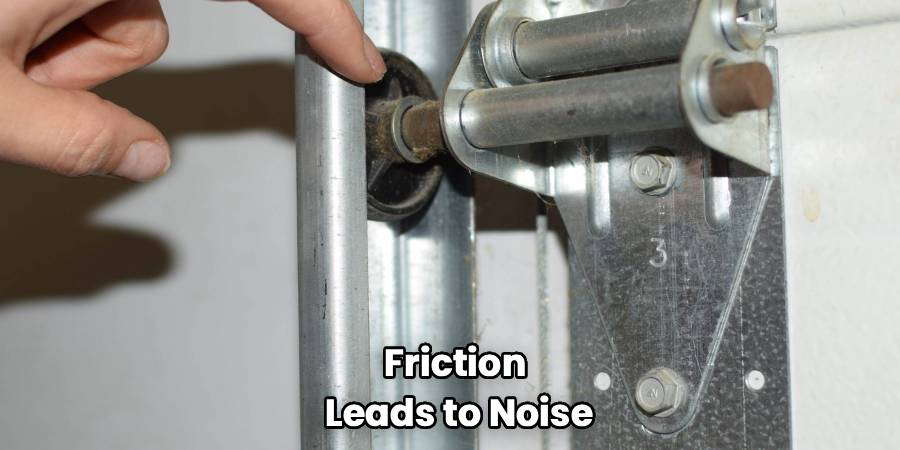
Is there anything more jarring than the screeching, grinding metal sound of a garage door opening early in the morning? It’s the kind of noise that sets your teeth on edge and probably wakes up half the neighborhood. If your home has become known for that distinct, ear-piercing wail every time you leave for work, you aren’t alone. Over time, every garage door system experiences wear and tear that leads to friction—and friction leads to noise.
The good news is that you don’t necessarily need to call a professional repair service or spend hundreds of dollars to solve the problem. In fact, figuring out How To Fix Squeaking Garage Door issues is a straightforward weekend project that almost any homeowner can handle with a few basic tools. By dedicating just an hour of your time to proper maintenance, you can silence the squeaks, extend the lifespan of your door, and ensure your system operates smoothly for years to come. In this guide, we will walk you through everything you need to know to get the job done right.

Step-by-Step Guide to Fix Squeaking Garage Door
Fixing a noisy garage door solutions usually comes down to three main tasks: tightening, inspecting, and lubricating. While it might seem intimidating to mess with such a large mechanical object, the process is actually quite logical. Below is a comprehensive guide to restoring silence to your garage.
Step 1: Tools You Need for How To Fix Squeaking Garage Door
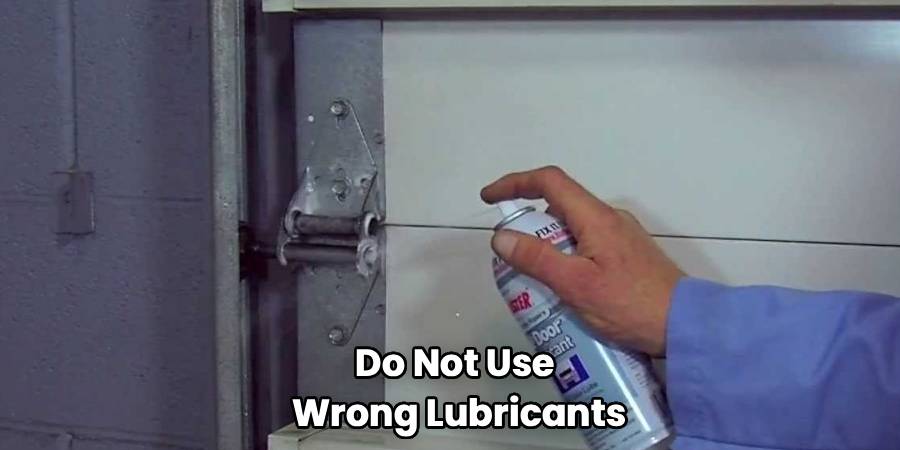
Before you begin, it is essential to gather the right supplies. Using the wrong tools or lubricants can actually make the problem worse. For instance, many people grab a can of WD-40, thinking it cures all squeaks. However, standard WD-40 is a solvent, not a lubricant. It might strip away existing grease and attract dust, eventually leading to more friction.
Instead, you want to be prepared. Here is what you should have on hand:
- Lithium-based grease or a specialized silicone garage door spray: These are designed to withstand temperature changes and won’t attract dust like heavy oil.
- A sturdy stepladder: You will need to reach the tracks and opener rail safely.
- A socket wrench set and open-ended wrenches: Essential for tightening loose bolts.
- Rags and a gentle cleaner: To wipe away old, gritty grease from the tracks.
- Safety glasses: You’ll be looking up at parts that might drip or flake rust, so eye protection is non-negotiable.
Step 2: Prioritize Safety and Disconnect Power
Garage doors are heavy and operate under significant tension. Before you start poking around the mechanism, safety must be your priority. Start by closing the garage door completely. You should never attempt to work on the door while it is open or moving unless you are specifically testing it.
Once the door is closed, disconnect the power to the garage door opener. You can do this by unplugging the unit from the ceiling outlet or flipping the corresponding breaker in your electrical panel. This ensures that no one accidentally hits a remote button while your fingers are near the moving parts.
Step 3: Clean the Tracks Thoroughly
One of the most common culprits for a noisy garage door is simply a buildup of debris. Over the years, the tracks that guide your door rollers can collect dust, dead bugs, spider webs, and old, hardened grease. When the rollers move over this grit, it creates a grinding sound.
Take your rag and a general-purpose household cleaner (or even just damp soapy water) and wipe down the inside of the tracks on both sides of the door. You want to remove all the gunk until the metal surface is clean.
Important Note: Do not lubricate the tracks themselves. Garage door tracks are designed to be clean and dry. Adding lubricant here will only turn into a sticky trap for dirt, which will eventually cause the rollers to slide rather than roll, leading to flat spots and more noise.
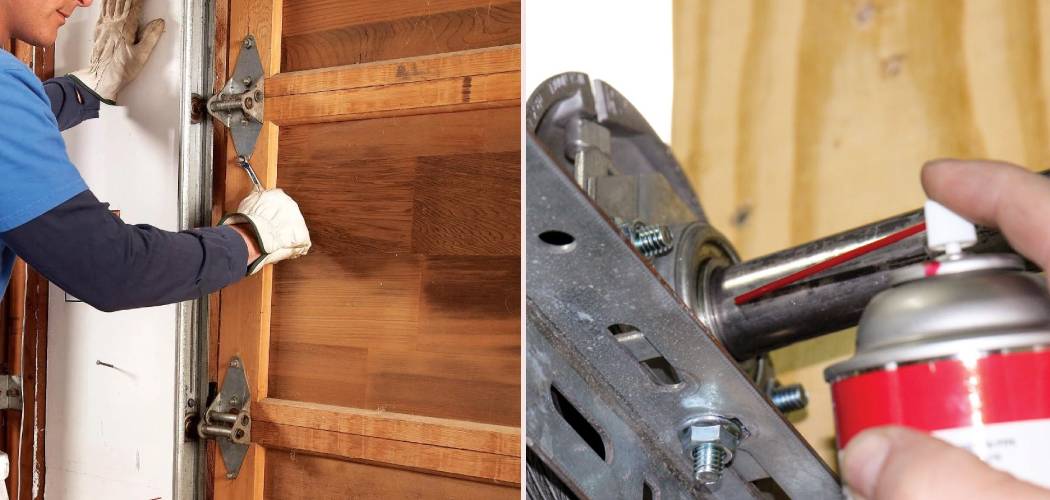
Step 4: Tighten All Hardware
Garage doors vibrate every time they move. Over hundreds of cycles, this vibration can loosen the nuts and bolts that hold the system together. Loose hardware causes parts to rattle and shake, contributing significantly to the overall noise level.
Grab your socket wrench and methodically go over the door. Check the brackets that hold the tracks to the wall and ceiling. Inspect the bolts on the hinges that hold the door panels together. Tighten anything that feels loose, but be careful not to overtighten. You don’t want to strip the bolt heads or crack the metal brackets. Just a snug fit is enough to stop the rattling.
Step 5: Inspect and Lubricate the Rollers
The rollers are the small wheels that run inside the track, and they are often the source of that high-pitched squeal. If you have metal rollers, the bearings inside can rust or dry out. If you have nylon rollers, the bearings can still wear down, though they are generally quieter.
Inspect each roller. If you see one that is worn, chipped, or wobbly, it might be time to replace it rather than just clean it. If they look okay, it’s time for lubrication.
Using the thin straw attachment on your lithium grease or silicone spray, apply a small burst of lubricant directly into the ball bearings of the roller. Spin the roller with your finger to work the grease in. Wipe away any excess that drips. This single step is often the most effective squeaky garage door fix you can perform.

Step 6: Lubricate the Hinges
The hinges are the metal joints that allow the door panels to bend as they travel up the curved track. Metal-on-metal contact here creates friction and squeaking.
Apply lubricant to the pivot points of each hinge. Again, you don’t need to drench them; a targeted spray is sufficient. As you spray, lift the door manually (if possible and safe) or just move the hinge slightly to help the oil penetrate.
Note: If you have a plastic garage door, check the manufacturer’s instructions. Some plastic hinges do not require lubrication and can actually be damaged by certain chemicals.
Step 7: Address the Springs and Bearing Plates
The springs are the muscles of your garage door system. Whether you have a torsion spring (the long coil above the door) or extension springs (along the sides), they are under immense tension and can make a lot of noise if they are dry.
This is a crucial moment when learning How To Fix Squeaking Garage Door efficiently because using the wrong grease here can cause a mess. Lightly spray down the length of the springs with your garage door lubricant. The goal is to reduce the friction between the coils as they expand and contract.
At the ends of the torsion spring shaft (the metal bar the spring is wrapped around), you will see circular bearing plates. These allow the shaft to spin freely. Give these bearings a shot of lubricant as well. If these bearings are seized or rusted, they can produce a terrible grinding sound.
Step 8: Check the Garage Door Opener Chain or Belt
If you have done all the above and still hear noise, the issue might be the opener itself. If you have a chain-drive opener, the chain might be loose and slapping against the rail, or it might be dry.
For a chain drive, apply a small amount of lubricant to the chain links. Do not use standard grease, which attracts dirt; use the same garage door spray or a specific bicycle chain lube. If you have a belt drive, do not lubricate the belt. However, you can check the tension. If the belt or chain appears to be sagging significantly, consult your owner’s manual on how to tighten it slightly to stop it from banging against the rail.
Step 9: Final Testing and Cleanup
Once you have tightened the bolts and lubricated the moving parts, it is time to reconnect the power. Run the garage door opener and listen.
The difference should be noticeable immediately. The motion should be smoother, and the screeching should be gone. If you still hear a specific noise, try to isolate where it is coming from. It might be a specific roller you missed or a hinge that needs a second coat.
Finally, grab a clean rag and wipe up any drips on the floor or excess grease on the door panels. You want the lubricant inside the moving parts, not on the surface where it can stain clothes or collect dust.
Frequently Asked Questions Section
Even with a detailed guide, homeowners often have specific questions about garage door maintenance. Here are answers to some of the most common queries regarding noisy garage door solutions.
How often should I lubricate my garage door?
Ideally, you should perform this maintenance routine every six months. A good way to remember is to do it when you change your clocks for Daylight Saving Time or when you check your smoke detector batteries. Regular garage door maintenance prevents rust from building up and keeps the noise from ever coming back. If you live in a harsh climate with high humidity or salt air, you might want to do this every three to four months.
Can I use WD-40 to fix a squeaky door?
As mentioned earlier, standard WD-40 is a water-displacement spray, not a long-term lubricant. While it might stop the squeak for a few days, it will dry out quickly and can actually strip away the factory grease that was already there. Always opt for a “White Lithium Grease” or a “Silicone Garage Door Lubricant.” These products are formulated to stick to the metal parts and withstand the friction and weight of the door.
What if the noise sounds like a loud bang?
A loud bang is different from a squeak or a grind. If you hear a loud bang when the door opens or closes, it could indicate a broken spring or a cable that has snapped. This is a serious safety hazard. Do not attempt to fix a broken spring yourself. Torsion springs are under extreme tension and can cause severe injury or death if handled incorrectly. If you suspect a broken spring, call a professional immediately.
My door is still noisy after lubrication. What now?
If you have lubricated everything and the door still rattles excessively, check the condition of the rollers again. Nylon rollers are significantly quieter than steel rollers. If you currently have steel rollers, upgrading to nylon rollers with sealed ball bearings can make a massive difference in noise reduction. This is a slightly more advanced DIY task but is well worth it for the silence it provides.
Is it safe to tighten the bottom brackets?
Be extremely careful with the bottom brackets on the door panels (where the cables attach). These brackets are under maximum tension from the springs. Do not loosen the bolts on the bottom brackets while the spring is under tension. If these brackets need adjustment or replacement, it is best to leave this specific task to a professional technician to avoid injury.
Conclusion
Learning How To Fix Squeaking Garage Door protects your investment and maintains the sanity of your household. By taking the time to clean the tracks, tighten loose hardware, and lubricate the moving parts with the correct products, you can transform a noisy, shuddering barrier into a smooth-operating entryway. Remember, a quiet door is usually a healthy door. If you stay on top of this simple maintenance schedule every six months, you will likely avoid costly repairs and enjoy the convenience of your garage for years to come.