

To replace your lock safely, you need to remove the old hardware, align the new latch within the door edge, and secure the exterior and interior lock components with the provided screws. Knowing how to install a Kwikset door lock is a straightforward task that most homeowners can complete in less than an hour. You do not need extensive technical knowledge to upgrade your door hardware, but you do need to follow a calm, practical approach.
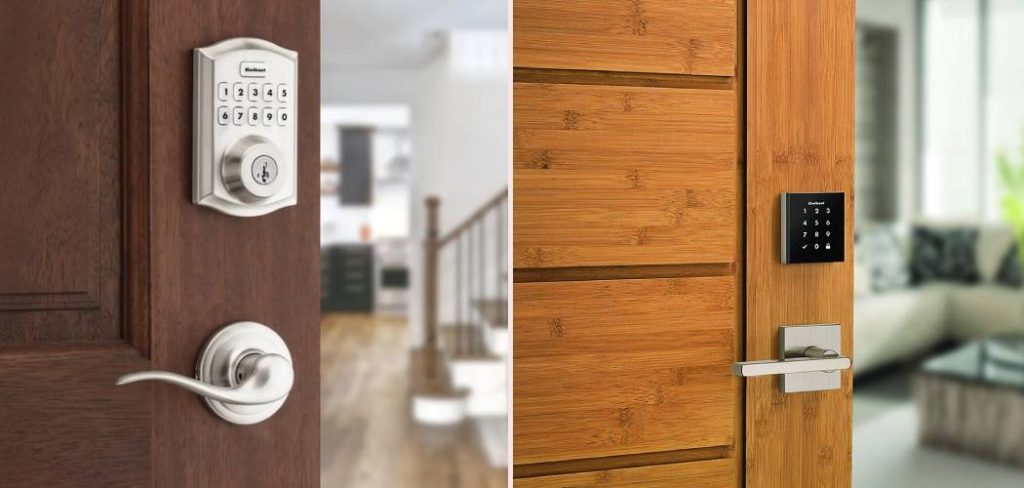
Doing the job right ensures your door latches properly and keeps your home secure. Taking a few moments to understand the parts of your new lock makes the assembly process much easier. This guide will help you confidently remove your old lock, prepare your door, and install your new Kwikset hardware safely.
Why This Task Matters
The most common reason you might need to change a lock is moving into a new home, upgrading an old rusty fixture, or improving your daily security. A properly functioning door lock serves as your primary defense against unauthorized entry. Over time, internal springs wear out, metal parts corrode, and latches lose their crisp alignment.
When a lock begins to stick or fails to catch the strike plate on the frame, your home security is compromised. Installing a new Kwikset lock restores that physical barrier and provides immediate peace of mind. Taking the time to handle this task yourself saves money on locksmith fees and teaches you valuable home maintenance skills. A smooth, properly installed lock also prevents daily frustration. You will no longer need to jiggle the key or pull the door forcefully just to get it to close correctly.
Tools or Materials You May Need
Having the right tools ready makes the installation process safe and simple. You do not need specialized equipment for a standard door lock replacement. Gather these items before you take anything apart:
- Phillips-head screwdriver
- Flathead screwdriver
- Measuring tape
- A small flashlight (optional, but helpful for seeing inside the door frame)
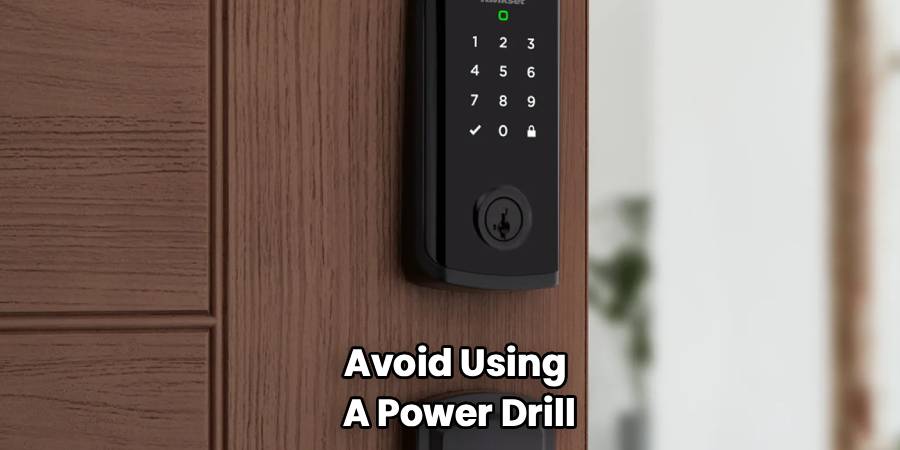
Avoid using a power drill to install the mounting screws. Power tools can easily strip the delicate screw threads or overtighten the hardware, which might crush the internal mechanisms of the lock. A simple manual screwdriver gives you full control over the tension.
Before You Begin
Start with the safest and simplest check. Before removing your current lock, verify that your new Kwikset lock matches the holes already drilled in your door. Use your measuring tape to check the backset, which is the distance from the edge of the door to the center of the lock hole. Standard backsets are either 2 3/8 inches or 2 3/4 inches.
Before you begin, make sure you prop the door open securely with a heavy object or a doorstop. You do not want the door to blow shut while the locking mechanism is removed, as this can trap you inside or outside the room. Lay out all the new parts from the Kwikset box on a flat, clear surface so nothing rolls away.
Step-by-Step Guide to How to Install a Kwikset Door Lock
Step 1 – Remove the Existing Door Hardware
Start by taking off your old lock to clear the way for the new one. Use your Phillips-head screwdriver to loosen the two long mounting screws on the interior side of the door knob or deadbolt. Once the screws are out, gently pull both halves of the lock apart. The interior handle will come off in your hand, and the exterior half will pull away from the other side.
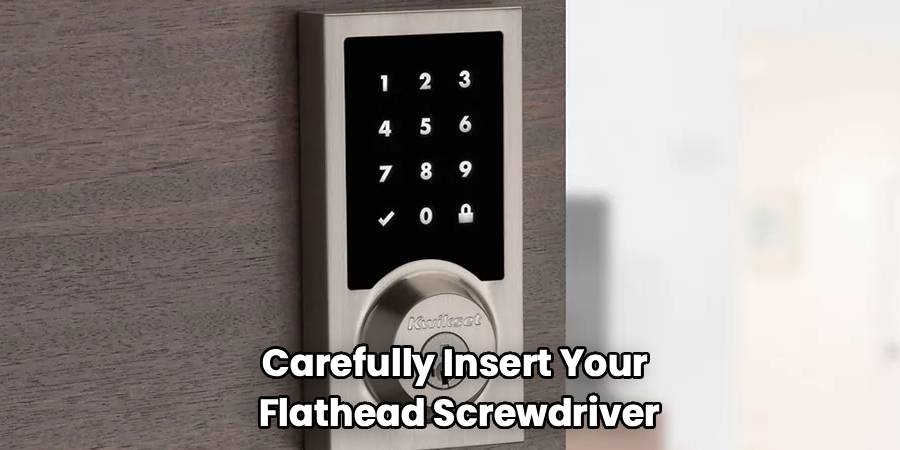
Next, find the two small screws holding the latch plate on the edge of the door. Remove these screws and slide the latch mechanism out of the door edge. If the latch is stuck, carefully insert your flathead screwdriver behind the plate and gently pry it loose.
Step 2 – Measure and Adjust the New Latch
Start with the safest and simplest check by measuring the latch length. Kwikset latches are adjustable to fit the two standard backset lengths mentioned earlier. Slide the new latch into the hole on the edge of the door and look through the large circular face of the door.
The square or cross-shaped hole in the latch must sit perfectly in the center of the large door hole. If it sits too far forward or too far back, you need to adjust it. Remove the latch from the door. Hold the latch faceplate with one hand and twist the mechanism to extend or shorten it until it matches your door’s backset exactly.
Step 3 – Install the New Kwikset Latch
Once the latch is the correct length, slide it back into the hole on the edge of the door. Make sure the angled part of the latch bolt faces the door frame. If the angled side faces the wrong way, the door will not close smoothly against the strike plate.
Insert the two short screws provided in your Kwikset kit through the latch plate. Use your Phillips-head screwdriver to tighten them securely. The latch plate should sit flush with the edge of the door. If it sits too high, it might catch on the door frame. Make sure the latch mechanism remains perfectly level as you tighten the hardware.
Step 4 – Position the Exterior Lock Half
Pick up the exterior half of the Kwikset lock. This is the side with the keyhole if you are installing a keyed entry lock. Feed the long metal spindle through the center hole of the latch you just installed. At the same time, line up the two metal mounting posts so they slide through the dedicated slots on the sides of the latch mechanism.
Hold this exterior piece flat against the face of the door. The keyhole should be completely vertical. Keep a firm grip on this piece with one hand, or have a helper hold it in place. If it shifts during the next step, the lock will not align correctly.
Step 5 – Attach the Interior Lock Half
Take the interior half of the lock and align it with the spindle sticking through the door. Slide the interior handle onto the spindle. The screw holes on the interior knob must align perfectly with the metal mounting posts from the exterior half.
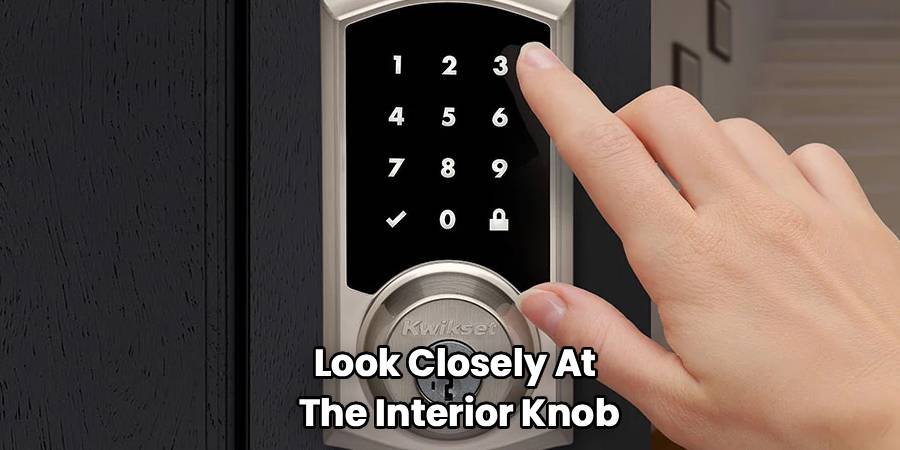
Look closely at the interior knob. You will see two recessed holes. Insert the two long mounting screws into these holes. Use your fingers to turn them clockwise a few times to get the threads started safely. Hand-threading the screws first prevents them from cross-threading, which can permanently ruin the lock mechanism.
Step 6 – Tighten the Mounting Screws
Once the screws are caught in the threads, use your manual Phillips-head screwdriver to tighten them. Alternate between the left and right screws, turning each one a few times before switching to the other. This method pulls the two halves of the lock together evenly and keeps everything centered.
Tighten the screws until the lock feels completely snug against the door surface. Do not forcefully overtighten them. If you tighten the screws too much, the lock cylinder will bind, and the knob will be very stiff to turn. If this happens, back the screws off by a quarter turn until the knob twists smoothly.
Step 7 – Install the Strike Plate on the Frame
Move over to the door frame to install the new strike plate. Remove the old strike plate by unscrewing the two screws holding it in place. Even if the old plate looks similar, always install the new one provided with your lock to ensure a perfect fit.
Place the new strike plate into the recess on the door frame. Insert the new screws and tighten them down evenly. Make sure the curved lip of the strike plate points toward the door. This lip guides the latch safely into the hole when the door closes. Ensure the plate sits flush so the door does not snag.
Step 8 – Test the Lock Functionality
Before you close the door, you must test the mechanical function of your newly installed lock. Insert the key into the exterior keyhole and turn it to verify the latch retracts fully. Turn the interior thumb turn or knob to ensure it operates smoothly without grinding or sticking.
If this does not work, try the next step. Loosen the main mounting screws slightly, wiggle the lock to recenter it, and retighten. Once the lock moves freely while the door is open, step outside, pull the door shut, and test the key again. The door should latch securely and lock without requiring you to push or pull heavily on the handle.
Common Mistakes to Avoid
The most common mistake beginners make is tightening the main mounting screws too much. When you torque these screws down forcefully, it crushes the internal metal components together. This causes the lock to stick, makes the key hard to turn, and eventually breaks the spring mechanism. Always tighten the screws just enough to hold the lock firmly against the door, using a manual screwdriver to maintain proper control over the tension.
Another frequent issue is installing the latch backward. The flat side of the latch must face the interior of the room, while the angled side must face the door jamb. If you put it in backward, the door will bounce off the frame instead of sliding smoothly into the strike plate. You would have to take the entire lock apart to fix it.
Finally, many people ignore the strike plate on the door frame. Leaving the old strike plate in place might seem like a time-saver, but different brands use slightly different dimensions. An unmatched strike plate can cause the latch to jam or prevent the door from locking completely. Always swap out the old frame hardware for the new pieces provided in the box to ensure your home stays fully secure.
Safety Warnings
Handling heavy doors and metal hardware carries minor risks that you can easily prevent. Doors can swing shut unexpectedly due to wind or drafts. Always wedge a solid doorstop under the door while working. This prevents the door from pinching your fingers in the jamb and keeps you from accidentally locking yourself out of your home while the hardware is disassembled.
Metal components, especially older latch plates and screws, can develop sharp burrs or rust. Inspect the edges of your old lock as you remove it. If you encounter jagged metal, wear work gloves to protect your hands from cuts. Keep all small screws and lock parts away from small children and pets, as they present a serious choking hazard.
When to Call a Professional
Call a professional if your door frame is heavily damaged or splintered, preventing the new latch or strike plate from sitting securely in the wood. A weak door frame compromises the physical safety of the entire locking system. A locksmith or carpenter can repair the wood safely.
You should also seek expert help if the door itself is severely warped or out of alignment. If you have to lift the door by the handle or throw your shoulder against it to make the lock engage, a new lock will not solve the issue. The door hinges or the frame itself require adjustment that goes beyond basic DIY troubleshooting.
Expert Tips
To keep your new Kwikset lock working smoothly for years, apply a quick puff of dry graphite lubricant into the keyhole every six months. Never use wet lubricants like WD-40 inside a keyhole, as they attract dust and grime that will eventually jam the small pins inside the cylinder.
When removing old, painted-over hardware, run a utility knife carefully around the edge of the old lock plates before unscrewing them. This cleanly breaks the paint seal. If you skip this step, pulling the old lock away might tear a large chunk of paint or wood veneer off the surface of your door, leaving an ugly scar that the new lock cannot cover.
Frequently Asked Questions
Can I install a Kwikset lock on any door?
Most standard residential doors are pre-drilled to accommodate Kwikset locks. You must verify that your door has a standard hole size of 2 1/8 inches and a backset of either 2 3/8 or 2 3/4 inches. If your door has unusual measurements or is much thicker than standard, you may need a thick door kit.
Do I need to drill new holes for my Kwikset lock?
If you are replacing an existing standard lock, you do not need to drill new holes. The new Kwikset lock will fit directly into the existing cutouts. You only need to drill holes if you are installing a lock on a brand-new, blank door slab that has never had hardware mounted on it before.
Why does my key get stuck in the new lock?
The most common reason is that the mounting screws on the interior handle are too tight. When screws are overtightened, they warp the cylinder housing and pinch the internal pins. Loosen the two main mounting screws by a quarter turn and try turning the key again to see if it moves smoothly.
What should I do if the latch does not reach the strike plate?
If the latch falls short of the hole in the door frame, your backset is likely adjusted incorrectly. Remove the lock from the door, take out the latch, and adjust it to the longer 2 3/4-inch setting by twisting and extending the mechanism. Reinstall the latch and try closing the door again.
Can I rekey a Kwikset lock myself?
Yes, if your lock features Kwikset SmartKey technology. SmartKey allows you to rekey the cylinder to match any existing Kwikset key in seconds using the included SmartKey tool. Follow the manufacturer instructions precisely, and ensure you do not pull the key out during the reset process to avoid damaging the cylinder.
Conclusion
Replacing a faulty or aging door fixture is an excellent way to maintain your home’s security and improve your daily convenience. By taking your time, reading the measurements carefully, and avoiding power tools, you can ensure a flawless setup. Learning how to install a Kwikset door lock empowers you to take control of your physical safety without relying on expensive professional services.
Remember to keep the door propped open during your work, test the mechanical function before closing it, and tighten the screws firmly but gently. If everything feels smooth and the door catches the frame securely, you have successfully completed the job. For your next step, inspect the exterior locks on your other doors to see if they require a similar safety upgrade.