

Upgrading your home security with a smart doorbell can feel like a big step, but it doesn’t have to be a complicated one. Getting your new device up and running is likely easier than you think. This guide provides a detailed walkthrough on how to install Arlo Video Doorbell, ensuring a smooth and successful setup from start to finish.
We’ll cover everything from unboxing your device to syncing it with your home’s Wi-Fi network. By following these instructions, you’ll have your new layer of security operational in no time.

Before You Begin: Pre-Installation Checklist
A successful installation starts with good preparation. Before you unbox your new Arlo device, take a few minutes to gather your tools and check your existing setup. This foresight can prevent common issues and make the process much smoother.
What’s in the Box?
First, open your Arlo Video Doorbell box and familiarize yourself with the contents. You should find the following components:
- The Arlo Video Doorbell unit itself
- A flat mounting plate
- An angled mounting wedge (for adjusting the camera’s view)
- A power kit
- Wall mounting screw kit
- Wire extensions
- A release pin
- A quick start guide
If any of these items are missing, contact Arlo support before proceeding.
Tools You Will Need
Having the right tools on hand will make your installation much quicker. Gather these items before you start:
- A Phillips-head screwdriver
- A power drill (optional, but helpful for drilling pilot holes)
- A level (to ensure the doorbell is mounted straight)
- Pliers (for handling wires)
- Your smartphone or tablet
Check Your Existing Doorbell and Chime
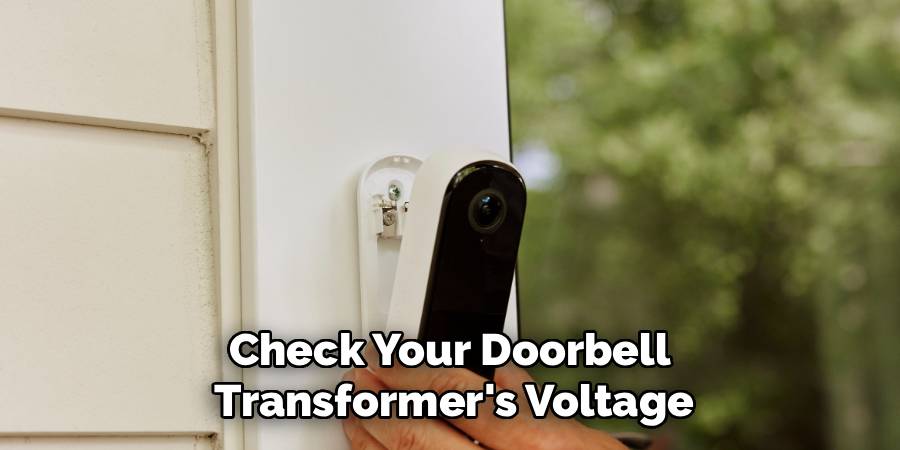
Your Arlo doorbell is designed to work with an existing wired doorbell system. You need to ensure your current setup is compatible.
First, check your doorbell transformer’s voltage. The Arlo Video Doorbell requires a voltage between 16-24V AC. You can usually find the voltage rating printed directly on your transformer, which is often located in your basement, attic, or near your main electrical panel.
Next, identify your indoor chime box. This is the unit inside your home that makes the ringing sound. You will need to install the included Arlo Power Kit inside this box. Take the cover off your chime box and look at the wiring. It should be a mechanical or digital chime.
Finally, verify your Wi-Fi signal strength at your front door. A strong, stable 2.4 GHz Wi-Fi connection is crucial for the video doorbell to function correctly. Stand by your door with your smartphone and check that you have at least two or three bars of Wi-Fi signal. If the signal is weak, you may need to move your router closer or consider a Wi-Fi extender.
7 Easy Step-by-Step Installation Guide
Now that you’ve completed the pre-installation checks, you’re ready to begin the main part of the process. This section provides detailed guidance on how to install Arlo Video Doorbell. Follow each step carefully for a secure and functional setup.
Step 1: Power Down Your Existing Doorbell
Safety is the top priority. Before you handle any wiring, you must turn off the power to your doorbell system.
Go to your home’s main circuit breaker panel. Find the breaker that controls your doorbell and chime. If it isn’t labeled, you may need to test a few breakers. Flip the correct breaker to the “OFF” position.
To confirm the power is off, press your existing doorbell button. If the chime does not ring, you have successfully cut the power.
Step 2: Install the Arlo Power Kit
With the power off, you can safely work on your indoor chime box.
Remove the cover from your chime. You will see several wires connected to terminals, typically labeled “FRONT,” “TRANS” (for transformer), and “REAR.”
Take the Arlo Power Kit from the box. It has two wires. Connect one wire from the Power Kit to the “FRONT” terminal and the other wire to the “TRANS” terminal. It doesn’t matter which Power Kit wire goes to which terminal. Use a screwdriver to loosen the terminal screws, slide the Power Kit wires underneath, and then tighten the screws securely.
The Power Kit can be mounted inside the chime box using the included adhesive. Once it’s secure, replace the chime box cover.
Step 3: Remove Your Old Doorbell Button
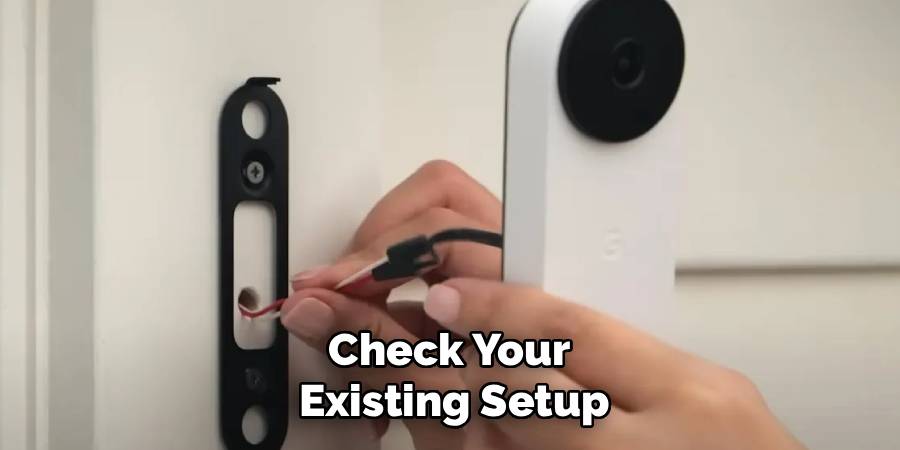
Now, head back outside to your front door. It’s time to remove your old doorbell button.
Unscrew the existing button from the wall or doorframe. Gently pull it away to expose the two wires connected to the back.
Using your screwdriver, loosen the screws holding the two wires and disconnect them from the old button. Make sure the wires don’t fall back into the wall. You can wrap them around a pencil or use a piece of tape to hold them in place.
Step 4: Mount the Arlo Base Plate
Position the Arlo mounting plate where your old doorbell was. Use a level to ensure it is straight. Pull the two doorbell wires through the large opening in the center of the plate.
Mark the screw hole locations on your wall with a pencil. If you are mounting on wood, you can screw the plate directly into the wall. If you are mounting on brick, stucco, or drywall, you’ll need to drill pilot holes and use the included wall anchors.
Once your pilot holes are ready, secure the mounting plate to the wall using the provided screws.
If you need to adjust the camera’s viewing angle, use the angled wedge. Attach the wedge to the wall first, and then attach the flat mounting plate to the wedge.
Step 5: Connect the Wires to the Arlo Doorbell
Now you will connect the doorbell wires to your new Arlo unit.
On the back of the Arlo Video Doorbell, you’ll find two small screws. Loosen these screws.
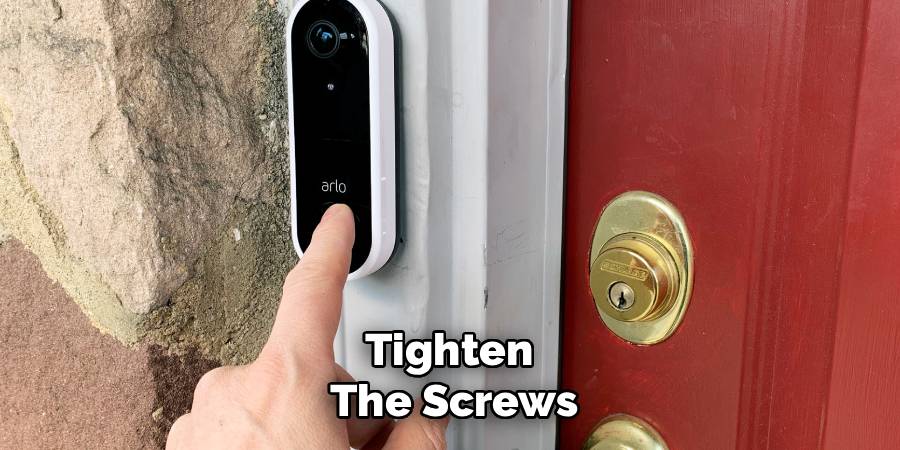
Wrap one of the doorbell wires around each screw. It does not matter which wire goes to which screw. Once the wires are in place, tighten the screws firmly to ensure a good connection. If your existing wires are too short, use the provided wire extensions.
Step 6: Attach the Arlo Doorbell to the Mounting Plate
With the wiring complete, it’s time to attach the doorbell to the plate you mounted on the wall.
Carefully tuck the wires and any wire connectors back into the wall opening.
Align the top of the Arlo doorbell with the top of the mounting plate and push it inward. You will hear a “click” when the bottom of the doorbell locks into place on the mounting plate. This confirms it is securely attached.
Step 7: Restore Power and Sync with the App
You can now go back to your circuit breaker and turn the power back on.
The small LED light around the button on your Arlo Video Doorbell should begin to glow or flash white, indicating it has power and is ready for setup.
On your smartphone or tablet, download and open the Arlo Secure App. If you don’t have an account, you’ll need to create one.
In the app, select “Add New Device” and choose your Arlo Video Doorbell model from the list. The app will guide you through the process of connecting the doorbell to your home Wi-Fi network. You’ll be asked to select your network and enter the password.
The app will then generate a QR code on your phone’s screen. Hold your phone about 4-6 inches in front of the Arlo doorbell’s camera. The doorbell will scan the code. You will hear a chime sound from the doorbell itself once the code is successfully scanned.
The app will then finalize the setup. This may take a few minutes. Once complete, you’ll be able to see a live video feed from your new doorbell directly in the Arlo app.
Troubleshooting Common Installation Issues
Even with careful preparation, you might encounter a small hiccup. Here are some common problems and how to solve them.
- Doorbell Has No Power: If the LED light doesn’t turn on, double-check your breaker to ensure the power is on. Verify all wire connections at the doorbell and inside the chime box are secure. Also, confirm your transformer meets the 16-24V AC power requirement.
- Chime Doesn’t Ring: If your indoor chime doesn’t sound when the doorbell is pressed, re-check the Power Kit wiring. Ensure it’s connected to the “FRONT” and “TRANS” terminals correctly.
- Can’t Connect to Wi-Fi: If the device fails to connect to your network, confirm you are using a 2.4 GHz network. Check your Wi-Fi signal strength at the door. You might need to move your router or use an extender. Also, double-check that you entered the correct Wi-Fi password.
- Poor Video Quality: Choppy or low-quality video is usually a sign of a weak Wi-Fi connection. A stronger signal will improve performance.
Frequently Asked Questions
Here are answers to some common questions about setting up your Arlo doorbell.
Can I install the Arlo Video Doorbell without an existing doorbell?
The wired Arlo Video Doorbell is designed to be powered by existing doorbell wiring. However, Arlo also offers a wire-free version that runs on a rechargeable battery. If you don’t have existing wiring, the wire-free model is the better choice for you.
Do I need a subscription for the Arlo doorbell?
Your Arlo doorbell comes with a trial of Arlo Secure. This plan includes features like cloud video storage, smart notifications that can differentiate between people, packages, and animals, and interactive alerts. After the trial, you can choose to subscribe to a plan to continue using these features or use the device with basic live streaming and motion notifications.
How long does the installation take?
For someone with basic DIY skills, the entire installation process typically takes about 30 to 45 minutes. This includes gathering tools, shutting off power, and syncing the device with the app.
What if my transformer voltage is too low?
If your existing transformer does not supply 16-24V AC, you will need to replace it with a compatible one. This is a task that should be performed by a qualified electrician, as it involves working with your home’s main electrical system.
How do I remove the Arlo doorbell from the mount?
To remove the doorbell, you’ll need the release pin that came in the box. Insert the pin into the small hole at the bottom of the mounting plate. Press firmly until the doorbell releases, then pull the bottom of the unit away from the wall.
Does the Arlo doorbell work with Alexa or Google Assistant?
Yes, the Arlo Video Doorbell is compatible with both Amazon Alexa and Google Assistant. You can link your Arlo account to these smart home platforms to view your camera feed on devices like the Echo Show or Google Nest Hub and receive announcements when someone presses the button.
Conclusion
To conclude, learning how to install Arlo Video Doorbell is a manageable project that significantly boosts your home’s security and convenience. By following this guide, you can confidently set up your new device and enjoy the peace of mind that comes with knowing who is at your front door, whether you’re at home or away. Take your time, double-check your connections, and you’ll have a fully functional smart doorbell system ready to protect your home.