

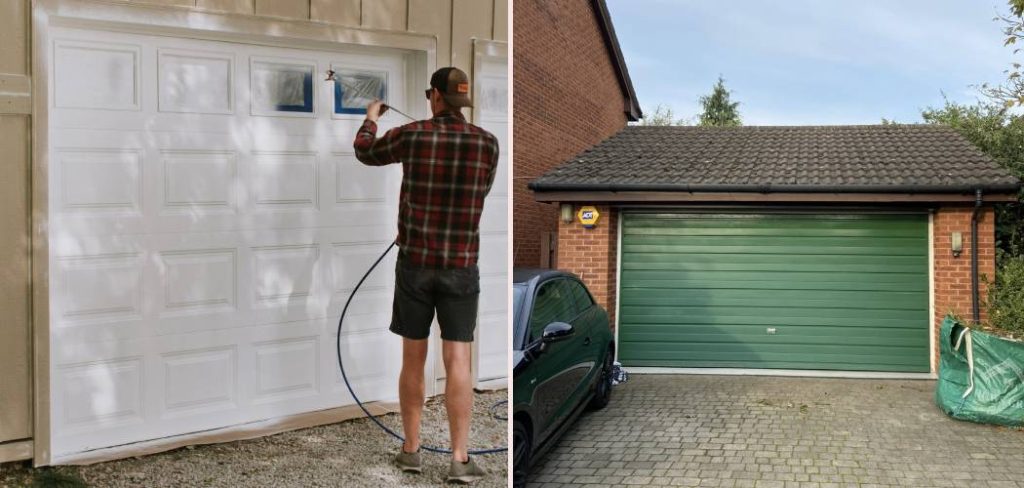
Your garage door takes up a huge amount of visual real estate on the front of your home. When it starts looking faded, chalky, or a bit rusty, it brings the whole curb appeal down with it. The good news? You don’t necessarily need to shell out thousands for a replacement. A fresh coat of paint can work miracles, protecting the metal and making your home look brand new again.
However, metal isn’t quite like wood or drywall. It requires specific prep work to ensure the paint actually sticks rather than peeling off in sheets after the first hot summer day. If you have been wondering how to paint metal garage doors properly so the finish lasts, you are in the right place. This guide will walk you through everything—from checking the weather to that final satisfaction of peeling off the painter’s tape.
Step-by-Step Guide on How to Paint Metal Garage Doors
Painting a metal door is less about the painting itself and more about the preparation. If you skip the cleaning or sanding, even the most expensive paint won’t help you. Let’s break down the process into manageable chunks so you can tackle this project over a weekend.
Step 1: Assess the Weather and Gather Your Supplies
Before you even head to the hardware store, check the forecast. Metal expands and contracts with heat, and painting in direct, scorching sunlight can cause the paint to dry too fast, leading to brush marks or blistering. Ideally, you want a day that is overcast but dry, with temperatures between 50 and 75 degrees Fahrenheit. Low humidity is your best friend here.
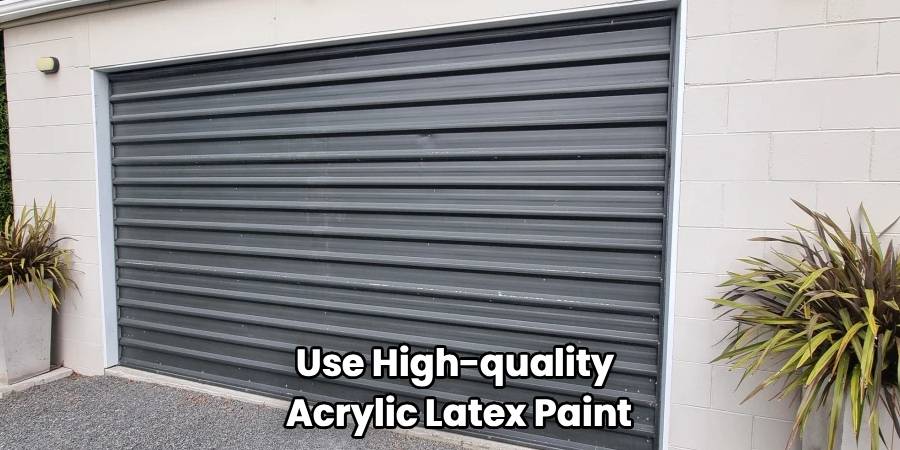
You will need to gather a few specific tools. Grab a high-quality acrylic latex exterior paint—this is usually the best choice for metal because it’s flexible and resists fading. You don’t necessarily need oil-based paint for modern metal doors, and latex is much easier to clean up.
Checklist:
- Cleaning: TSP (Trisodium Phosphate) or a biodegradable degreaser, a stiff scrub brush, and a garden hose.
- Prep: 220-grit sandpaper, sanding sponges, drop cloths, and high-quality painter’s tape.
- Painting: A 4-inch roller with a 3/8-inch nap (for the flat surfaces), a 2-inch angled synthetic brush (for the corners), and a paint tray.
- Safety: Goggles and a dust mask (especially for sanding).
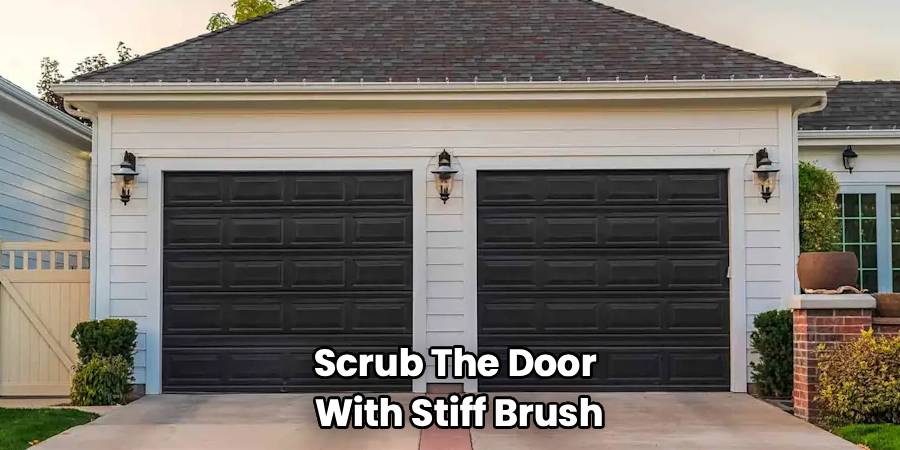
Step 2: Clean the Door Thoroughly
This is the non-negotiable step. Garage doors collect a surprising amount of grime, road dust, and subtle grease layers from the tracks and opener mechanisms. If you paint over this, the paint will fail.
Mix your TSP or degreaser with water in a bucket according to the label instructions. Scrub the door vigorously with your stiff brush. You aren’t just rinsing it; you are scouring it. Pay special attention to the bottom corners where dirt splashes up from the driveway. Rinse it completely with a hose and let it dry. It must be bone dry before you move on.
Step 3: Remove Loose Paint and Rust
If your door is older, you might have spots where the old factory finish is flaking or where rust is peeking through. You need to address this now. Use a wire brush or a scraper to knock off any loose flakes. If you find rust, sand it down until you see bare metal.
Even if your door looks okay, you still need to scuff it up. Glossy or smooth metal is hard for new paint to grab onto. Take your sanding sponge or sandpaper and lightly sand the entire surface of the door. You aren’t trying to strip the paint off; you just want to create a matte surface with “teeth” for the new coat to grip.
Step 4: Detailed Instructions on How To Paint Metal Garage Doors
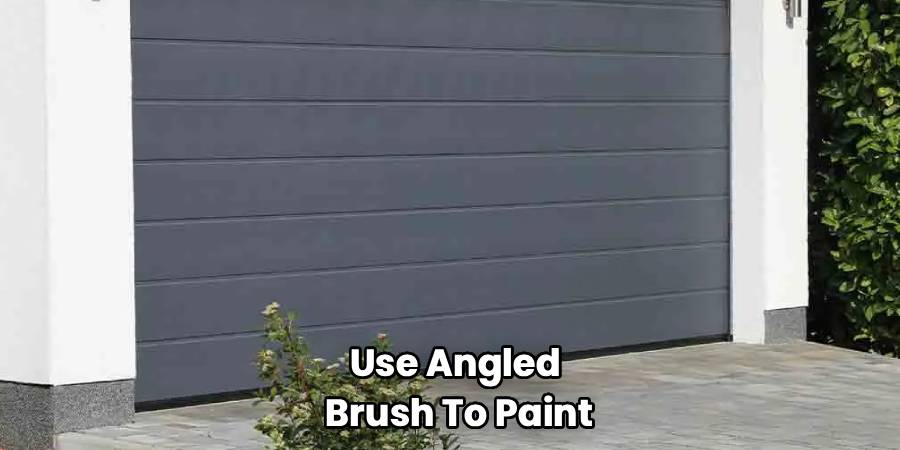
Once your surface is prepped, taped off, and primed (if you had bare metal spots), you are ready for the color. The trick to a professional finish is working in sections to maintain a “wet edge.”
Start with the recessed areas or panels first. Use your angled brush to paint the indented corners and edges of the first panel. Don’t let this dry before you fill in the center. Immediately switch to your roller and fill in the flat center of that panel. This blends the brush strokes with the roller texture.
Move systematically across the door. If you have a sectional door, paint the horizontal rails (the flat spaces between the panels) as you go, or save them for the end—just be consistent. Work from the top of the door down to the bottom so you can catch any drips before they dry.
Step 5: Let It Dry and Assess the Second Coat
Most exterior paints will need about 4 to 12 hours to dry before a second coat, but check your specific paint can for the manufacturer’s “re-coat time.” Do not rush this. If you paint too soon, you might pull up the first layer, creating a gummy mess.
Once the first coat is dry, look at it in different lighting. Metal doors often look streaky after just one coat. A second coat is almost always necessary to get that deep, rich color and uniform sheen. Apply the second coat exactly like the first.
Step 6: Clean Up and Remove Tape
This is the satisfying part, but it requires careful timing. If you wait until the paint is fully cured (rock hard), peeling the tape might rip the paint off the door frame. Ideally, remove the painter’s tape while the final coat is still slightly tacky or just after it has dried to the touch. Pull the tape away from the painted edge at a 45-degree angle for the sharpest line.
Rinse out your brushes and rollers immediately if you used latex paint—warm soapy water usually does the trick.
Frequently Asked Questions
You probably still have a few questions about the specifics of your door. Here are the answers to the most common questions homeowners have when taking on this project.
Do I really need to use primer on a metal garage door?
It depends on the condition of the door. If the original factory finish is intact and you are just changing the color, you can often skip the primer if you use a high-quality “paint and primer in one” product. However, if you sanded down to bare metal, or if there were rusty spots, you absolutely must use a metal primer on those specific areas. Bare metal will rust quickly if covered only by topcoat paint.
Can I use a paint sprayer instead of a roller?
Yes, absolutely. In fact, a sprayer will give you the smoothest, most factory-like finish because it eliminates brush marks entirely. However, sprayers require significantly more prep work. You have to mask off everything nearby—the driveway, the brick siding, the light fixtures, and the plants—because overspray drifts everywhere. If you aren’t comfortable taping off your entire house front, stick to a roller and brush.
What is the best sheen for a garage door?
Most experts recommend a satin or semi-gloss finish. A flat or matte finish tends to hold onto dirt and is harder to scrub clean, which is bad news for a surface exposed to driveway dust and exhaust. High-gloss can look a bit too “plastic” and will highlight every tiny dent or imperfection in the metal. Satin or semi-gloss offers a nice balance: it is easy to clean but hides minor dings.
How long should I leave the garage door open after painting?
This is crucial! If you close the door while the paint is still tacky, the weatherstripping will glue itself to the door, and the panels might stick together. When you eventually open it, the paint will rip. Leave the door open for at least 4 to 6 hours, or until the paint is dry to the touch and no longer feels sticky. If you can, leave it slightly cracked open overnight just to be safe.
Can I paint my garage door black?
You can, but proceed with caution. Dark colors like black or dark gray absorb a tremendous amount of heat from the sun. On a metal door, this heat can cause the metal to expand and warp, or it can cause the paint to fail prematurely. Some paint manufacturers actually void warranties if you use dark colors on certain exterior surfaces. If you want a dark look, search for “vinyl-safe” paints or coatings specifically formulated to reflect heat even in dark pigments.
Conclusion
Learning how to paint metal garage doors is one of the most high-impact DIY projects you can do for your home’s exterior. It protects your investment from the elements and instantly refreshes the look of your house. By taking the time to prep the surface correctly and working methodically from top to bottom, you can achieve a finish that looks like it was done by a pro. Just remember to check the weather, have patience between coats, and enjoy the transformation of your home.