
Let’s be honest: there is never a convenient time for a garage door to break. You hit the button, hear the motor whir, but nothing happens—or worse, the door starts to go up crooked and jams halfway. If you look closely, you might see a frayed wire hanging loose or a cable that has snapped completely. It’s frustrating, but it’s a common issue for homeowners. While it might look intimidating, fixing it yourself is often possible if you have the right tools and a healthy respect for safety protocols.
If you are staring at a snapped wire and wondering how to replace the cable on a garage door, you have come to the right place. This guide is designed to walk you through the process calmly and clearly. We aren’t just going to list mechanical instructions; we are going to talk through the “why” and the “how” so you feel confident handling this repair.
Before we dive in, we need to address the elephant in the room: safety. Garage doors are heavy, and the spring systems that lift them are under immense tension. If you have a torsion spring system (the big spring above the door header), you need to be incredibly careful. If at any point you feel unsure or the tension feels too dangerous to manage, there is no shame in calling a pro. However, if you are handy with tools and ready to tackle a DIY garage door cable repair, let’s get your door moving again.
Step-by-Step Guide to Cable Replacement
Replacing these cables is a precise job. It isn’t necessarily complicated, but it requires patience. You cannot rush this. If you rush, you risk the door falling or a spring snapping back, which can cause serious injury. Take a deep breath, clear your schedule for the afternoon, and let’s go through this together.
Step 1: Gather the Right Tools and Assess the Situation
Before you touch anything, you need to know what you are dealing with. Look at your spring system. Do you have extension springs (long springs running alongside the overhead tracks) or torsion springs (one or two heavy springs on a bar directly above the door opening)? This guide focuses primarily on the standard torsion spring setup, as that is where cables most often fray at the drum connection, but the principles of safety apply to both.
You are going to need a specific set of tools. Don’t try to improvise here. You will need:
- Two winding bars (specifically made for garage doors—do not use screwdrivers)
- A set of locking pliers (Vice-Grips)
- A socket wrench set
- A sturdy ladder (or two, if you have a helper)
- Safety glasses and heavy leather gloves
- Replacement cables (make sure they are the correct length and thickness for your door height/weight)
Check your new cables against the old ones immediately. If the thickness is different, they might not sit in the drum grooves correctly.
Step 2: Secure the Door and Cut the Power
Safety starts here. Go to your garage door opener motor and unplug it. Pull the red emergency release cord to disconnect the door from the trolley. This ensures that no one accidentally hits a remote button while your fingers are near the drums.
If the cable broke while the door was open, the door is likely hanging unevenly. You need to get the door fully closed. If the cable is snapped, do not try to use the opener. Manually lower the door carefully. You might need a helper to support the side with the broken cable so it doesn’t crash down. Once the door is fully closed, use your locking pliers to clamp the track just above one of the rollers. This acts as a lock, preventing the door from shooting up if the remaining spring tension releases unexpectedly.
Step 3: Relieve the Tension on the Springs
This is the critical “do or die” moment of the repair. The cables are attached to drums, which are held tight by the torsion springs. You cannot remove the cable without releasing this tension.
Put on your safety glasses and gloves. Climb your ladder to the center of the door where the springs are. Insert a winding bar fully into one of the holes on the winding cone (the metal part at the end of the spring). Hold that bar firmly—you will feel the full weight of the tension.
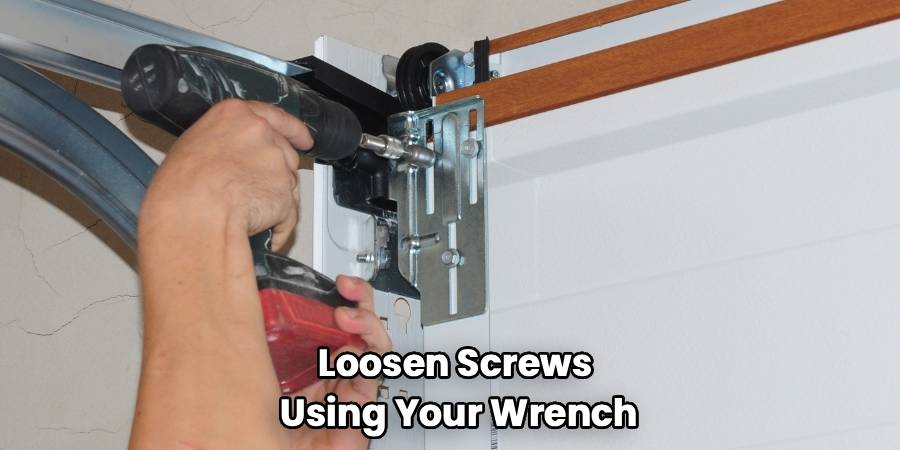
While holding the tension with the winding bar, loosen the two set screws on the winding cone with your wrench. Do not remove them; just loosen them until the spring tension transfers entirely to your winding bar.
Carefully—very carefully—lower the winding bar to unwind the spring. As you lower it, insert the second winding bar into the next hole and take the weight. Repeat this “hand-over-hand” motion until the spring is completely loose. If you have two springs, you must do this for both. Never try to cut corners here.
Step 4: Loosen the Drums
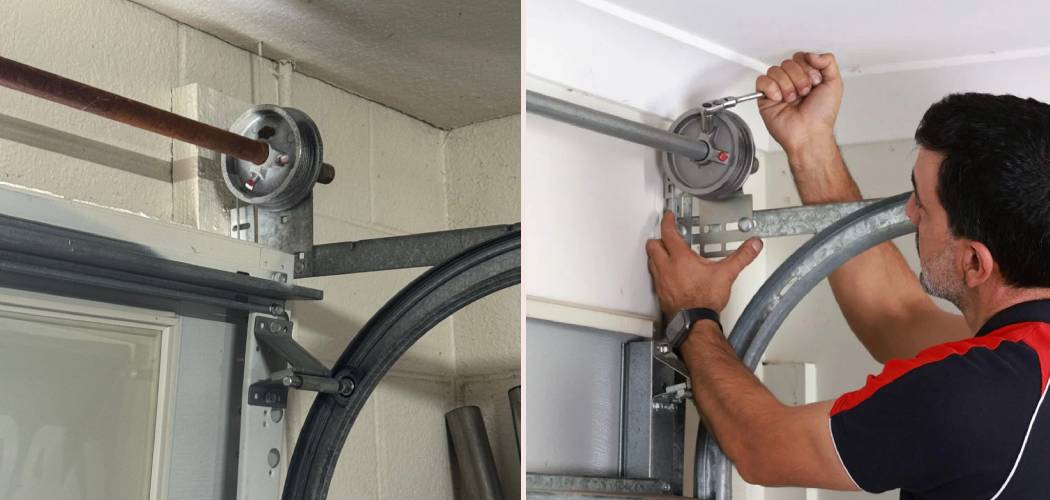
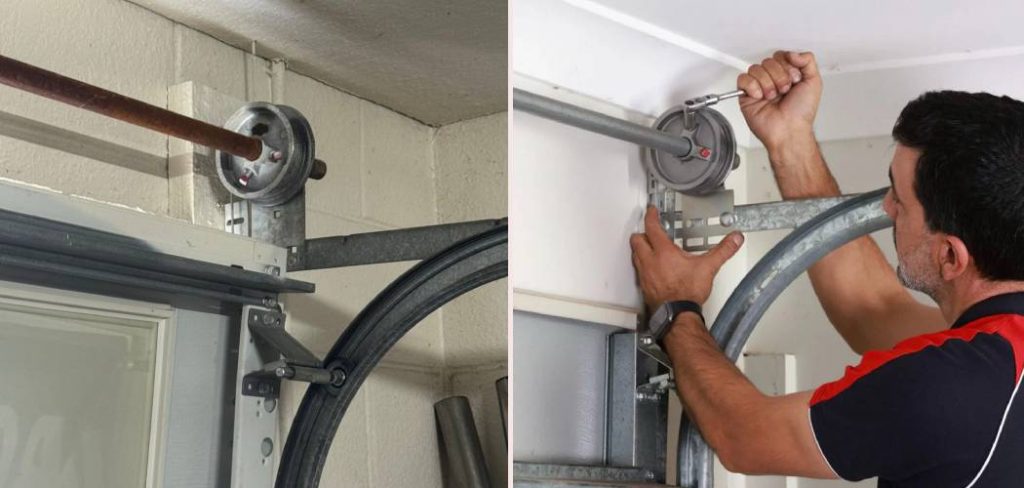
Now that the springs are limp, the tension is off the cables. Move your ladder to the side where the cable is broken. You will see a metal drum at the end of the torsion bar (the long metal pole holding the springs).
The drum is held onto the shaft by set screws. Loosen these screws using your wrench. Once loose, the drum should slide freely on the shaft. This allows you to unhook the old cable. If your cable was frayed but not snapped, you’ll unspool it from the drum now. If it snapped, just remove the remaining chunk from the drum slot.
Step 5: How To Replace The Cable On A Garage Door Loop and Drum
Now we get to the actual replacement. Go down to the bottom of the garage door. The bottom bracket (often called the bottom fixture) has a pin or a loop where the cable attaches. Remove the old cable loop. If the pin is rusty or worn, you might need to clean it up or replace the bracket entirely—though be careful, as the bottom bracket is under tension if you haven’t fully unwound the springs (which we did in Step 3, so you are safe).
Hook the new cable loop onto the bottom bracket pin. Run the cable up the side of the door, passing behind the rollers and vertically toward the drum.
Back up at the top of the ladder, insert the end of the new cable into the slot on the drum. There is a specific entry point that locks the cable stop (the little metal nugget at the end) into the drum. Make sure it is seated deep in the cavity so it won’t slip out.
Step 6: Wind the Cable and Set the Drum
This part requires finesse. You need to wind the new cable onto the drum grooves. The cable must follow the grooves perfectly—no overlapping or crossing. Rotate the drum by hand to wind the slack cable onto it until the cable is taut against the bottom bracket.
Once the cable is tight and sitting in the grooves, slide the drum back against the bearing plate (the bracket holding the bar to the wall). Tighten the set screws on the drum manually first, then wrench-tighten them to lock the drum to the shaft.
Important: You generally should replace both cables at the same time. Even if only one snapped, the other is likely just as old and worn. Uneven cables (one new, one stretched old one) will cause the door to open crookedly. Repeat Steps 4 through 6 for the other side.
Step 7: Re-tensioning the Springs
Once both cables are installed, taut, and the drums are locked, you have to put the power back into the system. This is essentially Step 3 in reverse.
Go back to the center spring. Insert your winding bar. You will wind the spring up (usually toward the ceiling). You need to know how many “turns” your door requires. A standard 7-foot garage door usually takes roughly 30 to 32 quarter-turns (or 7.5 to 8 full revolutions).
As you wind, the cables will tighten. Ensure the cables stay in the drum grooves. If they pop out, stop immediately. Once you hit the required number of turns, hold the tension with one winding bar while you tighten the set screws on the winding cone. Be aggressive with tightening these screws; they hold the weight of the door.
Step 8: Final Adjustments and Testing
Remove the locking pliers from the track. Carefully lift the door by hand about waist high. A perfectly balanced door should stay in place—it shouldn’t crash down (springs too loose) or shoot up (springs too tight).
Learning how to replace the cable on a garage door effectively means you also learn how to balance it. If the door drifts down, add a quarter turn of tension. If it flies up, release a quarter turn.
Once balanced, reconnect the opener trolley and plug the motor back in. Run the opener for a full cycle. Watch the cables like a hawk. They should spool and unspool smoothly without jumping off the drum.
Frequently Asked Questions About Cable Repair
We know that even with a detailed guide, you might have some lingering concerns. It’s natural to have questions when dealing with heavy machinery in your home. Here are some of the most common things people ask when tackling this project.
Why do garage door cables break in the first place?
It is usually a combination of rust and wear. Because the cables are located near the door opening, they are exposed to moisture, humidity, and temperature changes. Over time, the galvanized coating wears off, and the steel strands begin to rust. Additionally, every time the door opens and closes, the cable flexes. Just like bending a paperclip back and forth, eventually, the metal fatigues and snaps. Friction is another enemy; if a cable rubs against a track or a burr on the drum, it will fray prematurely.
Can I just repair the cable instead of replacing it?
No, absolutely not. A garage door cable supports hundreds of pounds of tension. You cannot tie a knot in it, tape it, or clamp two pieces together. Once the structural integrity of the braided wire is compromised—even if it’s just a few frayed strands—the entire cable is a safety hazard. Replacement is the only viable option. The cost of a new cable set is minimal compared to the damage a falling door can cause to your car or your family.
How do I know if I have the right replacement cable?
Cables are rated by thickness (diameter) and length. The most common diameter for residential doors is 1/8 inch, but heavier wood doors might use 5/32 inch or 3/16 inch. Length is determined by the height of your door. A standard 7-foot door needs a specific cable length, while an 8-foot door needs a longer one. If you buy a cable that is too short, the door won’t close. If it’s too long, you’ll have messy slack on the drum. When in doubt, bring your old (broken) cable to the hardware store to match it, or measure the height of your door and buy a “universal” cable set designed for that height.
What happens if the cable tension is uneven?
If one cable is tighter than the other, the door will “rack” or twist as it opens. You might see the door hang crookedly in the opening, or it might get stuck in the tracks because one side is being pulled up faster than the other. This puts massive stress on the rollers and the track system. To fix this, you don’t adjust the cable itself (since the length is fixed); you adjust the position of the drums on the torsion tube to ensure both cables start with equal tautness before you wind the springs.
Is it necessary to replace the rollers at the same time?
It isn’t strictly necessary, but it is a fantastic idea. You are already up on the ladder, you have the tools out, and you are servicing the door. If your rollers are plastic and wobbling, or if the bearings are stiff, swap them out for nylon rollers with ball bearings. It will make your door significantly quieter and smoother, which actually reduces the strain on your new cables and the opener motor. It’s a cheap upgrade that makes a huge difference in daily operation.
How often should I inspect my garage door cables?
Ideally, you should give your garage door a quick visual inspection every three to six months. You don’t need to take anything apart. Just stand inside the garage with the door closed and shine a flashlight up the tracks. Look for rust, fraying, or kinks in the cable. Also, look at the bottom brackets for rust. If you catch a fraying cable early, you can schedule a repair on your own terms rather than waking up to a car trapped in the garage on a Monday morning.
Conclusion
Taking on this repair is a serious achievement for any DIY enthusiast. Now that you have learned how to replace the cable on a garage door, you can rest easy knowing your home is secure and your door is operating safely.
Remember that the longevity of this repair depends on maintenance. Lubricate your springs and bearings (but not the tracks!) with a proper garage door spray lubricant once or twice a year to keep everything moving smoothly. Keep an eye out for rust, especially near the bottom loops where moisture gathers.
While this guide empowers you to handle the fix, always listen to your gut. If a spring looks too rusty to wind safely, or if the drums are cracked, call a professional. Saving money is great, but your safety is priceless. With your new cables installed and your door balanced, you’ve extended the life of your garage door system for years to come. Great job!