
You’ve got your new smart home device in hand, the box is open, and you’re ready to upgrade your front porch security. It can feel a little intimidating to stare at wires and mounting brackets, especially if you aren’t an electrician.
Don’t worry, because this process is much simpler than it looks. Most homeowners can get their new system up and running in under an hour with just a few basic tools.
Whether you are tech-savvy or just learning the ropes of smart home automation, this guide is designed for you. We are going to walk through How To Install Xfinity Video Doorbell so you can start monitoring your deliveries and visitors right away.
Let’s get those tools ready and dive in.
Preparation and Safety First
Before we touch any wires, we need to make sure you have everything you need. Safety is the absolute priority here. Since you are dealing with electricity, even low-voltage doorbell wiring, you need to be careful. Always verify that the power is off before handling any exposed wires.
What You Will Need
Check your Xfinity kit to ensure all the parts are there. You should have the camera unit, a mounting bracket, a chime kit, screws, and wall anchors. You might also find an angled wedge kit if your entryway requires a specific viewing angle.
Grab a Phillips-head screwdriver, as this is usually the only tool required for the hardware. A power drill might be necessary if you are mounting into brick, stucco, or concrete. It is also helpful to have a smartphone handy with the Xfinity app downloaded and logged in.
Check Your Voltage
Your existing doorbell wiring needs to have the right amount of power. Most smart video doorbells require a transformer that outputs between 16 and 24 volts AC. If your home is older, the doorbell transformer might be lower voltage.
You can check this with a multimeter if you have one. If you don’t, check the stamping on your chime box or the transformer itself, usually located in the garage, attic, or basement.
Turn Off the Power
Go to your home’s breaker box. Locate the switch that controls the doorbell. Flip it to the “Off” position. Test your existing doorbell button to make sure it doesn’t ring. If it is silent, you are safe to proceed.
Installation Guide
This section covers the physical setup of your new device. We will break this down into manageable chunks so you never feel overwhelmed. Follow these steps closely to ensure a solid connection and proper functionality.
Install the Chime Kit
The chime kit is a small device that bridges the gap between your new camera and your old mechanical chime. It regulates power and ensures your indoor bell still rings when someone presses the button outside. Locate your internal chime box, which is usually mounted high on a wall in a hallway or living room.
Remove the plastic cover carefully. You will see two wires connected to terminals, usually labeled “Front” and “Trans” (or transformer). Loosen these screws slightly, but don’t remove the wires completely. Take the wire harness from your Xfinity kit.
Connect the wire harness to the terminals as shown in your manual—usually, it doesn’t matter which wire goes to which terminal for this specific kit, but double-check the diagram. Tighten the screws back down to secure both the original wires and the new harness forks. Use the adhesive tape provided to stick the small chime module inside the box where it won’t interfere with the moving parts. Replace the cover and head outside.
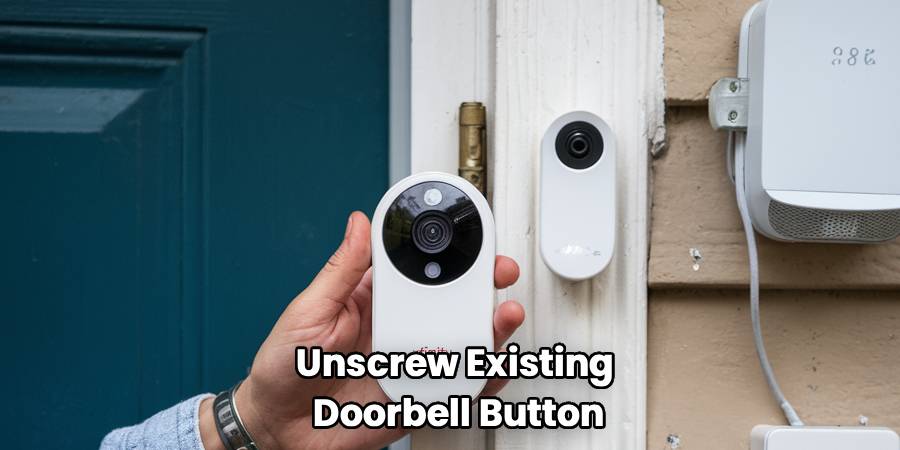
Remove Your Old Doorbell
Now go to your front door. Unscrew the existing doorbell button from the wall. Gently pull it away from the siding or trim. You will see two wires connected to the back.
Loosen the screws on the back of the old button to release the wires. Make sure the wires don’t slip back into the wall hole! Wrap them around a pencil or tape them to the wall temporarily if they seem short. Clean the area where the old button was mounted so the new bracket sits flush.
Position the Mounting Bracket
Take the mounting bracket from your kit. Hold it up against the wall where the wires are protruding. Pull the wires through the center hole of the bracket. If the screw holes from your old doorbell match the bracket, you are in luck. If not, use the bracket as a template to mark new pilot holes with a pencil. If you are drilling into wood, you can usually screw the bracket directly in.
For brick or stucco, drill pilot holes and insert the plastic wall anchors provided in the kit. Secure the bracket to the wall using the provided screws. Make sure it is level and firmly attached. If you need a better viewing angle, attach the angled wedge to the wall first, then attach the bracket to the wedge.
Connect the Wiring
This is the part where the magic happens. Take the two wires coming from your wall. Loosen the two terminal screws on the back of your new video doorbell unit. Wrap one wire around each screw. It generally does not matter which wire goes to which screw for doorbell wiring, as it is alternating current.
Tighten the screws securely so the wires have good contact. If your wall wires are too short, use the wire extenders and wire nuts included in your kit to give yourself more slack. Push any excess wiring gently back into the wall cavity.
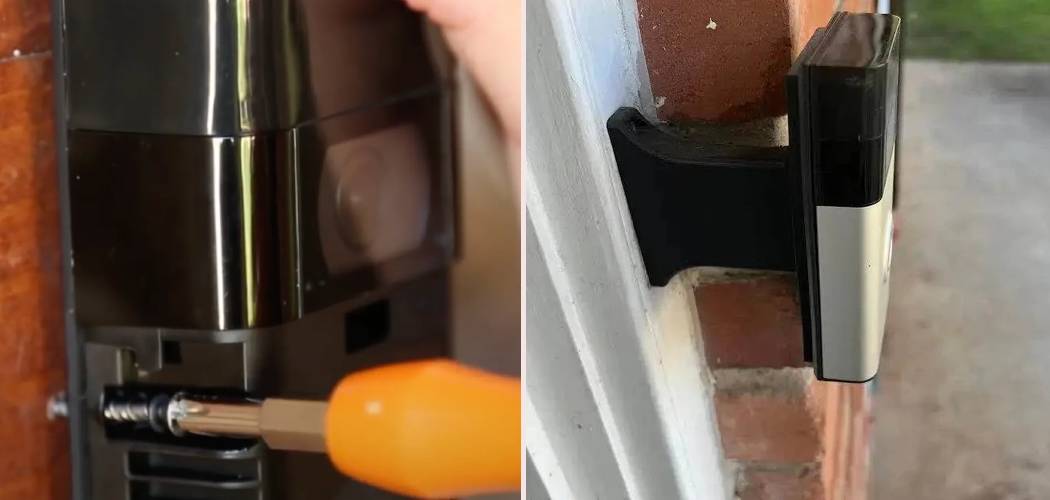
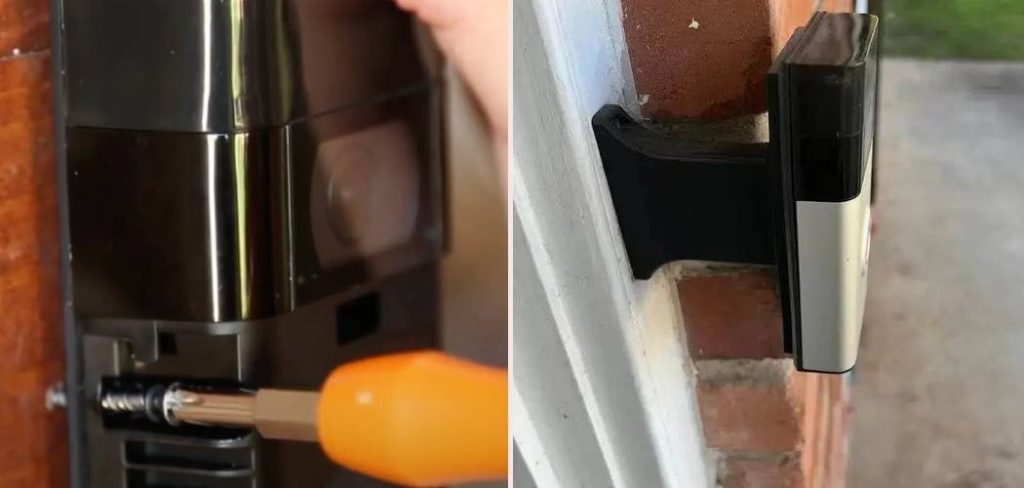
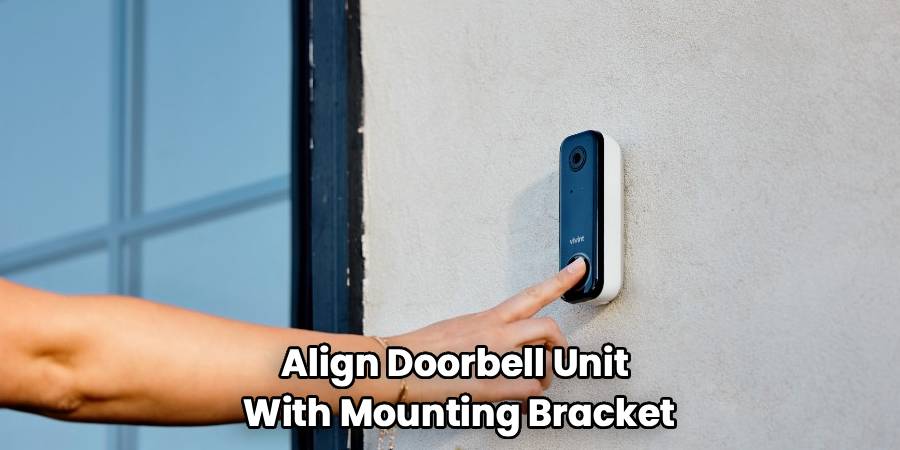
Secure the Doorbell
Align the video doorbell unit with the mounting bracket you just installed. It usually clicks or slides into place. You might need to push it in and then slide it down to lock it. Insert the security screw into the bottom or side of the unit (depending on the model) to prevent theft.
Use the special star-shaped screwdriver or tool provided in the kit for this step. Don’t overtighten it; just make sure the unit can’t be easily removed. Remove the protective film from the camera lens.
Restore Power and Test
Head back to your breaker box. Flip the switch back to the “On” position. Return to the front door. Look for a light on the front of the doorbell.
It might be flashing white or blue, indicating it is receiving power and ready for setup. If there is no light, check your breaker again or double-check your wiring connections. Give the button a press to see if your indoor chime rings. If it does, the hard part is over!
Connect to the App
Open the Xfinity app on your smartphone. Navigate to the “Home” or “Devices” tab. Select the option to “Add a Device.” Choose “Video Doorbell” from the list of available devices. Follow the on-screen prompts to connect the camera to your WiFi network.
You may need to scan a QR code on the back of the device or on the box insert. The app will walk you through naming your camera (e.g., “Front Door”). Once connected, you will see a live video feed on your phone. This confirms that you successfully learned How To Install Xfinity Video Doorbell and the system is live.
Troubleshooting Common Issues
Even with the best instructions, things can sometimes go sideways. Here are a few quick fixes for common hiccups.
Poor WiFi Signal
If the video freezes or takes a long time to load, your WiFi signal might be weak at the front door. Exterior walls, especially brick or stone, block signals effectively. Check your signal strength in the device settings. You might need a WiFi extender or an xFi Pod plugged in near the front of the house to boost the connection.
Chime Not Ringing
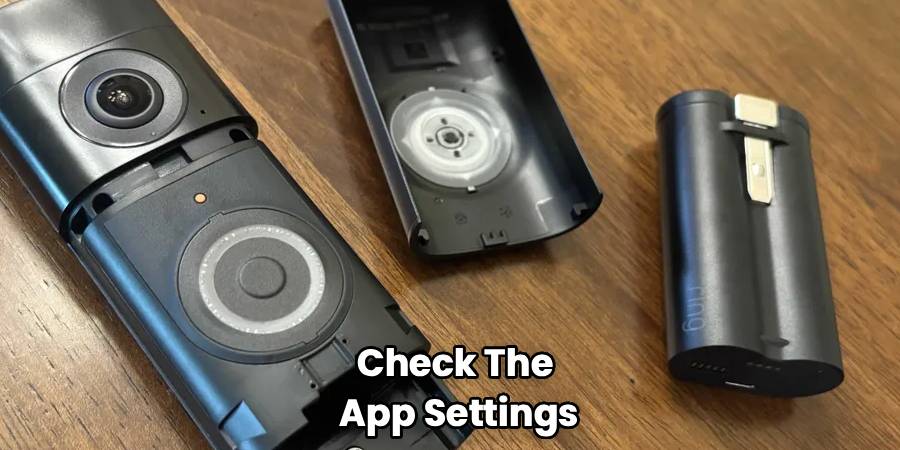
If the app works but the indoor chime is silent, check the app settings. There is often a setting for “Indoor Chime” that needs to be toggled on. Also, revisit your chime kit installation.
Ensure the wires are secure and not touching any moving metal parts inside the box. If you have a digital chime (one that plays a melody rather than a “ding-dong”), ensure the switch on the chime kit is set to “Digital.”
Video Quality Issues
If the image looks blurry, ensure the plastic film is fully removed. Wipe the lens with a soft, microfiber cloth. Check for glare from nearby porch lights.
If night vision is washed out, a nearby wall might be reflecting the infrared light. Using the angled wedge kit can point the camera away from the side wall and improve night clarity.
Enhancing Your Experience
Now that you are up and running, let’s make the most of your new gadget. Customizing your settings ensures the device works for you, not the other way around.
Motion Zones
You don’t want a notification every time a car drives past your house. In the app, you can set up motion zones.
This allows you to draw a specific area on the screen that you want to monitor. Focus on your walkway and porch area. Exclude the street and the sidewalk to reduce false alarms.
Notifications
Decide how often you want to be bothered. You can choose to be notified for all motion, or only when a person is detected.
Smart detection features can distinguish between people, pets, and vehicles. Toggle these settings to suit your lifestyle. Turning off vehicle detection is usually a good idea for street-facing cameras.
24/7 Recording
If you have the appropriate subscription, your camera can record continuously. Review your timeline to see what happened while you were sleeping or at work.
Footage is stored in the cloud, so you don’t need to worry about memory cards. Check your plan details to see how many days of history are saved.
Frequently Asked Questions
You might still have a few questions about your new security setup. Here are answers to the most common inquiries we hear from homeowners.
Do I need a professional to install this?
No, you do not generally need a professional. The device is designed for DIY installation. If you are comfortable using a screwdriver and can follow basic instructions, you can do it.
However, if your home has no existing doorbell wiring at all, you might need an electrician to run new wires and install a transformer.
Does the doorbell work if the WiFi goes out?
The camera requires an active internet connection to stream video and send alerts. If your WiFi goes down, you won’t be able to view the live feed.
However, the physical doorbell button will usually still ring your indoor chime because that part is hardwired. Once the internet is restored, the device will automatically reconnect.
How do I reset the device if it freezes?
If the device becomes unresponsive, you can perform a factory reset. You will typically need to remove the security screw and take the unit off the mounting bracket.
Look for a reset button on the back or side of the unit. Press and hold it for about 10–15 seconds until the light flashes. You will then need to set it up again in the app as if it were new.
Can I use my own router with this doorbell?
Yes, the device connects to standard WiFi networks. While it is optimized for the Xfinity ecosystem, it works with most routers.
Just ensure you are connecting to a 2.4GHz network, as this frequency has better range for penetrating exterior walls. Some modern mesh systems handle this automatically.
Is the device weather-resistant?
Yes, the hardware is built to withstand the elements. It is rated for outdoor use and can handle rain, snow, and temperature fluctuations.
However, it is not submersible. Using silicone sealant around the top and sides of the mounting bracket (leaving the bottom open for drainage) can add extra protection against moisture getting behind the unit.
Conclusion
Knowing How To Install Xfinity Video Doorbell gives you peace of mind and total control over your home’s entryway. It is a satisfying weekend project that pays off immediately with enhanced security and convenience.
You no longer have to guess who is knocking or worry about packages sitting out in the open. Remember to check your app settings periodically to ensure everything stays updated. With your new smart eye on the front porch, you can relax and enjoy a safer, smarter home environment.