

You’re standing in the driveway with a brand-new car seat, the instruction booklet in one hand, and a knot in your stomach. Your baby’s due in three weeks. The seat came in a box with a dozen straps, clips, and warning labels — and none of it makes sense.
You’re not alone in this feeling.

Every year, thousands of parents face this exact moment. And here’s the hard truth: most car seats get installed wrong. Studies show that around half of all car seats are used or installed incorrectly.
That’s the real cost of a rushed installation: not a loose strap, but a baby who isn’t protected when it matters most.
The good news? A safe install isn’t complicated once someone walks you through it. In this guide, you’ll learn exactly how to install a rear facing infant car seat — step by step, using either the LATCH system or your seat belt. You’ll also learn the mistakes to avoid and how to check your work.
Why Rear Facing Matters So Much
Before you touch a single strap, it helps to know why rear facing is the rule for babies.
A baby’s head is heavy. Their neck is weak. In a sudden stop or crash, a forward-facing seat throws that head forward while the neck holds it back.
A rear facing seat does something different. It cradles the head, neck, and spine together, spreading the force across the whole body.
That’s the whole point: not comfort, but crash protection built for a body that can’t protect itself yet.
Safety experts agree on the timeline:
- Keep your baby rear facing until at least age 2.
- Better yet, keep them rear facing until they hit the height or weight limit printed on the seat.
- Never rush to turn the seat forward “because they look cramped.” Bent legs are fine. A broken neck is not.
In short: rear facing isn’t a phase to get through — it’s the safest position your baby can ride in.
What You’ll Need Before You Start
You don’t need special tools. Most of this is already in your car or your hands.
Gather these first:
- Your car seat and its base (if it has one)
- The car seat manual — read it, don’t skip it
- Your vehicle owner’s manual — the car seat section matters
- A tightly rolled towel or pool noodle (for angle adjustment)
- A little muscle to tighten straps firmly
One thing to check before anything else.
Find out if your car has the LATCH system. LATCH stands for Lower Anchors and Tethers for Children. Look for small metal bars tucked in the crease where the back and bottom seat cushions meet. Most cars made after 2002 have them.
You’ll install the seat one of two ways: with LATCH or with your car’s seat belt. Both are safe when done right. You never use both at the same time unless your manual specifically allows it.
Warning: Never install a rear facing infant seat in a front seat with an active airbag. A deploying airbag can seriously injure or kill an infant. The back seat is always the safest spot.
How to Install a Rear Facing Infant Car Seat Step by Step
Here’s the core process. It’s the same idea whether you use a base or install the seat directly: place it, secure it, set the angle, and check for tightness.
Let’s walk through each method.
Method 1: Installing With the LATCH System
LATCH is often the easiest method for first-timers because the anchors are built for car seats.

- Place the base (or seat) in the back seat, facing the rear of the car.
- Find the lower anchors in the seat crease. Give them a firm tug to confirm they’re solid.
- Attach the LATCH connectors from the car seat to those anchors. You’ll hear or feel a click.
- Push down hard on the base with your knee or hand while pulling the strap tight.
- Tighten the LATCH strap until the base barely moves.
- Set the recline angle (more on that below).
- Test it. Grab the base near the anchor path and wiggle it side to side and front to back.
The base should move less than one inch in any direction. If it moves more, tighten again.
Method 2: Installing With the Seat Belt
The seat belt method is just as safe and works in every car, even older ones.
- Place the base or seat rear facing in the back seat.
- Thread the seat belt through the correct belt path — it’s clearly marked on the car seat, usually blue for rear facing.
- Buckle the seat belt and pull it all the way out until it locks. Most belts click into a locked mode when fully extended.
- Push down firmly on the base while feeding the slack back into the belt.
- Confirm it’s locked by tugging the belt — it shouldn’t loosen.
- Set the recline angle.
- Test the movement at the belt path. Less than one inch of movement means you’re solid.
If your seat belt won’t lock, check your manual. Some older cars need a locking clip, which usually comes with your car seat.
Getting the Recline Angle Right
This step trips up a lot of parents, so let’s slow down.
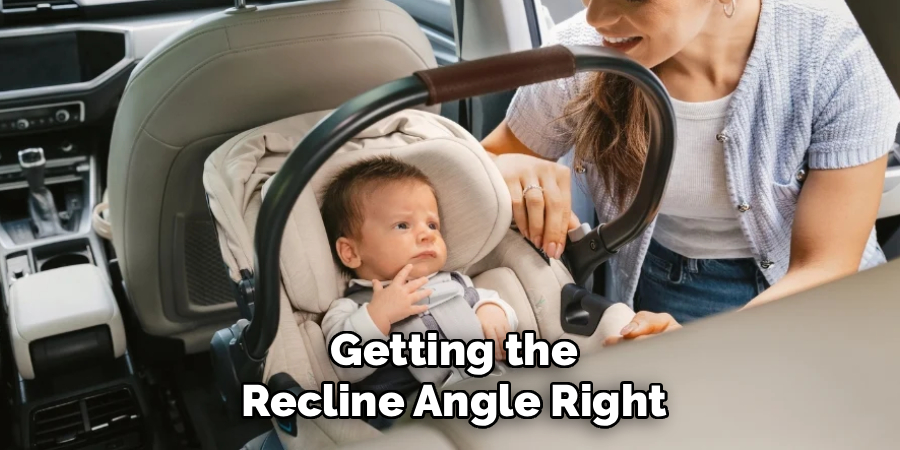
A newborn needs the seat reclined enough to keep their airway open. Too upright, and their head can slump forward, blocking their breathing.
- Most seats have a built-in level indicator — a line, bubble, or ball that shows when the angle is correct.
- If the base sits too upright, tuck a rolled towel or pool noodle under the front edge of the base.
- Adjust until the indicator shows the safe zone.
In short: place the seat, lock it down tight, set the angle, then test — every single time.
LATCH vs. Seat Belt: Which Should You Use?
Both methods keep your baby safe. The right choice depends on your car, your seat, and what feels secure to you.
This table breaks it down.
| Feature | LATCH System | Seat Belt | Best For |
| Ease of use | Easier for beginners | Takes more practice | First-time parents lean toward LATCH |
| Availability | Cars made after 2002 | Every car, any age | Seat belt wins for older vehicles |
| Weight limit | Limited (check manual) | Higher, follows seat limit | Seat belt for heavier seats or older babies |
| Middle seat use | Often not allowed | Usually allowed | Seat belt for the center seat |
| Tightness feel | Consistent, clicks in | Depends on belt locking | LATCH for a repeatable, snug fit |
Notice one thing here.
There’s a weight limit on LATCH. Once your child plus the car seat passes the LATCH weight rating (often around 65 pounds combined), you must switch to the seat belt. Your manual lists the exact number.
How to Check Your Install Is Safe
You’ve done the work. Now you confirm it holds.
Run through this quick safety check every time:
- The inch test: Grab the seat at the belt path or anchor. It shouldn’t move more than one inch side to side or front to back.
- The angle check: The level indicator sits in the safe zone.
- The belt path check: The belt or LATCH strap runs through the correct rear facing path.
- The airbag check: No active front airbag near the seat.
- The harness check: When baby’s in, straps sit at or below their shoulders, snug enough that you can’t pinch slack at the collarbone.
If any check fails, stop and fix it before you drive.
Still unsure? You can get a free car seat inspection from a Certified Child Passenger Safety Technician. Many fire stations, hospitals, and police stations offer this. There’s no shame in asking — even the pros double-check each other’s work.
Common Mistakes & Troubleshooting
Even careful parents make these errors. Here’s what goes wrong most often, why it happens, and how to fix each one.
1. The Seat Is Too Loose
Why it happens: You tighten by hand while standing outside the car. That’s not enough force to compress the seat cushion.
How to fix it: Put your weight into it. Press your knee or hand firmly into the base while you pull the strap or feed the belt. Then run the inch test. A loose seat is the single most common — and most dangerous — install mistake.
2. Wrong Recline Angle
Why it happens: Car seats sit differently in every vehicle. What looks level to your eye may leave a newborn’s head slumped forward.
How to fix it: Trust the built-in level indicator, not your guess. Add a rolled towel under the base to adjust. For a newborn, a slightly reclined angle keeps their airway open and safe.
3. Harness Straps Set Too High
Why it happens: People assume higher straps mean more room. For rear facing, that’s backward.
How to fix it: For a rear facing infant seat, the harness straps must come from at or below your baby’s shoulders. Move the straps to the correct slot before your baby ever rides.
4. Using LATCH and Seat Belt Together
Why it happens: It feels like two anchors must be safer than one.
How to fix it: Pick one method unless your car seat manual clearly approves both. Using both can create uneven pressure the seat wasn’t tested for. When in doubt, choose one and lock it down tight.
5. Bulky Clothing Under the Straps
Why it happens: You want your baby warm, so you buckle them in with a puffy coat.
How to fix it: Puffy jackets flatten in a crash, leaving the harness dangerously loose. Buckle your baby in thin layers, then lay a blanket over the straps for warmth.
6. Chest Clip in the Wrong Spot
Why it happens: The clip slides down easily and parents don’t notice.
How to fix it: Position the chest clip at armpit level, not on the belly. A low clip lets the straps slip off the shoulders in a crash. Check it every trip.
One reminder: if your car seat has been in a crash, has cracks, or is past its expiration date (yes, they expire), stop using it. A damaged seat can’t protect your baby no matter how well you install it.
Frequently Asked Questions
How tight should a rear facing car seat be?
The seat shouldn’t move more than one inch side to side or front to back when you tug it at the belt path or anchor point. If it moves more than that, it’s too loose. Press your weight into the base as you tighten to get a firm, safe hold.
Can I install a rear facing car seat in the middle seat?
Often yes, and the middle seat is statistically the safest spot in the car. But many vehicles don’t have LATCH anchors in the middle, so you’ll likely use the seat belt. Check both your car and car seat manuals to confirm middle installation is allowed.
Is LATCH or seat belt better for a rear facing infant seat?
Both are equally safe when installed correctly. LATCH is usually easier for beginners, while the seat belt works in every car and handles higher weight limits. Pick the one that gives you a snug, secure fit — and never use both at once unless your manual allows it.
How long should my baby stay rear facing?
Keep your baby rear facing until at least age 2, and ideally until they reach the height or weight limit printed on the seat. Rear facing protects a baby’s head, neck, and spine far better than forward facing. Don’t rush the switch just because their legs look cramped.
Do I really need the car seat base?
Not always. Many infant seats can install directly with the seat belt, no base required — handy for taxis or a second car. But the base makes daily use easier and clicks in fast. Whichever you use, run the inch test to confirm it’s tight.
Wrapping Up
That knot in your stomach? It fades the moment you feel the seat lock in tight and pass the inch test.
You now know how to install a rear facing infant car seat two ways — with LATCH or the seat belt — plus how to set the angle, check your work, and dodge the mistakes that trip up most parents. The pattern is simple: place it, tighten it, set the angle, then test every time.
Take your time. Double-check. And when in doubt, book that free inspection with a certified tech.
Want to keep your little one safe as they grow? Check out our guide on [when to switch to a convertible car seat] for your next step.

About
Robert D is a distinguished figure in the world of Safety Systems and Risk Management, with a decade of expertise creating innovative and sustainable workplace solutions. His professional focus lies in merging traditional safety protocols with modern digital monitoring techniques, fostering environments that are both practical and hazard-conscious. As the lead author of SafetyRift, Robert delves into the art and science of risk mitigation, inspiring safety officers and industry professionals alike to bridge the gap between compliance and culture.
Education
RMIT University (Melbourne, Australia)
Associate Degree in Design (Industrial Safety)
-
Focus on sustainable safety infrastructure, industry-driven risk assessments, and practical implementation.
-
Gained hands-on experience with traditional hazard identification and digital monitoring tools, such as IoT safety sensors and predictive analytics software.
Nottingham Trent University (United Kingdom)
Bachelor’s in Occupational Health and Safety (Honors)
-
Specialized in systemic design with a focus on blending human behavior psychology with modern safety production techniques.
-
Participated in industry-wide projects, working with global logistics and manufacturing firms to gain real-world insights into large-scale safety deployments.
Publications and Impact
In SafetyRift, Robert shares his insights on safety design processes, protective materials, and strategies for efficient, accident-free production. His writing bridges the gap between foundational safety knowledge and modern industrial needs, making it a must-read for both budding safety coordinators and seasoned risk management professionals.
