

Losing your car keys is a frustrating experience that can leave you feeling stranded and helpless. If you own an older General Motors vehicle, you might think your only option is calling an expensive locksmith or towing your car to a dealership. Fortunately, that isn’t always the case. With a little patience and the right tools, you can handle this repair yourself right in your driveway.

This guide is designed specifically for beginners who need a safe, cost-effective solution. We will walk you through the entire process, ensuring you understand exactly how to remove GM ignition lock cylinder without key safely and effectively. By following these instructions, you can save significant money and gain the satisfaction of fixing your own vehicle. Let’s get your car started again without breaking the bank.
Why You Might Need to Replace Your Ignition Cylinder
Ignition lock cylinders are mechanical components that endure significant wear and tear over the lifespan of a vehicle. Every time you insert your key, turn it to start the engine, and remove it, the internal tumblers and springs degrade slightly. Eventually, these internal mechanisms can fail completely, leaving you unable to turn the ignition even if you have the correct key. In other scenarios, keys break off inside the lock, or the keys are simply lost entirely.
For GM vehicles specifically, particularly older models from the 90s and early 2000s, ignition cylinder failure is a common issue. Replacing the cylinder is often more cost-effective than attempting to repair the intricate internal parts. Furthermore, if you have lost your keys, replacing the cylinder is necessary to ensure the security of your vehicle, as it allows you to start fresh with a new set of keys. Understanding this process empowers you to maintain your vehicle’s security and functionality without relying on expensive external services.
8 Step Methods Guide on How to Remove GM Ignition Lock Cylinder without Key
Step 1: Disconnect the Battery and Prepare the Area
The very first step in this process is ensuring your safety and the safety of your vehicle’s electrical system. Locate the battery under the hood of your car and disconnect the negative terminal, which is usually marked with a minus sign or is black in color. This prevents accidental shorts or sparks while you are working near the steering column wiring.
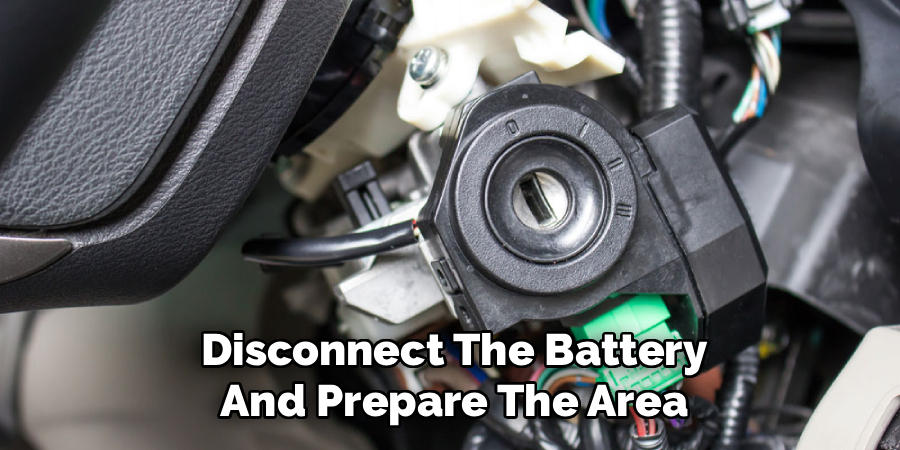
Once the power is cut, move inside the car and adjust the driver’s seat as far back as it will go. You need plenty of room to work comfortably around the steering wheel. Gather all your tools and place them on the passenger seat or floorboard where they are easily accessible. Taking these few minutes to prepare the workspace prevents frustration later and ensures you aren’t scrambling for a screwdriver while holding a plastic panel in place.
Step 2: Remove the Steering Column Plastic Covers
To access the ignition cylinder, you must remove the plastic shroud that surrounds the steering column. This cowling is typically held together by two or three screws located on the underside of the column. Use your Phillips head screwdriver to remove these screws and place them in a cup or magnetic tray so they don’t get lost.
Once the screws are out, the plastic cover usually splits into a top and bottom half. Gently separate them by pulling them apart; you might need to tilt the steering wheel down to get the upper half off easily. Be gentle with the plastic tabs, as older plastic can be brittle and prone to cracking. Removing these covers reveals the metal structure of the steering column and the housing where the ignition cylinder sits.
Step 3: Locate the Ignition Cylinder Release Tab
With the plastic covers removed, look closely at the ignition cylinder housing. You are looking for a small hole or access point on the metal casing surrounding the lock cylinder. On many GM models, specifically older ones, there is a specific retention pin that holds the cylinder in place inside the housing.
This pin is usually only accessible when the key is turned to the “Start” or “Run” position, but since we don’t have a key, we have to bypass this or use a different method depending on the specific model year. Locate the small access hole that aligns with the retention pin. If you cannot turn the lock at all because you lack the key, you may need to locate the release pin mechanism that is accessible without rotation, or prepare for more invasive removal methods.
Step 4: Drilling the Lock Cylinder (If Necessary)
If the ignition is locked in the “Off” position and you cannot rotate it, you may need to drill out the internal pins to free the mechanism. This sounds intimidating, but it is a standard procedure when you are learning how to remove GM ignition lock cylinder without key. Use a high-quality metal drill bit that is roughly the width of the keyway. Carefully drill straight into the center of the key slot where the key would normally go.
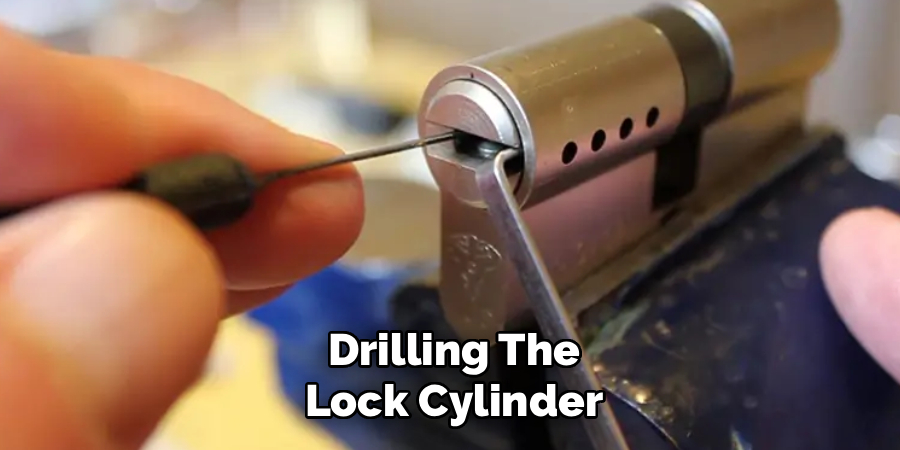
You want to drill deep enough to destroy the internal tumblers that keep the lock secure. Go slowly and apply steady pressure, being careful not to drill too deep into the steering column itself. Stop periodically to blow out metal shavings. Once the tumblers are destroyed, you should be able to turn the lock mechanism using a flathead screwdriver as if you had a key.
Step 5: Rotate the Cylinder to the “Run” Position
Once you have compromised the internal tumblers via drilling, or if you are lucky enough that the lock is worn and can be turned with a screwdriver, you need to rotate the cylinder. Insert a flathead screwdriver into the keyway and turn it clockwise to the “Run” or “On” position. You are not trying to start the engine, but simply aligning the internal mechanism with the release pin hole you identified earlier.
This specific alignment is crucial because the retention pin that holds the cylinder in the steering column can only be depressed when the lock is in this specific position. If the cylinder does not turn easily, check to ensure you have drilled out all the pins sufficiently. Sometimes a few metal fragments can jam the rotation, so try wiggling the screwdriver while turning.
Step 6: Depress the Retention Pin
Now that the cylinder is rotated to the correct position, look for that small access hole on the top or side of the metal ignition housing again. Insert a small tool, such as a sturdy paperclip, a small Allen wrench, or a specialized punch tool, into this hole. You should feel a spring-loaded pin inside. Press down firmly on this pin.
This pin acts as the anchor keeping the cylinder inside the column housing. While you are keeping steady pressure on the pin, grab the body of the ignition lock cylinder (or the screwdriver currently inserted in it) and pull it outward away from the steering column. It might be a bit sticky due to old grease or dirt, so give it a firm wiggle while pulling.
Step 7: Slide the Old Cylinder Out
With the retention pin depressed, the lock cylinder should slide out of the housing relatively easily. Continue pulling the cylinder straight out until it is completely free from the steering column. If it resists, double-check that the retention pin is fully depressed and that the cylinder is still in the “Run” position.
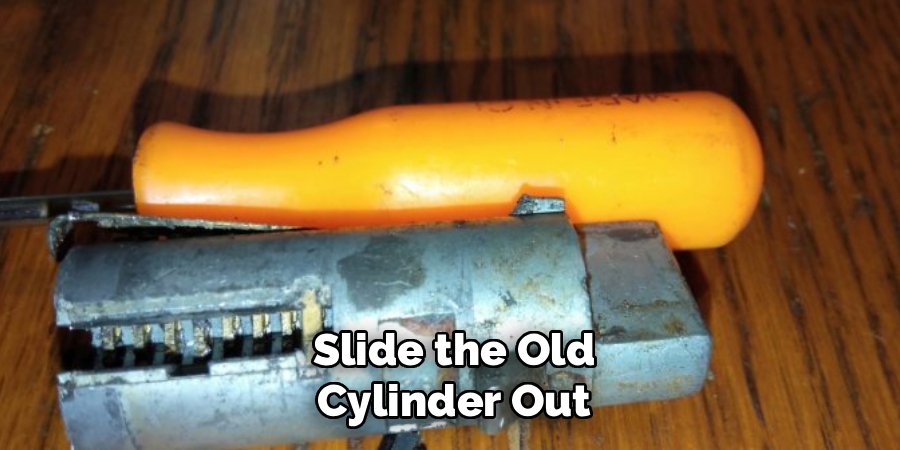
Sometimes the cylinder can bind slightly on the way out, so a little gentle jiggling helps. Once removed, inspect the housing for any metal shavings left over from the drilling process. It is vital to clean this area thoroughly before installing anything new. Use compressed air or a small vacuum to remove debris. This ensures that the new cylinder will seat perfectly and function smoothly without jamming.
Step 8: Prepare and Install the New Cylinder
Take your new GM ignition lock cylinder out of its packaging. Compare it to the old one to ensure they are identical in size and shape. Your new cylinder will come with new keys. Insert one of the new keys into the new cylinder and turn it to the “Run” position. This retracts the retention pin on the new unit, allowing it to slide into the housing.
Align the new cylinder with the grooves in the steering column housing and gently slide it in. You should feel it click or seat into place. Once it is fully inserted, turn the key back to the “Off” position. This action extends the retention pin, locking the new cylinder securely into the steering column housing.
Reassemble the Steering Column Covers
Test the new lock cylinder to make sure it turns smoothly through all positions—Accessory, Off, Run, and Start. Once you are satisfied that the mechanism is working correctly, it is time to put everything back together. Reattach the top and bottom halves of the plastic steering column shroud. Align the plastic tabs carefully and snap them back into place.
Reinsert the screws you removed in Step 2 and tighten them snugly, but be careful not to overtighten and crack the plastic. Reconnect your car battery’s negative terminal. You have now successfully completed the task of how to remove GM ignition lock cylinder without key and installed a brand new one. Sit in the driver’s seat, take a deep breath, and start your engine with your new key.
Frequently Asked Questions
Is It Illegal to Remove an Ignition Cylinder Myself?
Generally, it is not illegal to remove or replace an ignition cylinder on a vehicle that you legally own. Mechanics and car owners perform this repair frequently. However, tampering with ignition locks on vehicles you do not own is illegal. Always ensure you have proper documentation and ownership of the vehicle before performing any work that involves bypassing security features like ignition locks.
Do I Need to Reprogram My Car Key After Replacement?
This depends entirely on the year of your GM vehicle. Older models (pre-1990s) typically use purely mechanical keys that do not require programming. However, newer models equipped with GM’s PASS-Key or Passlock theft-deterrent systems will require a “relearn” procedure. This usually involves a sequence of turning the key and waiting for security lights to turn off, which syncs the new sensor to the car’s computer.
Can I Use a Screwdriver Instead of Drilling?
Using a screwdriver to force the ignition is often called “punching” the ignition. While it is possible on some very old or very worn locks, it is generally risky. Forcing the lock with a screwdriver can damage the steering column housing itself, turning a cheap repair into an expensive one. Drilling is a more controlled method that destroys only the disposable cylinder, preserving the permanent housing structure.
What Should I Do If the Cylinder Is Stuck Halfway Out?
If the cylinder gets stuck while you are pulling it out, the retention pin likely isn’t fully depressed, or the cylinder isn’t perfectly aligned in the “Run” position. Don’t force it, as you might score the metal housing. Push the cylinder back in slightly, ensure the rotation is correct, and try pressing the retention pin again with your tool before pulling outward gently.
How Long Does This Repair Typically Take?
For a beginner, this repair usually takes between 60 to 90 minutes. Most of that time is spent carefully removing plastic panels and drilling the lock slowly to avoid damage. A professional might do it in 20 minutes, but rushing increases the risk of damaging the steering column. Take your time, work methodically, and prioritize safety over speed to ensure a successful repair.
Conclusion
Taking control of your own vehicle repairs is empowering and practical. By following this guide, you have learned that a lost key doesn’t have to result in a massive towing bill or dealership invoice. We have covered the essential safety prep, the careful removal of the steering column covers, and the precise method required to drill and remove the old unit. Remember, patience is your best tool during this process.
Whether you are fixing up an old project car or just trying to get to work, knowing how to remove GM ignition lock cylinder without key is a valuable skill in your automotive DIY arsenal. With your new cylinder installed and your engine running, you can drive with confidence knowing you saved money and solved the problem yourself.

About
Robert D is a distinguished figure in the world of Safety Systems and Risk Management, with a decade of expertise creating innovative and sustainable workplace solutions. His professional focus lies in merging traditional safety protocols with modern digital monitoring techniques, fostering environments that are both practical and hazard-conscious. As the lead author of SafetyRift, Robert delves into the art and science of risk mitigation, inspiring safety officers and industry professionals alike to bridge the gap between compliance and culture.
Education
RMIT University (Melbourne, Australia)
Associate Degree in Design (Industrial Safety)
-
Focus on sustainable safety infrastructure, industry-driven risk assessments, and practical implementation.
-
Gained hands-on experience with traditional hazard identification and digital monitoring tools, such as IoT safety sensors and predictive analytics software.
Nottingham Trent University (United Kingdom)
Bachelor’s in Occupational Health and Safety (Honors)
-
Specialized in systemic design with a focus on blending human behavior psychology with modern safety production techniques.
-
Participated in industry-wide projects, working with global logistics and manufacturing firms to gain real-world insights into large-scale safety deployments.
Publications and Impact
In SafetyRift, Robert shares his insights on safety design processes, protective materials, and strategies for efficient, accident-free production. His writing bridges the gap between foundational safety knowledge and modern industrial needs, making it a must-read for both budding safety coordinators and seasoned risk management professionals.
