
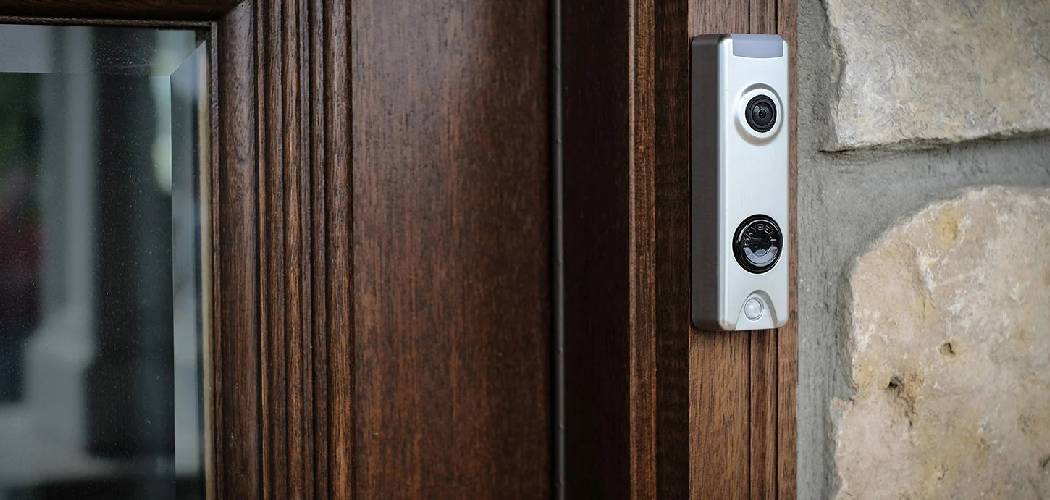
Upgrading your home security is one of the smartest decisions you can make. A camera doorbell not only lets you see who’s at your door but also adds a significant layer of protection and convenience to your daily life. Whether you’re at home, at work, or on vacation, you can monitor your front porch with ease. If you’ve been thinking about this upgrade but feel intimidated by the process, you’ve come to the right place.

This guide will walk you through the entire process, showing you that learning how to install camera doorbell systems is easier than you might think. We will cover everything from gathering your tools to connecting the device to your Wi-Fi, ensuring you have the confidence to get the job done right.
Step-by-Step Guide to Your Doorbell Camera Installation
This detailed guide breaks down the installation into manageable steps. Whether you have a wired or a wireless model, these instructions will help you navigate the process smoothly. Remember to always turn off the power at your circuit breaker before working with any electrical wiring. Safety first! Now, let’s get started with your smart doorbell setup.
Step 1: Gather Your Tools and Unbox the Doorbell
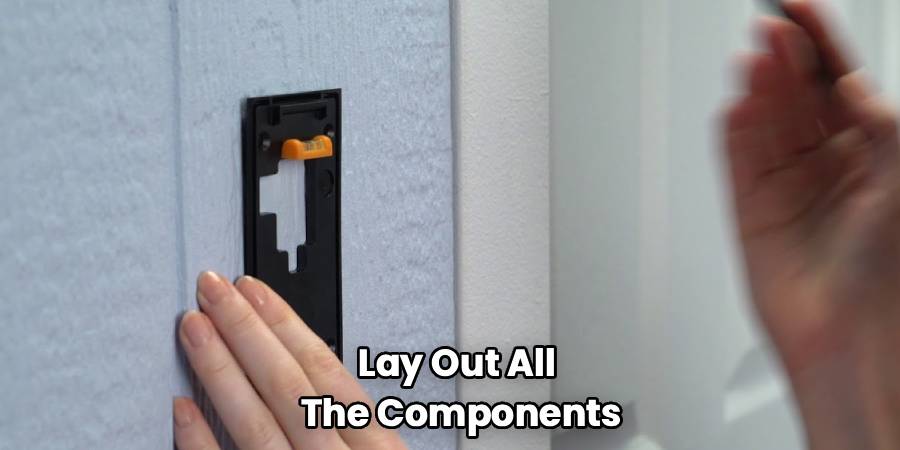
Before you begin, make sure you have everything you need. Having all your tools ready will prevent unnecessary trips to the garage or hardware store. Unbox your new video doorbell and lay out all the components. Most kits include the doorbell unit, mounting brackets, screws, wire extensions, and sometimes even a specialized screwdriver.
You will typically need:
- A Phillips-head screwdriver
- A drill with various bit sizes (often included in the kit)
- A level to ensure a straight installation
- Pliers or a wire stripper for wired installations
- Your smartphone for the final setup process
For wireless models, ensure the battery is fully charged before you begin. Plug it into a power source using the provided USB cable and wait for the indicator light to show it’s ready. This simple preparation makes the rest of the installation a breeze.
Step 2: Turn Off Power and Remove Your Old Doorbell
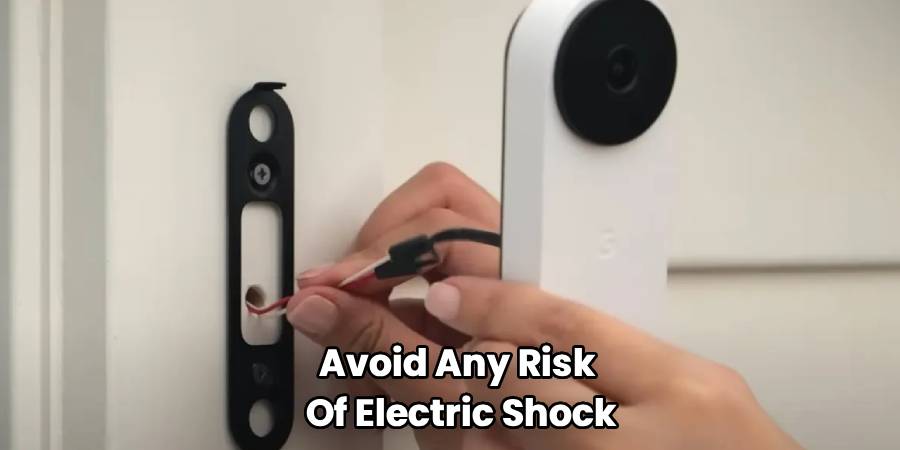
This step is crucial for wired installations. To avoid any risk of electric shock, locate your home’s circuit breaker panel. Find the breaker that controls your existing doorbell and switch it to the “OFF” position. To be absolutely certain the power is off, try ringing your current doorbell. If it doesn’t make a sound, you’re good to go.
Once the power is confirmed off, you can safely remove your old doorbell button. Most are attached with one or two small screws. Carefully unscrew the unit from the wall and gently pull it away. You will see two small wires attached to the back. Use your screwdriver to loosen the terminal screws and detach these wires. Be careful not to let the wires fall back into the wall. You can gently bend them or tape them to the exterior wall to keep them accessible.
For wireless doorbell installations, you can skip this step entirely if you are placing the doorbell in a new location without existing wiring.
Step 3: Install the Mounting Bracket
Your new camera doorbell will come with a mounting bracket or plate. This piece is what secures the device to your wall. Hold the bracket against the wall where you plan to install the doorbell. Use a level to make sure it’s perfectly straight. An angled camera can distort the view and may not capture the area you intend to monitor.
Once you have it positioned correctly, use a pencil to mark the screw holes. If you are mounting it on a soft surface like wood or vinyl siding, you can often drill the screws directly. For harder surfaces like brick, stucco, or concrete, you will need to drill pilot holes first. Use a drill bit that is slightly smaller than the included wall anchors. Gently tap the anchors into the holes until they are flush with the wall. Now, you can align the mounting bracket with the holes and use the provided screws to secure it tightly.
Step 4: Connecting the Wires (For Wired Doorbells)
If you are installing a wired video doorbell, it’s time to connect it to your home’s existing wiring. Take the two wires that were connected to your old doorbell and loop one around each of the terminal screws on the back of your new doorbell’s mounting bracket. It doesn’t matter which wire goes to which screw, as the low-voltage circuit is not polarized.
Tighten the screws firmly to ensure a secure connection. If the existing wires are too short, use the wire extenders and wire nuts that are often included in the kit. A solid connection is essential for the doorbell to receive power and function correctly. Tuck any excess wiring neatly into the hole in the wall behind the bracket. This is a key moment in the process of installing a video doorbell, so take your time to ensure the connections are solid.
For wireless models, you can ignore this step as your device runs on battery power.
Step 5: How To Install Camera Doorbell by Attaching the Unit
With the bracket securely in place and the wires connected (if applicable), you can now attach the main doorbell unit. Most designs require you to hook the top of the doorbell onto the mounting bracket and then swing the bottom part into place until it clicks. It should feel snug and secure.
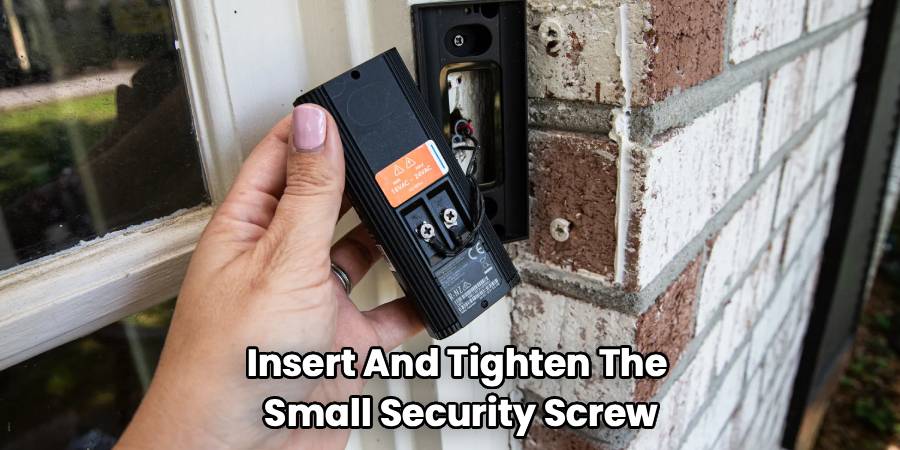
To finish the physical installation, insert and tighten the small security screw at the bottom of the unit. This screw prevents theft and ensures the doorbell cannot be easily removed. Many brands provide a special tool, like a star-shaped screwdriver, for this screw. Keep this tool in a safe place in case you need to remove the doorbell later for charging or maintenance.
Step 6: Restore Power and Complete the Software Setup
Now you can head back to your circuit breaker and turn the power back on. If you installed a wired doorbell, it should power up immediately. You will often see a light on the front of the device begin to spin or flash, indicating it is in setup mode.
For all models, the final step happens on your smartphone. Download the manufacturer’s app from the Apple App Store or Google Play Store. Create an account or log in. The app will guide you through the process of connecting the doorbell to your home’s Wi-Fi network. This usually involves selecting the doorbell from a list of devices, entering your Wi-Fi password, and sometimes scanning a QR code with the doorbell’s camera.
Once connected, you can configure your settings. Customize motion detection zones, adjust sensitivity, and set your notification preferences. Test the doorbell by pressing the button and checking the video feed on your phone. Congratulations, you’ve successfully completed your doorbell camera installation!
Frequently Asked Questions
Here are answers to some common questions that arise during the installation process.
Do I need to be an electrician to install a video doorbell?
Absolutely not. For most installations, especially wireless ones, the process is very straightforward and designed for the average homeowner. As long as you follow the instructions and take the necessary safety precaution of turning off the power for a wired installation, you can handle this project yourself. The kits come with everything you need, and the app-based setup is very user-friendly.
What if my existing doorbell transformer is not powerful enough?
Some older homes have transformers that don’t provide enough voltage for a modern smart doorbell. Most video doorbells require between 16 and 24 volts of AC power. If you install your wired doorbell and it doesn’t power on or functions intermittently, an incompatible transformer may be the culprit. You can check your existing transformer’s voltage, which is usually printed on the unit itself (often located near your breaker panel or in a utility closet). If it’s underpowered, you will need to replace it. This is a more advanced task, and if you’re not comfortable with it, it’s best to hire a professional electrician.
Can I install a smart doorbell if I don’t have an existing doorbell?
Yes, you can. This is where wireless, battery-powered video doorbells are the perfect solution. Since they don’t rely on existing wiring for power, you can mount them anywhere you like. Simply charge the battery, mount the bracket on your door frame or an adjacent wall, and complete the setup through the app. This makes them a great option for renters or anyone who doesn’t want to deal with wiring.
How high should I mount my doorbell camera?
The ideal height for a doorbell camera is approximately 48 inches (4 feet) from the ground. This height provides a clear view of most visitors’ faces while also capturing packages left on the ground. Most manufacturers recommend this height in their installation manuals. Before you drill any holes, it’s a good idea to hold the doorbell at this height and check the live video preview on your phone to ensure the camera angle covers the area you want to monitor.
Conclusion
Finishing the project of how to install camera doorbell systems gives you more than just a new piece of tech; it provides peace of mind. By following these steps, you have successfully boosted your home security and added a layer of modern convenience to your life. You can now answer your door from anywhere, keep an eye on deliveries, and monitor your front porch 24/7. Enjoy the security and control that comes with your new smart doorbell. You’ve earned it